Arm Cuff Blood

Pressure Monitor

63-1514

Step One

Installing Batteries

1.Press the tab to lift up the battery compartment cover.

2.Insert four AA batteries (not supplied) into the compartment as indicated by the polarity symbols (+ and –) marked inside.

3.Pull down the cover then press the cover down to snap it in place.

When the display dims or the batteries weaken, !appears on the display. Replace the batteries.

Or

Step Two

Setting the Date and Time

1.Press MODE. The month digit flashes.

2.Repeatedly press (or hold down) SET to set the correct month.

3.Repeat Steps 1 and 2 to set the date, hour, and minute.

4.Press MODE to complete setting.

What’s Included

Auto Inflatable Arm Cuff

Monitor

Step Three

Attaching the Arm Cuff

1.Roll up your sleeve to prevent constricting circulation to your arm.

2.Insert the plug

at the end of the tube into the jack on the left side of the monitor.

3. Sit upright on the chair, and

with your palm face up, thread

the cuff through your arm until it reaches your biceps, just above your elbow.

4.Adjust the cuff so the inflation tube is on the top of your arm as shown. Leave the cuff’s bottom edge about 0.8 to 1.2 inches (2 – 3 cm) above the crease of your elbow.

5.Fasten the cuff snugly, leaving at least a finger’s room in between the cuff and your arm.

6.Place your arm on the table so the cuff is at the same height as your heart. Be sure the inflation tube lines up with your arm

Using an AC Adapter

You can also power the blood pressure monitor using a 6V DC, 1A AC adapter. To connect an AC adapter to the blood pressure moni- tor, attach a size M AdaptaplugTM to the adapter with its tip set to positive. Insert the adapter’s barrel plug into the monitor’s DC 6V jack. Then plug the adapter into a standard AC outlet.

• Carry Pouch

Optional Accessories

Body Fat Analyzer

Environizer

Rechargeable Batteries

Battery Charger

Step Four

Measuring Blood Pressure

1.Press START/STOP. All display segments appear briefly and the monitor automatically inflates to

160 mmHg, or the necessary inflation level. The systolic rate decreases gradually, G appears, and flashes at the same rate as your heartbeat.

2.Once your blood pressure is detected, the monitor deflates slowly. The blood pressure reading and pulse rate appear. The air pressure in the arm cuff releases.

3.To stop the measurement at any time, press START/STOP.

#appears briefly when:

You do not wrap or position the cuff around your arm correctly.

You talk or move the body during measurement.

You have incorrect posture.

The batteries become weak and !flashes.

Page 1
Image 1
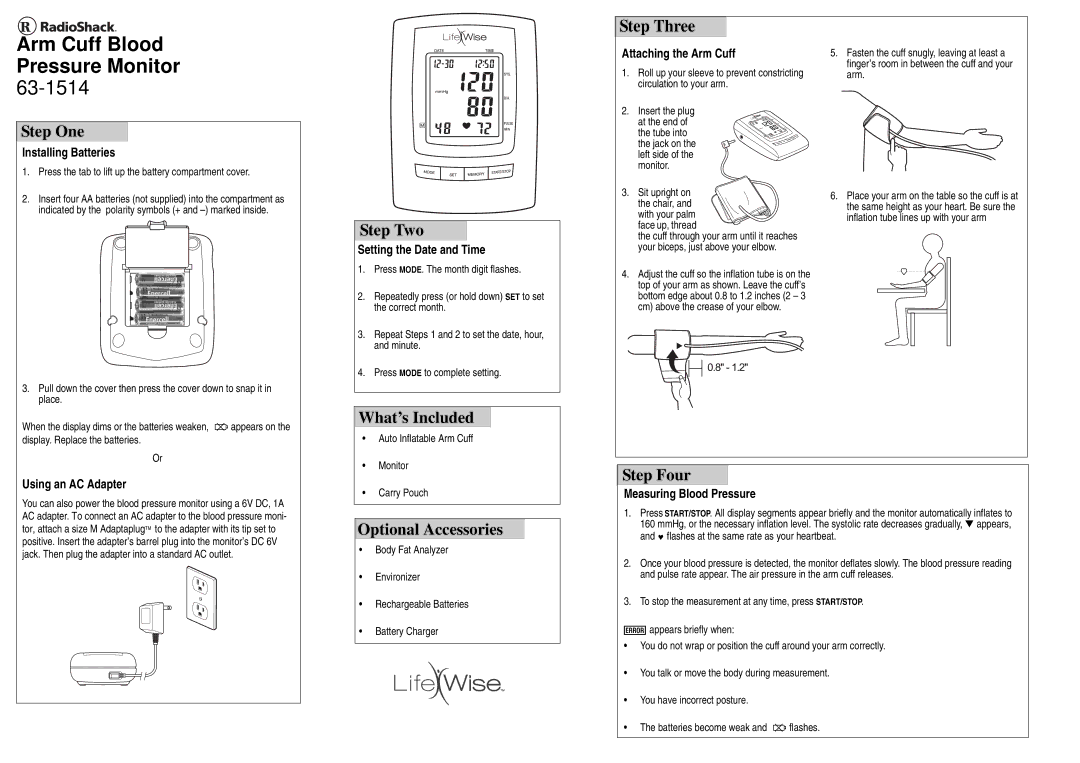
Radio Shack 63-1514 manual Step One, Step Two, What’s Included, Step Three, Optional Accessories, Step Four

63-1514 specifications

The Radio Shack 63-1514 is a vintage multifunction electronic device that holds a special place in the hearts of technology enthusiasts and collectors alike. Released in the early 1980s, this device is a standout example of the innovative spirit of that era. It combines various functions into a compact design, showcasing the ability to integrate multiple technologies into one user-friendly gadget.

One of the main features of the Radio Shack 63-1514 is its analog and digital capabilities. This dual compatibility makes it ideal for users who are transitioning from older analog systems to more modern digital technologies. The device typically includes a simple yet effective display, which allows users to easily read measurements and settings.

The 63-1514 also includes a range of functionalities, such as a multimeter for measuring voltage, current, and resistance. This all-in-one feature makes it a valuable tool for both hobbyists and professionals, as it eliminates the need for multiple separate devices, leading to a more streamlined and cost-effective solution. With its accurate measurement capabilities, users can confidently diagnose electrical circuits and components.

In terms of design, the Radio Shack 63-1514 features a user-friendly interface, with clearly labeled buttons and knobs for easy operation. Its compact form factor allows for portability, meaning it can easily fit into a toolbox or be carried to job sites. The device is often powered by standard batteries, making it accessible and convenient for users on the go.

Another notable characteristic of the 63-1514 is its durability. Built with high-quality materials, it can withstand the rigors of daily use, which is essential for any reliable electronic tool. This emphasis on durability caters to users who require a long-lasting device that can handle various environments and conditions.

In conclusion, the Radio Shack 63-1514 exemplifies the innovative technology of its time, blending multiple functionalities into one robust device. Its analog and digital capabilities, combined with accurate measurement features, user-friendly interface, portability, and durability, make it a memorable piece of technology history. Whether for practical applications in electronics or as a collectible item, the 63-1514 continues to attract attention and admiration from a diverse audience.