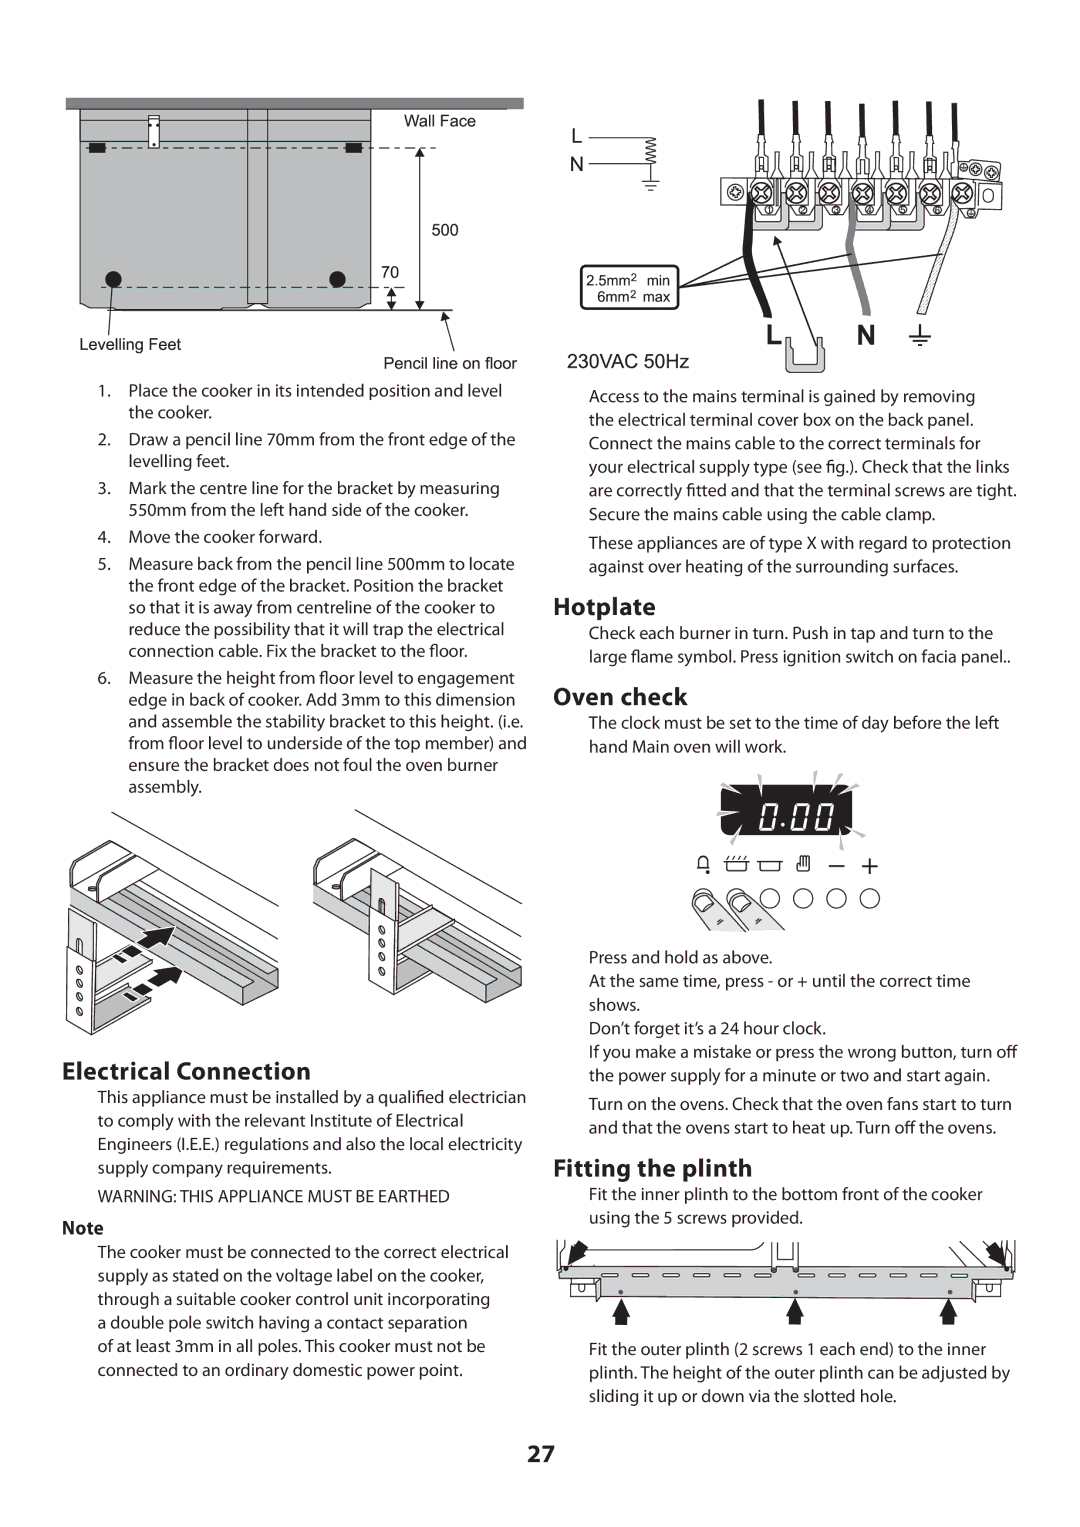
1.Place the cooker in its intended position and level the cooker.
2.Draw a pencil line 70mm from the front edge of the levelling feet.
3.Mark the centre line for the bracket by measuring 550mm from the left hand side of the cooker.
4.Move the cooker forward.
5.Measure back from the pencil line 500mm to locate the front edge of the bracket. Position the bracket so that it is away from centreline of the cooker to reduce the possibility that it will trap the electrical connection cable. Fix the bracket to the floor.
6.Measure the height from floor level to engagement edge in back of cooker. Add 3mm to this dimension and assemble the stability bracket to this height. (i.e. from floor level to underside of the top member) and ensure the bracket does not foul the oven burner assembly.
Electrical Connection
This appliance must be installed by a qualified electrician to comply with the relevant Institute of Electrical Engineers (I.E.E.) regulations and also the local electricity supply company requirements.
WARNING: THIS APPLIANCE MUST BE EARTHED
Note
The cooker must be connected to the correct electrical supply as stated on the voltage label on the cooker, through a suitable cooker control unit incorporating a double pole switch having a contact separation
of at least 3mm in all poles. This cooker must not be connected to an ordinary domestic power point.
Access to the mains terminal is gained by removing the electrical terminal cover box on the back panel. Connect the mains cable to the correct terminals for your electrical supply type (see fig.). Check that the links are correctly fitted and that the terminal screws are tight. Secure the mains cable using the cable clamp.
These appliances are of type X with regard to protection against over heating of the surrounding surfaces.
Hotplate
Check each burner in turn. Push in tap and turn to the large flame symbol. Press ignition switch on facia panel..
Oven check
The clock must be set to the time of day before the left hand Main oven will work.
Press and hold as above.
At the same time, press - or + until the correct time shows.
Don’t forget it’s a 24 hour clock.
If you make a mistake or press the wrong button, turn off the power supply for a minute or two and start again.
Turn on the ovens. Check that the oven fans start to turn and that the ovens start to heat up. Turn off the ovens.
Fitting the plinth
Fit the inner plinth to the bottom front of the cooker using the 5 screws provided.
Fit the outer plinth (2 screws 1 each end) to the inner plinth. The height of the outer plinth can be adjusted by sliding it up or down via the slotted hole.
27