Repair and Maintenance
qFront Tire Replacement
Tools required: 10mm wrench, two (2) 17mm wrenches and a flathead screwdriver.
1 Using a 10mm open wrench, | 2 Using two 17mm wrenches, |
loosen the brake cable bolt. | loosen the front axle bolts by |
| turning the wrenches counter |
| clockwise. Remove wheel and |
| install replacement wheel. |
qAdjusting the Chain
Tools required: 10mm wrench, two (2) 8mm wrenches, and two (2) 13mm wrenches.
1 Using two 13mm wrenches, | 2 Using a 10mm wrench, | 3 Once the tension is correct, |
loosen the rear axle bolts by | tighten the tension adjusters on | tighten the axle bolts. Test ride |
turning the wrenches counter | the axle 1/8 to 1/4 turn to fine- | the scooter. Readjust as needed. |
clockwise. | tune the chain tension. Both |
|
| adjusters must be tightened the |
|
| exact same amount to maintain |
|
| wheel alignment. |
|
5
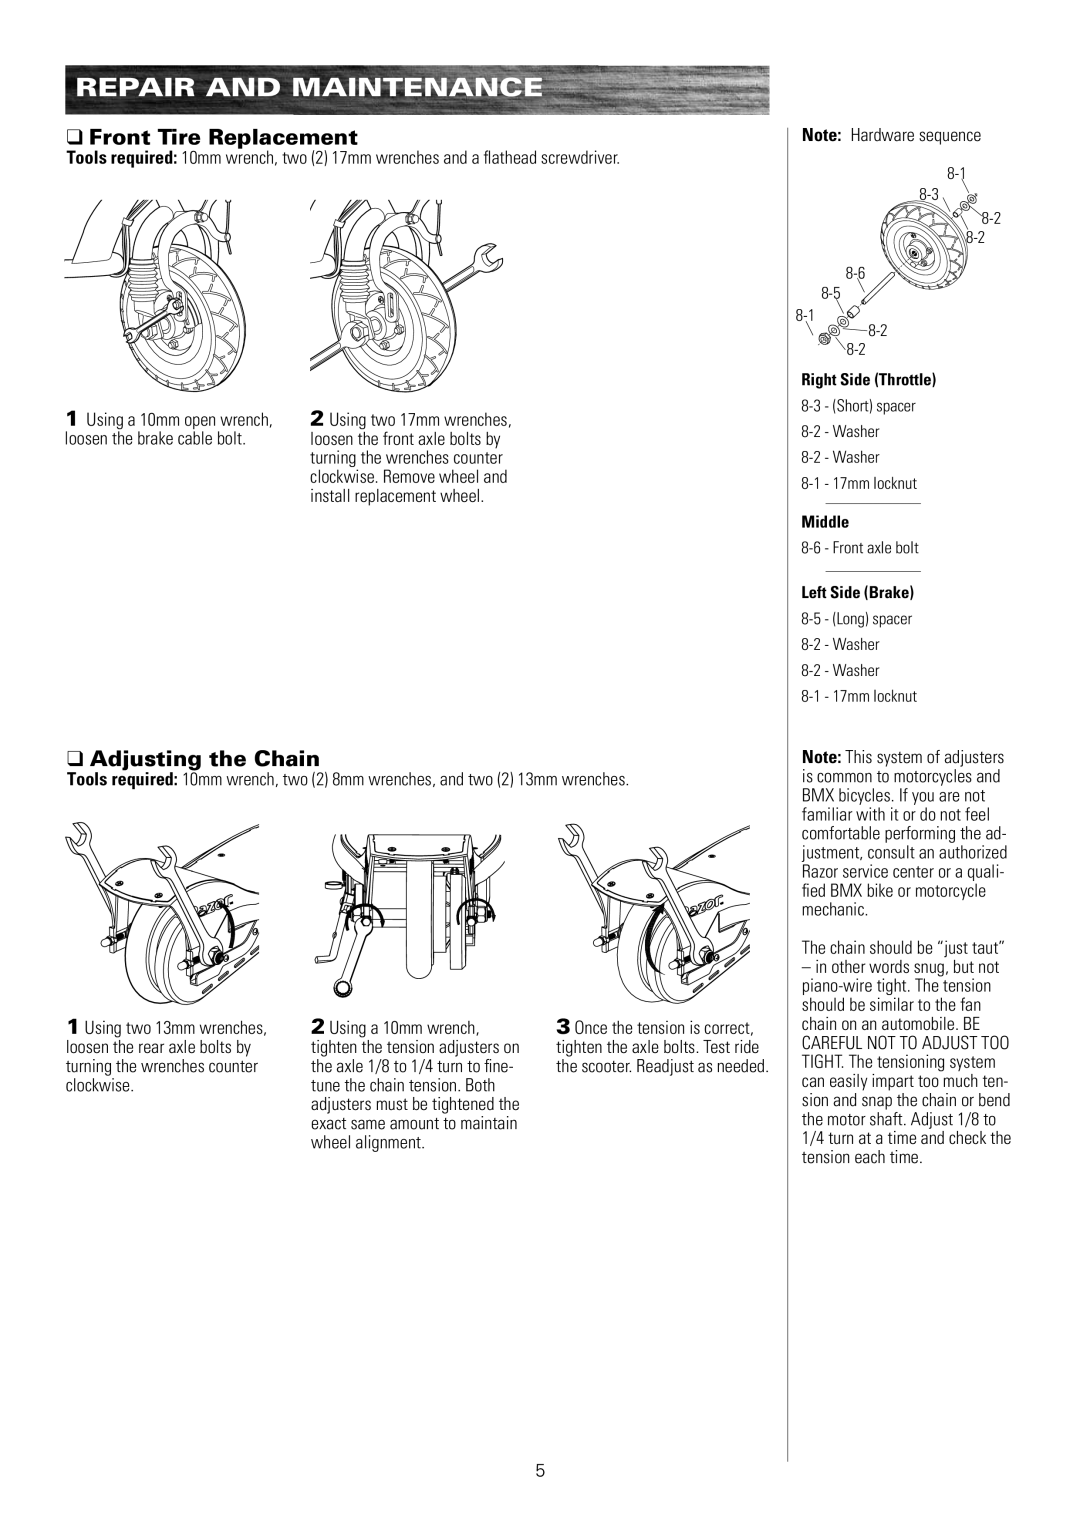
Note: Hardware sequence
![]()
![]() 8-2
8-2
![]()
![]()
![]()
![]() 8-2
8-2![]()
![]() 8-2
8-2
Right Side (Throttle)
Middle
Left Side (Brake)
Note: This system of adjusters is common to motorcycles and BMX bicycles. If you are not familiar with it or do not feel comfortable performing the ad- justment, consult an authorized Razor service center or a quali- fied BMX bike or motorcycle mechanic.
The chain should be “just taut”
–in other words snug, but not