Pre-installation Test
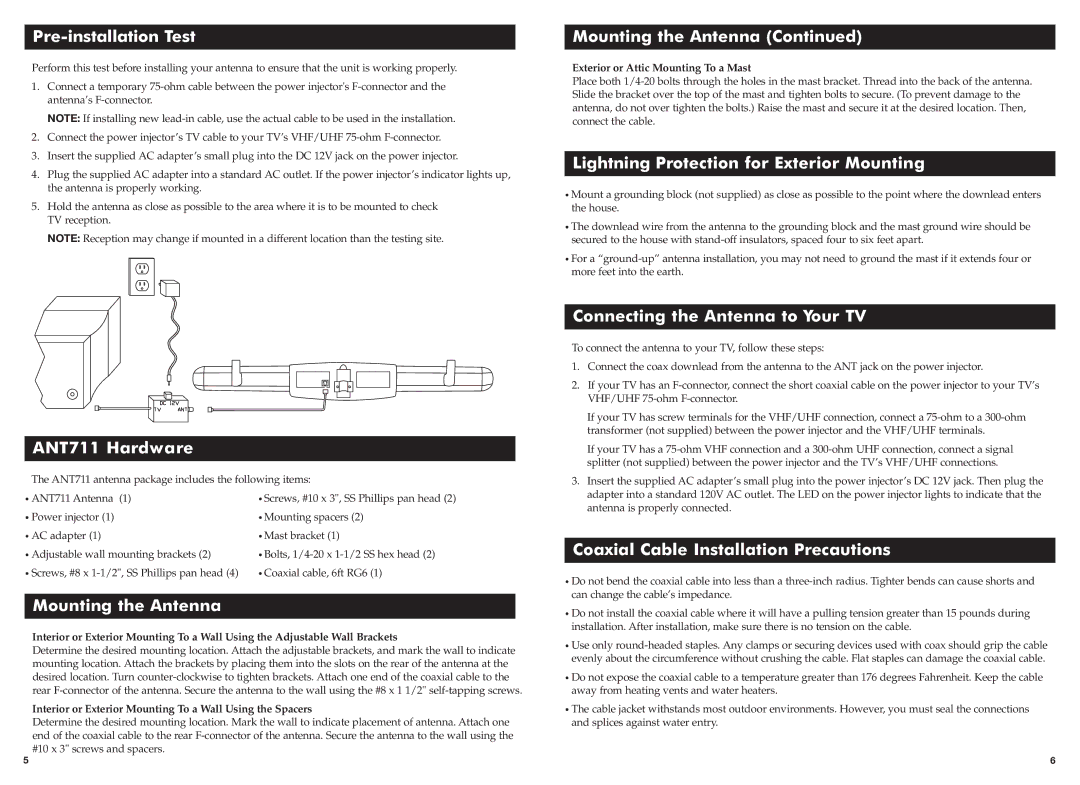
Perform this test before installing your antenna to ensure that the unit is working properly.
1.Connect a temporary
NOTE: If installing new
2.Connect the power injector’s TV cable to your TV’s VHF/UHF
3.Insert the supplied AC adapter’s small plug into the DC 12V jack on the power injector.
4.Plug the supplied AC adapter into a standard AC outlet. If the power injector’s indicator lights up, the antenna is properly working.
5.Hold the antenna as close as possible to the area where it is to be mounted to check TV reception.
NOTE: Reception may change if mounted in a different location than the testing site.
ANT711 Hardware
The ANT711 antenna package includes the following items:
Mounting the Antenna (Continued)
Exterior or Attic Mounting To a Mast
Place both
Lightning Protection for Exterior Mounting
•Mount a grounding block (not supplied) as close as possible to the point where the downlead enters the house.
•The downlead wire from the antenna to the grounding block and the mast ground wire should be secured to the house with
•For a
Connecting the Antenna to Your TV
To connect the antenna to your TV, follow these steps:
1. | Connect the coax downlead from the antenna to the ANT jack on the power injector. |
2. | If your TV has an |
| VHF/UHF |
| If your TV has screw terminals for the VHF/UHF connection, connect a |
| transformer (not supplied) between the power injector and the VHF/UHF terminals. |
| If your TV has a |
| splitter (not supplied) between the power injector and the TV’s VHF/UHF connections. |
3. | Insert the supplied AC adapter’s small plug into the power injector’s DC 12V jack. Then plug the |
•ANT711 Antenna (1)
•Power injector (1)
•AC adapter (1)
•Adjustable wall mounting brackets (2)
•Screws, #8 x
•Screws, #10 x 3", SS Phillips pan head (2)
•Mounting spacers (2)
•Mast bracket (1)
•Bolts,
•Coaxial cable, 6ft RG6 (1)
adapter into a standard 120V AC outlet. The LED on the power injector lights to indicate that the |
antenna is properly connected. |
Coaxial Cable Installation Precautions
Mounting the Antenna
Interior or Exterior Mounting To a Wall Using the Adjustable Wall Brackets
Determine the desired mounting location. Attach the adjustable brackets, and mark the wall to indicate mounting location. Attach the brackets by placing them into the slots on the rear of the antenna at the desired location. Turn
Interior or Exterior Mounting To a Wall Using the Spacers
Determine the desired mounting location. Mark the wall to indicate placement of antenna. Attach one end of the coaxial cable to the rear
•Do not bend the coaxial cable into less than a
•Do not install the coaxial cable where it will have a pulling tension greater than 15 pounds during installation. After installation, make sure there is no tension on the cable.
•Use only
•Do not expose the coaxial cable to a temperature greater than 176 degrees Fahrenheit. Keep the cable away from heating vents and water heaters.
•The cable jacket withstands most outdoor environments. However, you must seal the connections and splices against water entry.
5 | 6 |