Using the Battery to Power Your Camcorder
Charging the Battery
The battery must be charged before it can be used the first time. Charging will take approximately two hours depending on the condition of the battery. When fully charged, the battery should supply approximately 60 minutes of operating time (depending on how much you use zoom and pause). To extend the battery’s operation time, turn off the camcorder’s power when not in use.
Plug in AC Outlet
(120 V, 50/60 Hz)
WARNING: LEAD- |
| Hold Battery | |||
ACID BATTERY. |
| Flush and | |||
MUST BE DISPOSED |
| Slide Down | |||
OF PROPERLY. |
|
| |||
|
| ||||
|
|
|
|
|
|
|
|
|
|
|
|
| Adapter/Charger |
|
| ||
|
|
|
|
|
|
|
|
|
|
|
|
|
| CHARGE |
|
| |
|
| Indicator |
|
|
|
|
|
|
|
|
|
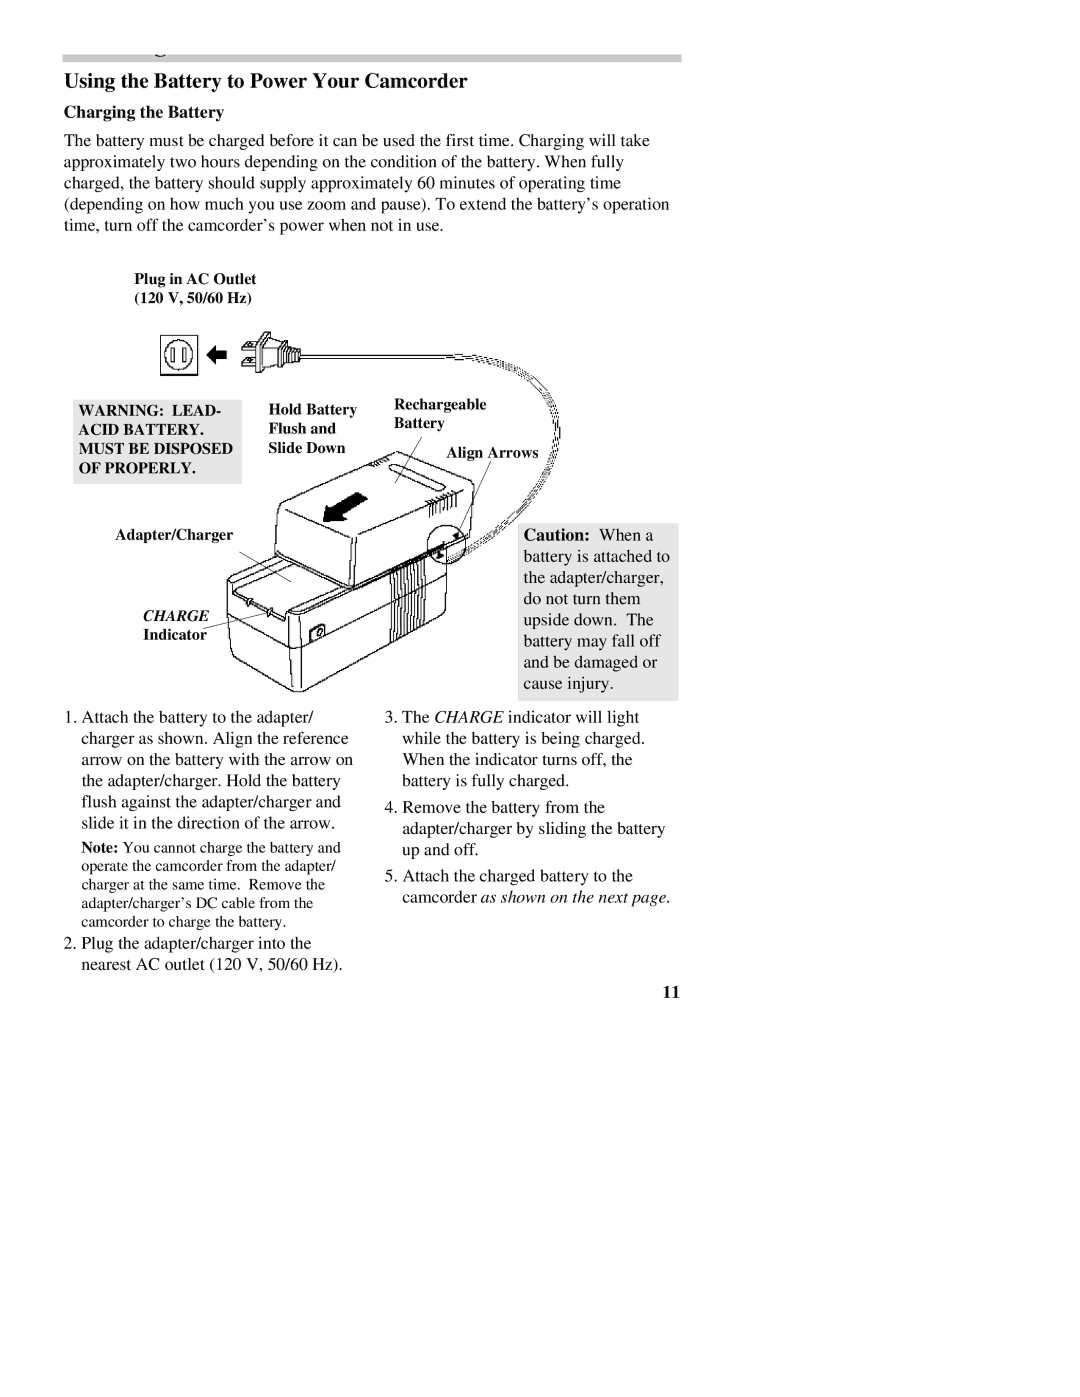
1.Attach the battery to the adapter/ charger as shown. Align the reference arrow on the battery with the arrow on the adapter/charger. Hold the battery flush against the adapter/charger and slide it in the direction of the arrow.
Note: You cannot charge the battery and operate the camcorder from the adapter/ charger at the same time. Remove the adapter/charger’s DC cable from the camcorder to charge the battery.
2.Plug the adapter/charger into the nearest AC outlet (120 V, 50/60 Hz).
Rechargeable
Battery
Align Arrows
Caution: When a battery is attached to the adapter/charger, do not turn them upside down. The battery may fall off and be damaged or cause injury.
3.The CHARGE indicator will light while the battery is being charged. When the indicator turns off, the battery is fully charged.
4.Remove the battery from the adapter/charger by sliding the battery up and off.
5.Attach the charged battery to the camcorder as shown on the next page.
11
