Fig.7
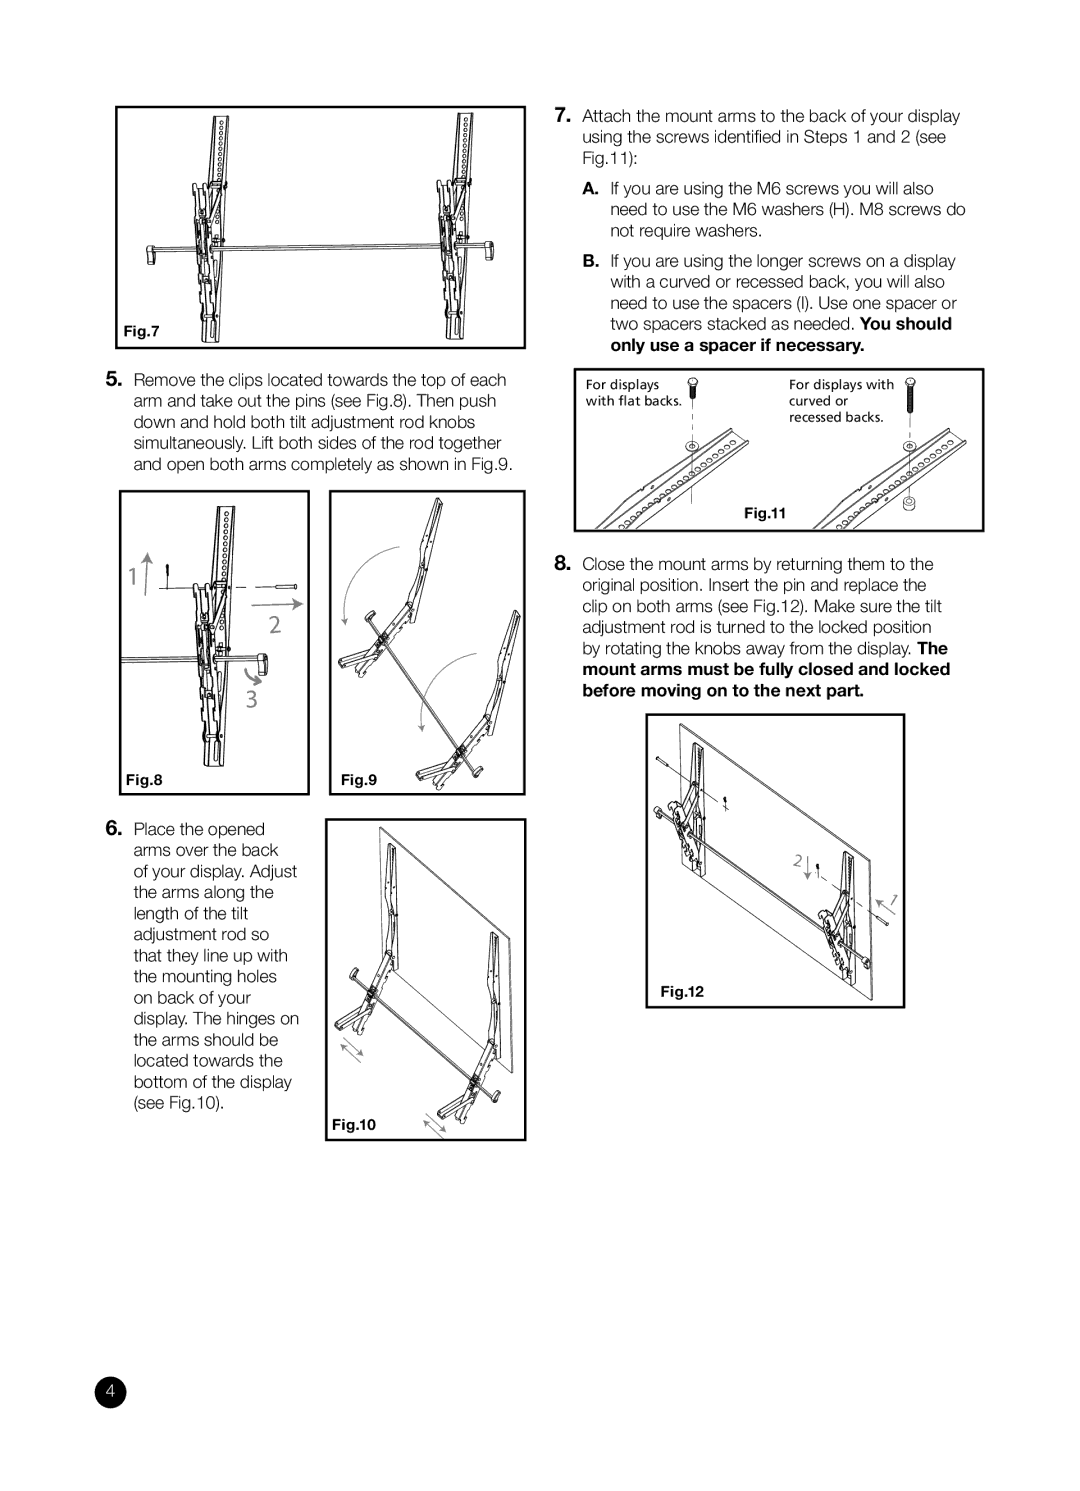
5.Remove the clips located towards the top of each arm and take out the pins (see Fig.8). Then push down and hold both tilt adjustment rod knobs simultaneously. Lift both sides of the rod together and open both arms completely as shown in Fig.9.
7.Attach the mount arms to the back of your display using the screws identifi ed in Steps 1 and 2 (see Fig.11):
A.If you are using the M6 screws you will also need to use the M6 washers (H). M8 screws do not require washers.
B.If you are using the longer screws on a display with a curved or recessed back, you will also need to use the spacers (I). Use one spacer or two spacers stacked as needed. You should only use a spacer if necessary.
For displays | For displays with |
with flat backs. | curved or |
| recessed backs. |
1 ![]()
2
3
Fig.8
6.Place the opened arms over the back of your display. Adjust the arms along the length of the tilt adjustment rod so that they line up with the mounting holes on back of your display. The hinges on the arms should be located towards the bottom of the display (see Fig.10).
Fig.9 |
Fig.10 |
Fig.11 |
8.Close the mount arms by returning them to the original position. Insert the pin and replace the clip on both arms (see Fig.12). Make sure the tilt adjustment rod is turned to the locked position by rotating the knobs away from the display. The mount arms must be fully closed and locked before moving on to the next part.
2 |
1 |
Fig.12 |
4
