
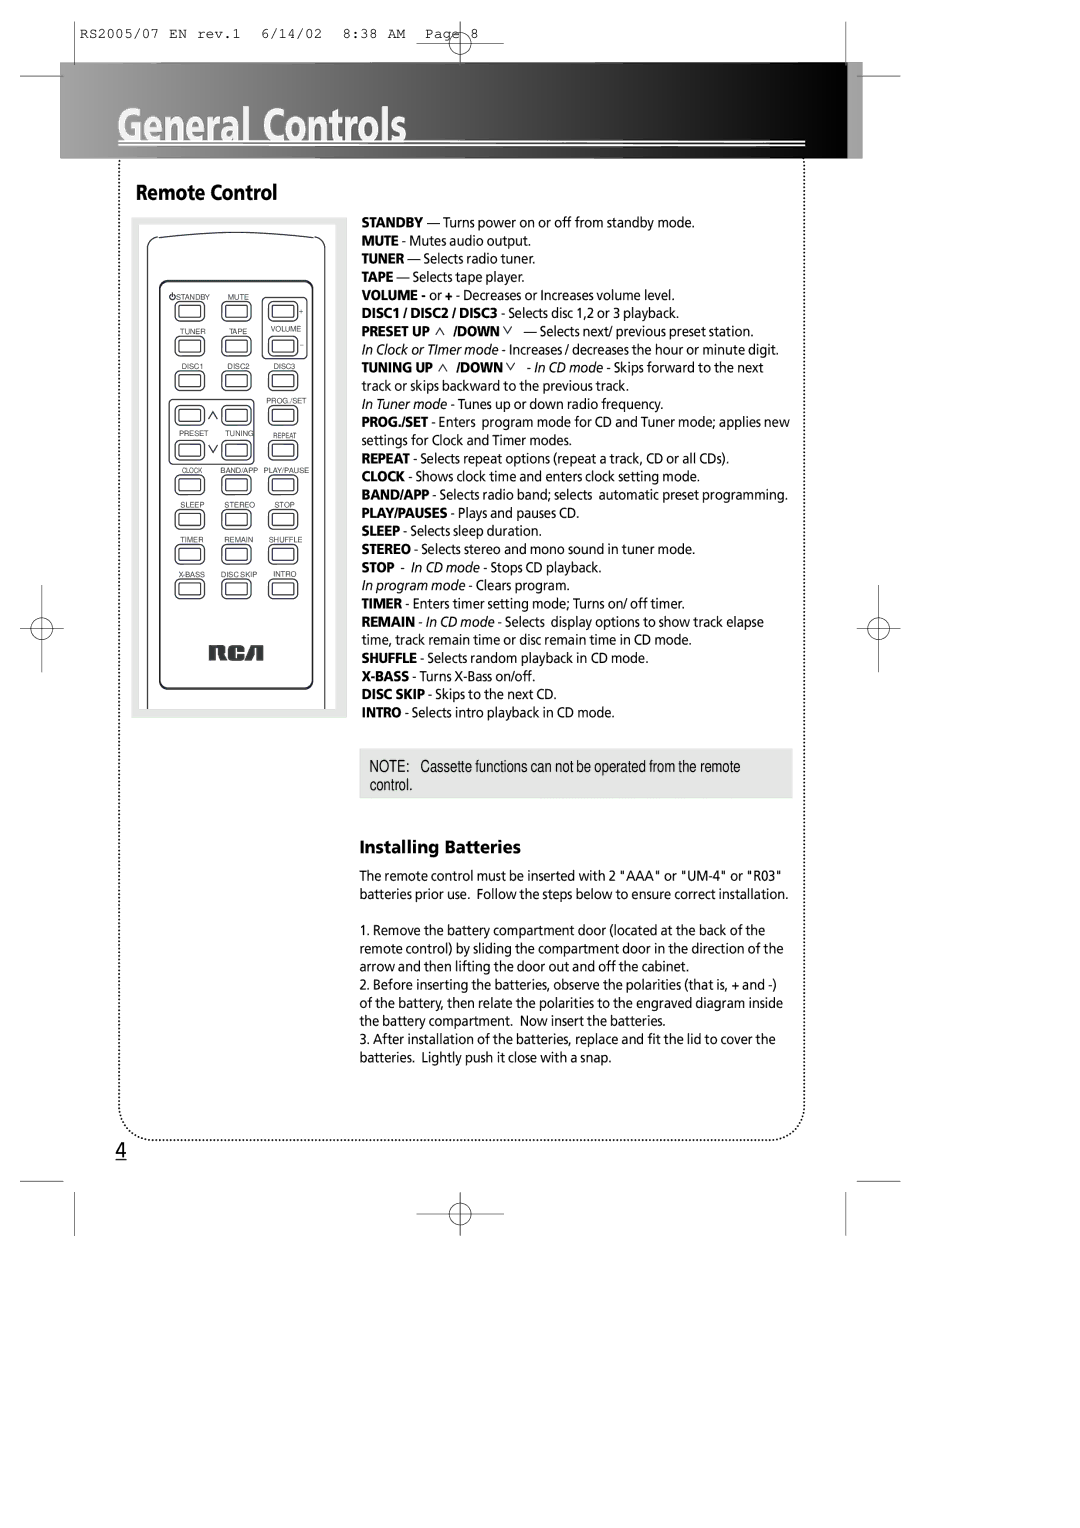
RS2005 specifications
The RCA RS2005 is a versatile and advanced speaker system primarily designed for those who appreciate high-quality audio experiences in their home or office settings. This model stands out due to its robust build quality and innovative features that cater to both casual listeners and audiophiles alike.One of the main features of the RCA RS2005 is its powerful output capability. The system delivers a rich sound profile, ensuring that every nuance of your favorite music is crystal clear. Its high output wattage allows it to fill larger rooms with sound, making it ideal for parties or gatherings. The speaker system includes deep bass enhancement, which provides a well-rounded listening experience across all music genres, adding depth to songs that require more low-end presence.
The RCA RS2005 incorporates advanced wireless technology, enabling seamless connectivity with various devices. It supports Bluetooth, allowing users to stream music directly from their smartphones, tablets, or laptops without the hassle of tangled wires. Additionally, the system includes options for multi-device connectivity, so multiple users can switch between devices and enjoy their playlists through the same speakers.
Another significant characteristic of the RCA RS2005 is its user-friendly interface. The setup process is straightforward, ensuring that even those not tech-savvy can enjoy high-quality audio instantly. The control panel is intuitively designed, allowing users to adjust volume levels, bass, and treble settings easily.
The design of the RCA RS2005 also deserves attention. Sleek and modern, it fits seamlessly into any home decor. The speakers are constructed using high-quality materials that not only enhance audio performance but also provide durability, ensuring a long-lasting audio solution.
Moreover, the RCA RS2005 supports various audio formats, making it highly versatile for different uses. Whether you're watching movies, gaming, or listening to music, this speaker system adapts to deliver superior sound quality tailored to the content being played.
In conclusion, the RCA RS2005 is a powerful speaker system that combines modern technology with user-friendly features. Its wireless capabilities, robust output, and stylish design make it a valuable addition to any sound setup, ensuring that users can enjoy an immersive audio experience like never before. Whether for casual listening or professional use, the RCA RS2005 stands out as an excellent choice for all audio enthusiasts.