User Manual BDL4771V
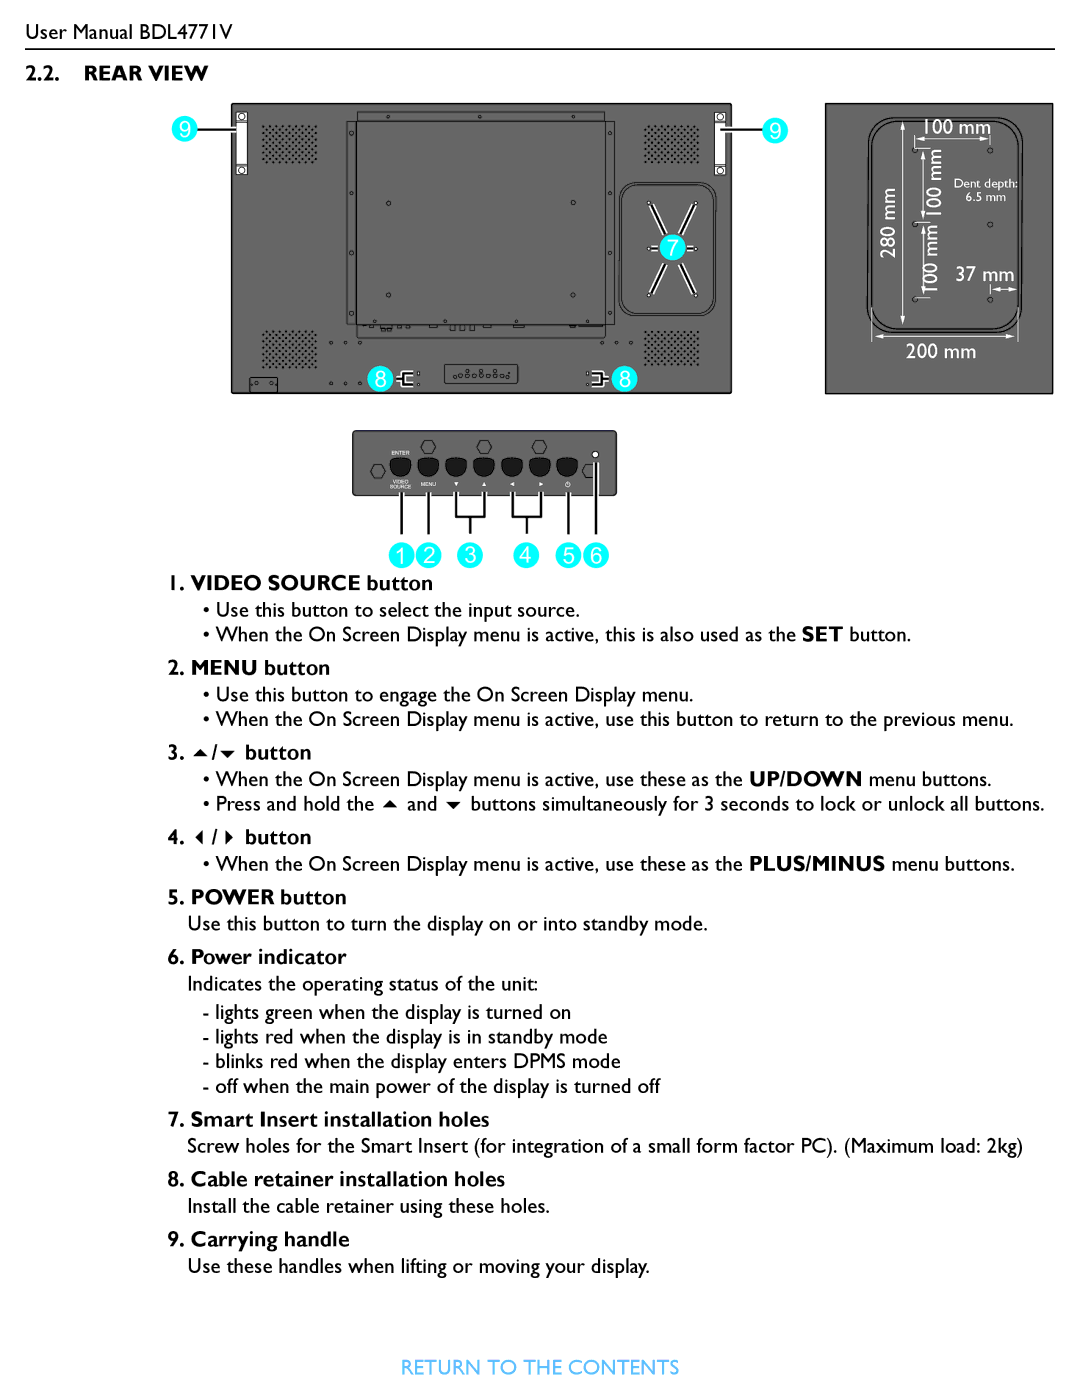
2.2.REAR VIEW
9 |
|
|
|
|
|
| 9 |
|
|
| |||||
|
|
|
|
|
| ||
|
|
|
|
|
|
|
|
|
|
|
|
|
|
|
|
![]()
![]() 7
7 ![]()
![]()
![]()
![]()
![]()
280 mm
100 mm
mm | Dent depth: | |
100 | ||
6.5 mm | ||
| ||
mm |
| |
100 | 37 mm | |
|
200 mm
8 |
|
|
| 8 |
|
| |||
|
|
1 | 2 | 3 | 4 | 5 | 6 |
1.VIDEO SOURCE button
•Use this button to select the input source.
•When the On Screen Display menu is active, this is also used as the SET button.
2.MENU button
•Use this button to engage the On Screen Display menu.
•When the On Screen Display menu is active, use this button to return to the previous menu.
3./ button
•When the On Screen Display menu is active, use these as the UP/DOWN menu buttons.
•Press and hold the and buttons simultaneously for 3 seconds to lock or unlock all buttons.
4./ button
•When the On Screen Display menu is active, use these as the PLUS/MINUS menu buttons.
5.POWER button
Use this button to turn the display on or into standby mode.
6. Power indicator
Indicates the operating status of the unit:
-lights green when the display is turned on
-lights red when the display is in standby mode
-blinks red when the display enters DPMS mode
-off when the main power of the display is turned off
7.Smart Insert installation holes
Screw holes for the Smart Insert (for integration of a small form factor PC). (Maximum load: 2kg)
8.Cable retainer installation holes Install the cable retainer using these holes.
9.Carrying handle
Use these handles when lifting or moving your display.
RETURN TO THE CONTENTS