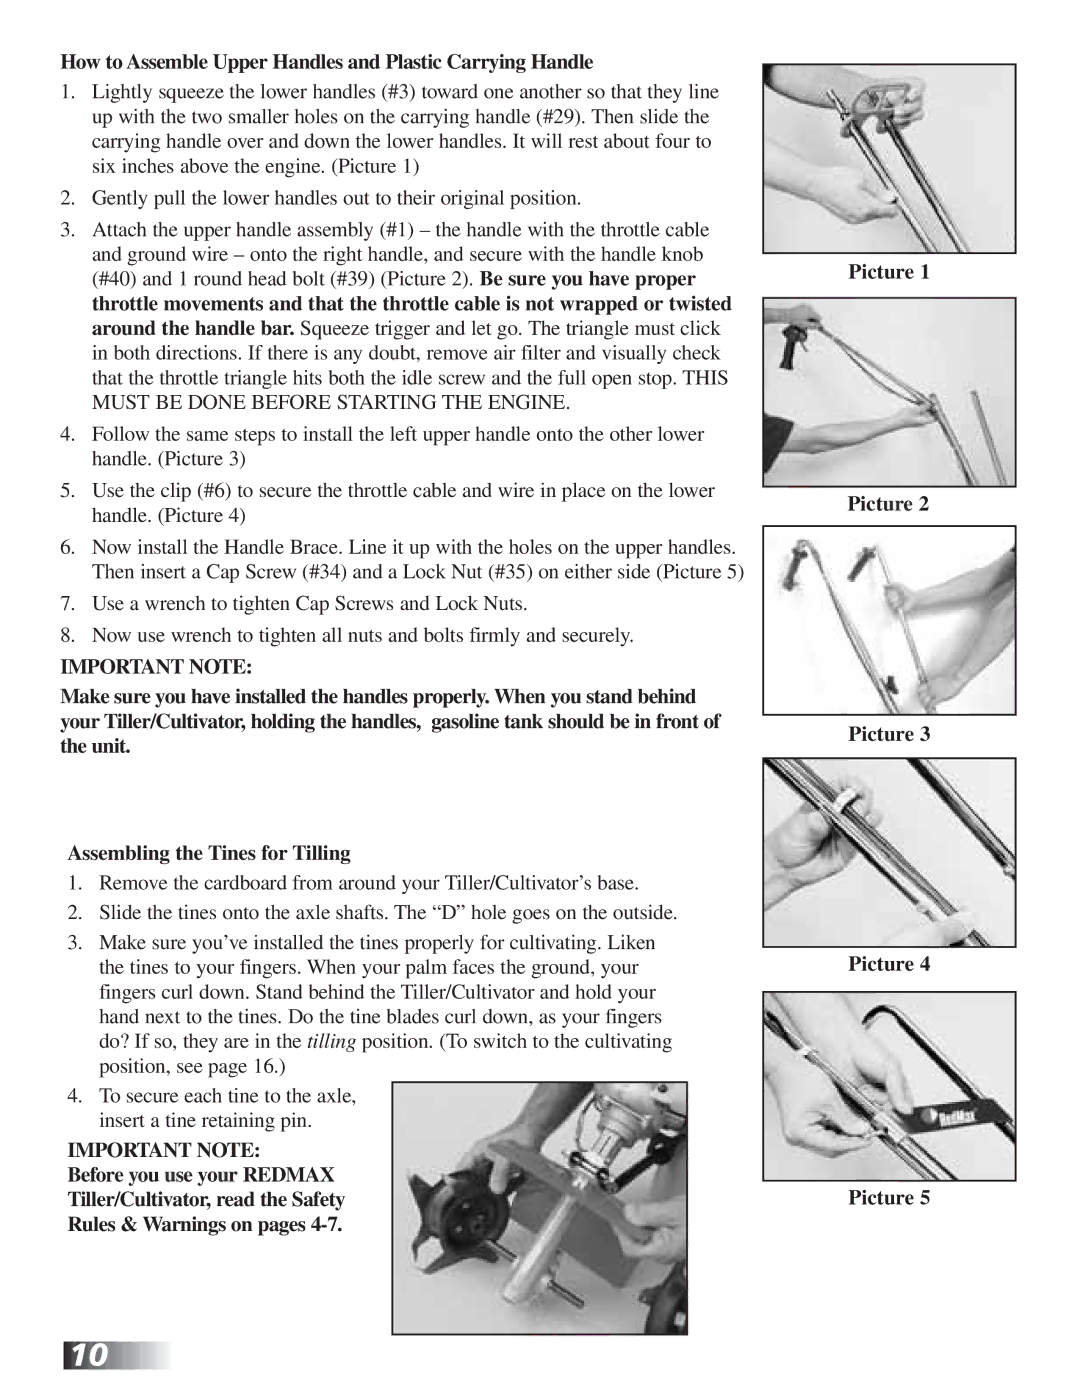
How to Assemble Upper Handles and Plastic Carrying Handle
1.Lightly squeeze the lower handles (#3) toward one another so that they line up with the two smaller holes on the carrying handle (#29). Then slide the carrying handle over and down the lower handles. It will rest about four to six inches above the engine. (Picture 1)
2.Gently pull the lower handles out to their original position.
3.Attach the upper handle assembly (#1) – the handle with the throttle cable and ground wire – onto the right handle, and secure with the handle knob (#40) and 1 round head bolt (#39) (Picture 2). Be sure you have proper throttle movements and that the throttle cable is not wrapped or twisted around the handle bar. Squeeze trigger and let go. The triangle must click in both directions. If there is any doubt, remove air filter and visually check that the throttle triangle hits both the idle screw and the full open stop. THIS MUST BE DONE BEFORE STARTING THE ENGINE.
4.Follow the same steps to install the left upper handle onto the other lower handle. (Picture 3)
5.Use the clip (#6) to secure the throttle cable and wire in place on the lower handle. (Picture 4)
6.Now install the Handle Brace. Line it up with the holes on the upper handles. Then insert a Cap Screw (#34) and a Lock Nut (#35) on either side (Picture 5)
7.Use a wrench to tighten Cap Screws and Lock Nuts.
8.Now use wrench to tighten all nuts and bolts firmly and securely.
IMPORTANT NOTE:
Make sure you have installed the handles properly. When you stand behind your Tiller/Cultivator, holding the handles, gasoline tank should be in front of the unit.
Assembling the Tines for Tilling
1.Remove the cardboard from around your Tiller/Cultivator’s base.
2.Slide the tines onto the axle shafts. The “D” hole goes on the outside.
3.Make sure you’ve installed the tines properly for cultivating. Liken the tines to your fingers. When your palm faces the ground, your fingers curl down. Stand behind the Tiller/Cultivator and hold your hand next to the tines. Do the tine blades curl down, as your fingers do? If so, they are in the tilling position. (To switch to the cultivating position, see page 16.)
4.To secure each tine to the axle, insert a tine retaining pin.
IMPORTANT NOTE:
Before you use your REDMAX
Tiller/Cultivator, read the Safety
Rules & Warnings on pages
Picture 1
Picture 2
Picture 3
Picture 4
Picture 5
![]()
![]()
![]()
![]()
![]()
![]()
![]() 10
10![]()
![]()
![]()
![]()
![]()
![]()
![]()
![]()
![]()
![]()
![]()
![]()
![]()
![]()
![]()
![]()
![]()
![]()
![]()
![]()
![]()
![]()
![]()
![]()
![]()
![]()
![]()
![]()
![]()
![]()
![]()
![]()
![]()
![]()
![]()
![]()
![]()
![]()
![]()
![]()
![]()
![]()
![]()
![]()
![]()
![]()
![]()
![]()
![]()
![]()
![]()
![]()
![]()
![]()
![]()
![]()
![]()
![]()
![]()
![]()
![]()
![]()
![]()
![]()
![]()
![]()
![]()
![]()
![]()
![]()
![]()
![]()
![]()
![]()
![]()
![]()
![]()
![]()
![]()
![]()
![]()
![]()
![]()
![]()
![]()
![]()
![]()
![]()
