Assembly Instructions
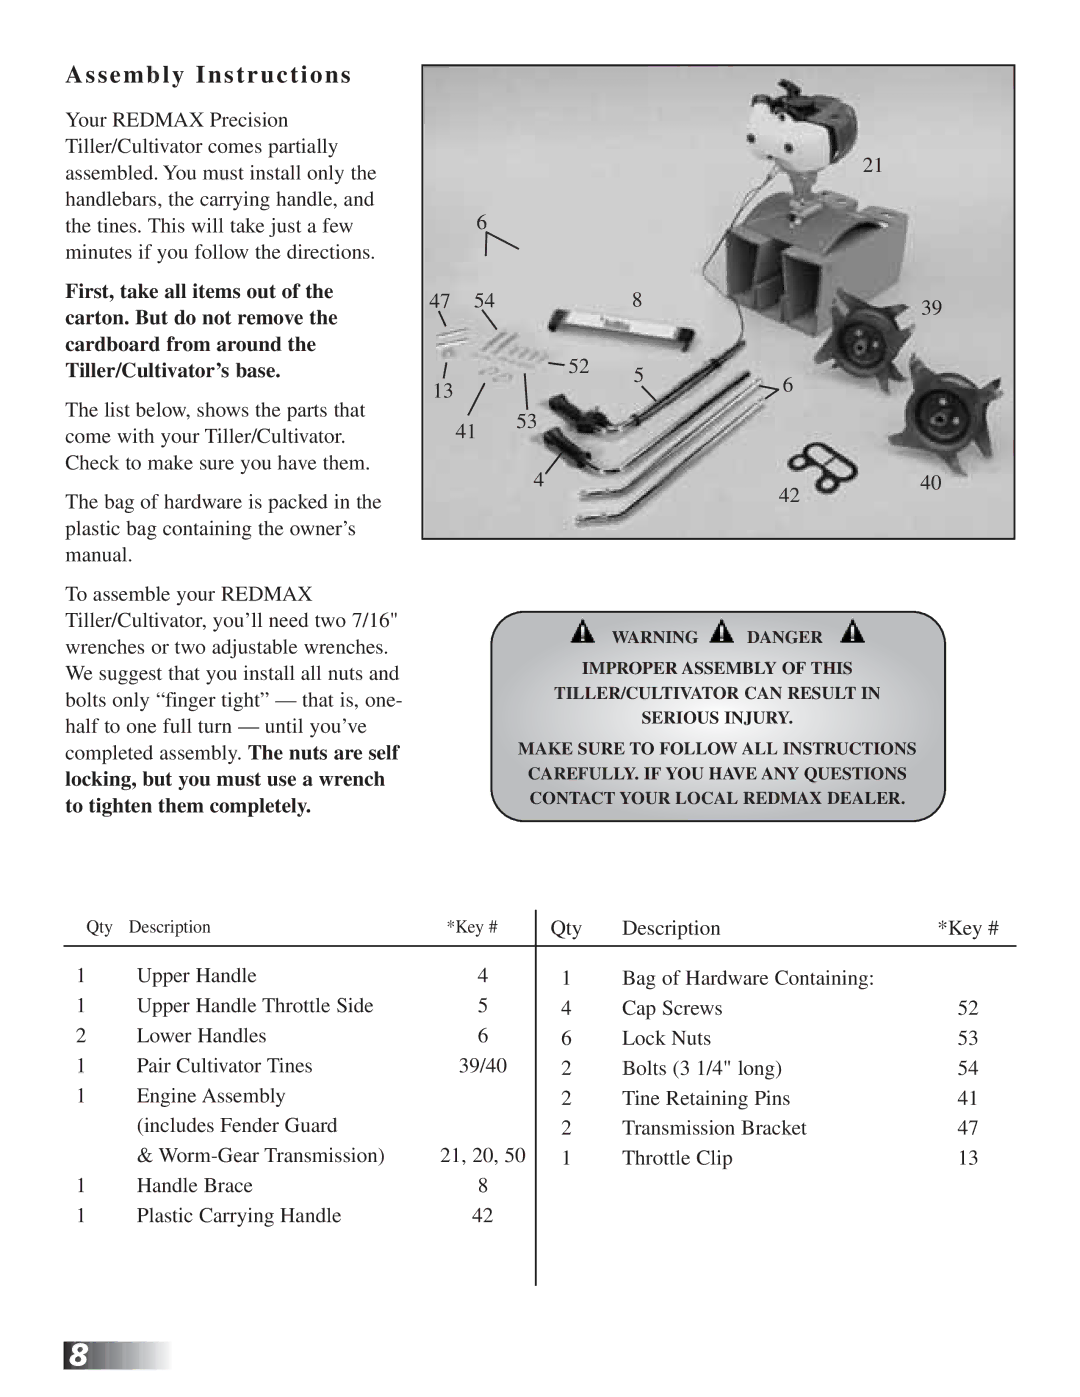
Your REDMAX Precision Tiller/Cultivator comes partially assembled. You must install only the handlebars, the carrying handle, and the tines. This will take just a few minutes if you follow the directions.
First, take all items out of the carton. But do not remove the cardboard from around the Tiller/Cultivator’s base.
The list below, shows the parts that come with your Tiller/Cultivator. Check to make sure you have them.
The bag of hardware is packed in the plastic bag containing the owner’s manual.
To assemble your REDMAX Tiller/Cultivator, you’ll need two 7/16" wrenches or two adjustable wrenches. We suggest that you install all nuts and bolts only “finger tight” — that is, one- half to one full turn — until you’ve completed assembly. The nuts are self
locking, but you must use a wrench to tighten them completely.
|
|
|
|
|
| 21 |
| 6 |
|
|
|
|
|
47 | 54 |
|
| 8 |
| 39 |
|
|
|
|
|
| |
|
|
| 52 | 5 | 6 |
|
13 |
|
|
|
| ||
|
|
|
|
| ||
| 41 | 53 |
|
|
|
|
|
|
|
|
|
| |
|
| 4 |
|
| 42 | 40 |
|
|
|
|
|
| |
|
|
|
|
|
|
|
WARNING ![]() DANGER
DANGER
IMPROPER ASSEMBLY OF THIS
TILLER/CULTIVATOR CAN RESULT IN
SERIOUS INJURY.
MAKE SURE TO FOLLOW ALL INSTRUCTIONS
CAREFULLY. IF YOU HAVE ANY QUESTIONS
CONTACT YOUR LOCAL REDMAX DEALER.
Qty | Description | *Key # | Qty | Description | *Key # |
|
|
|
|
|
|
1 | Upper Handle | 4 | 1 | Bag of Hardware Containing: |
|
1 | Upper Handle Throttle Side | 5 | 4 | Cap Screws | 52 |
2 | Lower Handles | 6 | 6 | Lock Nuts | 53 |
1 | Pair Cultivator Tines | 39/40 | 2 | Bolts (3 1/4" long) | 54 |
1 | Engine Assembly |
| 2 | Tine Retaining Pins | 41 |
| (includes Fender Guard |
| 2 | Transmission Bracket | 47 |
| & | 21, 20, 50 | 1 | Throttle Clip | 13 |
1 | Handle Brace | 8 |
|
|
|
1 | Plastic Carrying Handle | 42 |
|
|
|
|
|
|
|
|
|
![]()
![]()
![]()
![]()
![]()
![]()
![]() 8
8![]()
![]()
![]()
![]()
![]()
![]()
![]()
![]()
![]()
![]()
![]()
![]()
![]()
![]()
![]()
![]()
![]()
![]()
![]()
![]()
![]()
![]()
![]()
![]()
![]()
![]()
![]()
![]()
![]()
![]()
![]()
![]()
![]()
![]()
![]()
![]()
![]()
![]()
![]()
![]()
![]()
![]()
![]()
![]()
![]()
![]()
![]()
![]()
![]()
![]()
![]()
![]()
![]()
![]()
![]()
![]()
![]()
![]()
![]()
![]()
![]()
![]()
![]()
![]()
![]()
![]()
![]()
![]()
![]()
![]()
![]()
![]()
![]()
![]()
![]()
![]()
![]()
![]()
![]()
![]()
![]()
![]()
![]()
![]()
![]()
![]()
![]()
![]()
![]()
![]()
![]()
![]()
![]()
![]()
![]()
![]()
![]()
![]()
![]()
![]()
![]()
![]()
![]()
![]()
![]()
![]()
![]()
![]()
![]()
![]()
![]()
