c) The handset must not be able to come into contact with any used water in the bath or basin. If it can, even after the hose has been retained by the hose retainer (see diagram 13), then a vacuum breaker must be fitted. It should be noted that these devices are liable to minor leakage so they must be positioned so that any drips are not detrimental.
4. Fix the riser rail with screws provided. The fixing holes at the base of the brackets will be disclosed by removing the plastic fronts. Assemble as shown in diagram 13.
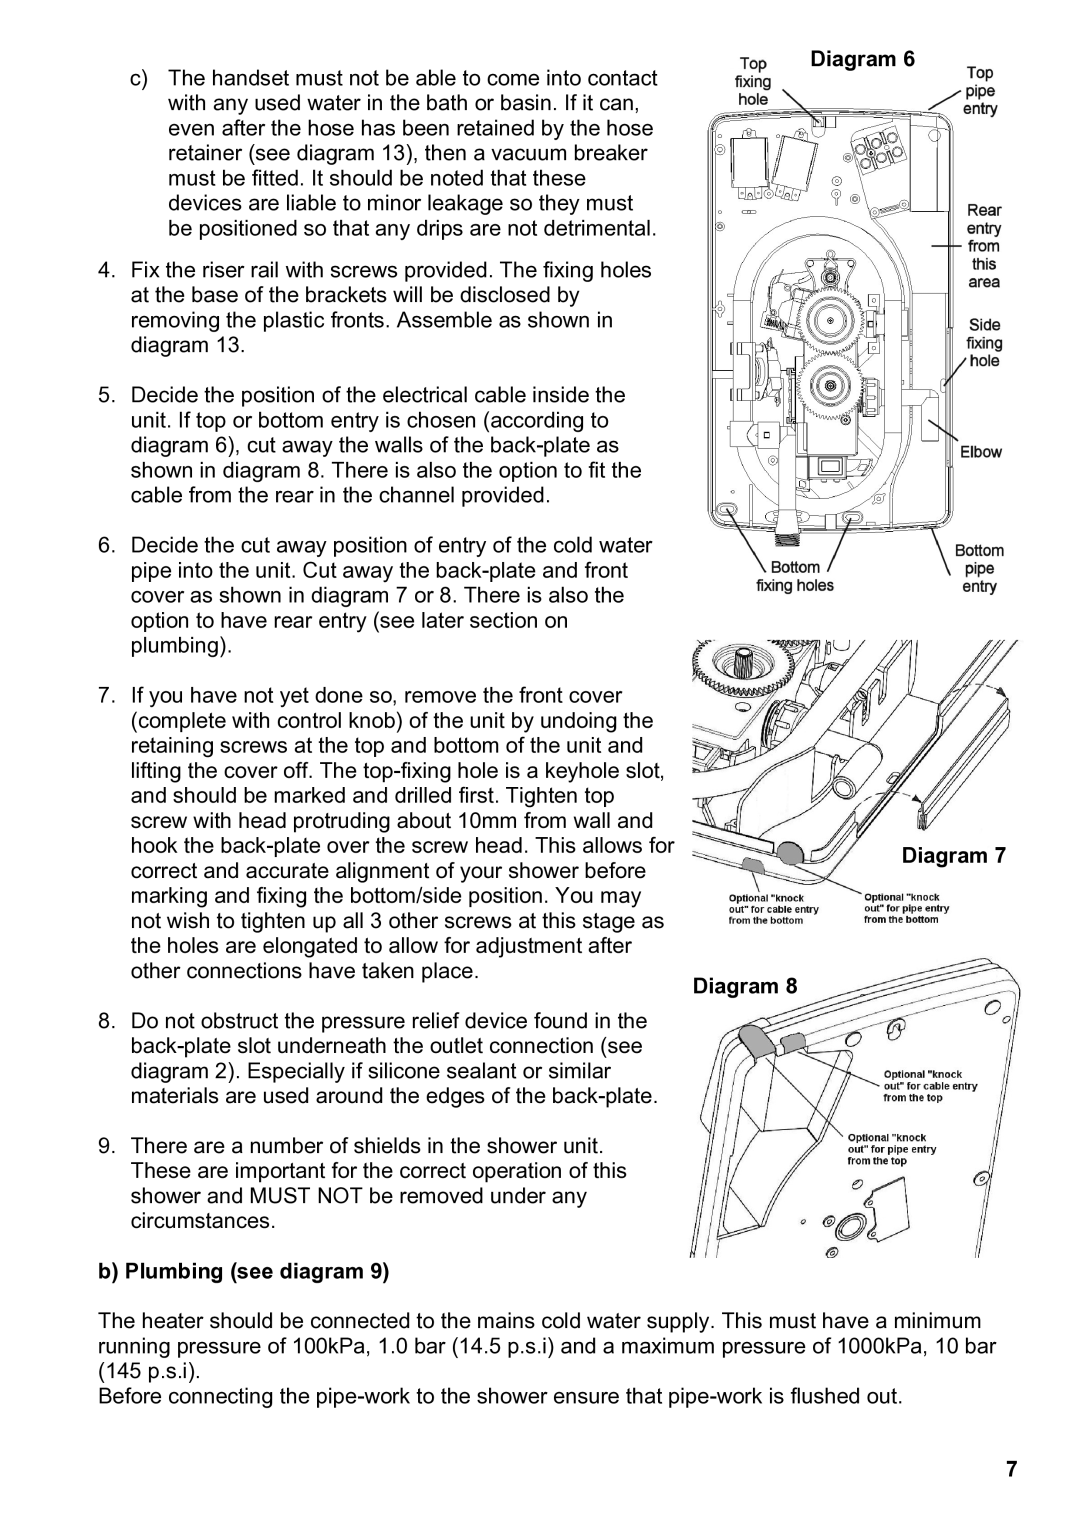
5. Decide the position of the electrical cable inside the unit. If top or bottom entry is chosen (according to diagram 6), cut away the walls of the
6. Decide the cut away position of entry of the cold water pipe into the unit. Cut away the
7. If you have not yet done so, remove the front cover (complete with control knob) of the unit by undoing the retaining screws at the top and bottom of the unit and lifting the cover off. The
8.Do not obstruct the pressure relief device found in the
9.There are a number of shields in the shower unit. These are important for the correct operation of this shower and MUST NOT be removed under any circumstances.
Diagram 8
Diagram 6
Diagram 5
Diagram 7
b) Plumbing (see diagram 9)
The heater should be connected to the mains cold water supply. This must have a minimum running pressure of 100kPa, 1.0 bar (14.5 p.s.i) and a maximum pressure of 1000kPa, 10 bar (145 p.s.i).
Before connecting the
7
