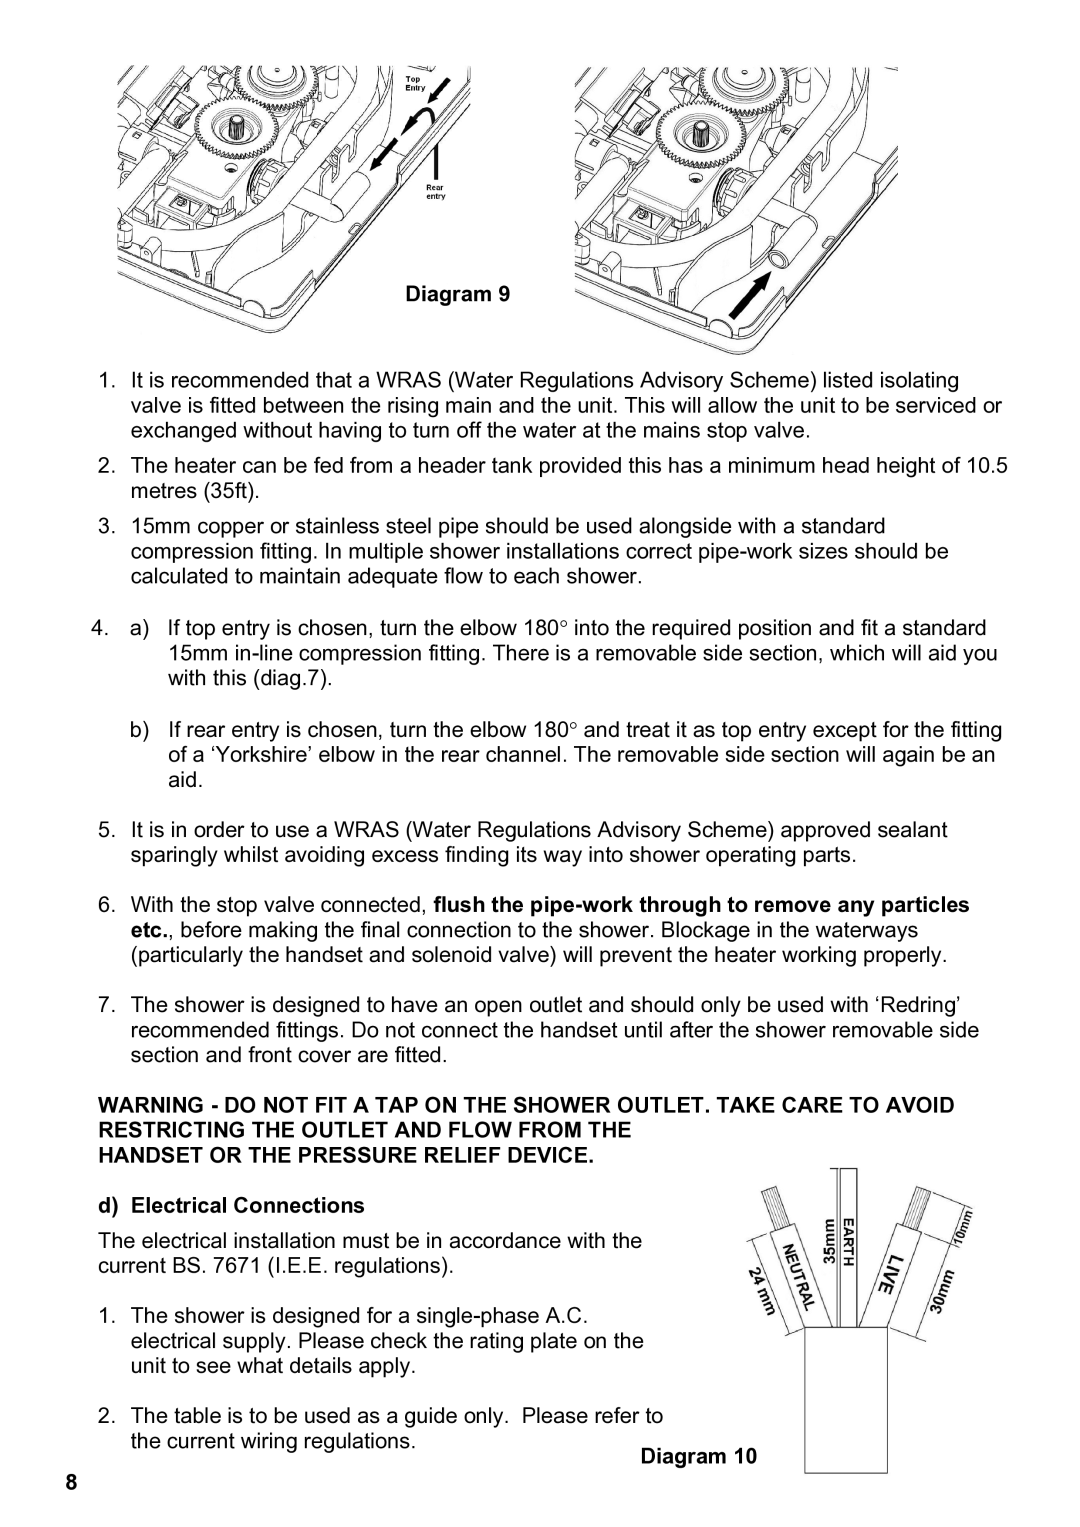
Diagram 9
1.It is recommended that a WRAS (Water Regulations Advisory Scheme) listed isolating valve is fitted between the rising main and the unit. This will allow the unit to be serviced or exchanged without having to turn off the water at the mains stop valve.
2.The heater can be fed from a header tank provided this has a minimum head height of 10.5 metres (35ft).
3.15mm copper or stainless steel pipe should be used alongside with a standard compression fitting. In multiple shower installations correct
4.a) If top entry is chosen, turn the elbow 180° into the required position and fit a standard 15mm
b)If rear entry is chosen, turn the elbow 180° and treat it as top entry except for the fitting of a ‘Yorkshire’ elbow in the rear channel. The removable side section will again be an aid.
5.It is in order to use a WRAS (Water Regulations Advisory Scheme) approved sealant sparingly whilst avoiding excess finding its way into shower operating parts.
6.With the stop valve connected, flush the
7.The shower is designed to have an open outlet and should only be used with ‘Redring’ recommended fittings. Do not connect the handset until after the shower removable side section and front cover are fitted.
WARNING - DO NOT FIT A TAP ON THE SHOWER OUTLET. TAKE CARE TO AVOID RESTRICTING THE OUTLET AND FLOW FROM THE
HANDSET OR THE PRESSURE RELIEF DEVICE.
d) Electrical Connections
The electrical installation must be in accordance with the current BS. 7671 (I.E.E. regulations).
1.The shower is designed for a
2.The table is to be used as a guide only. Please refer to the current wiring regulations.
8
