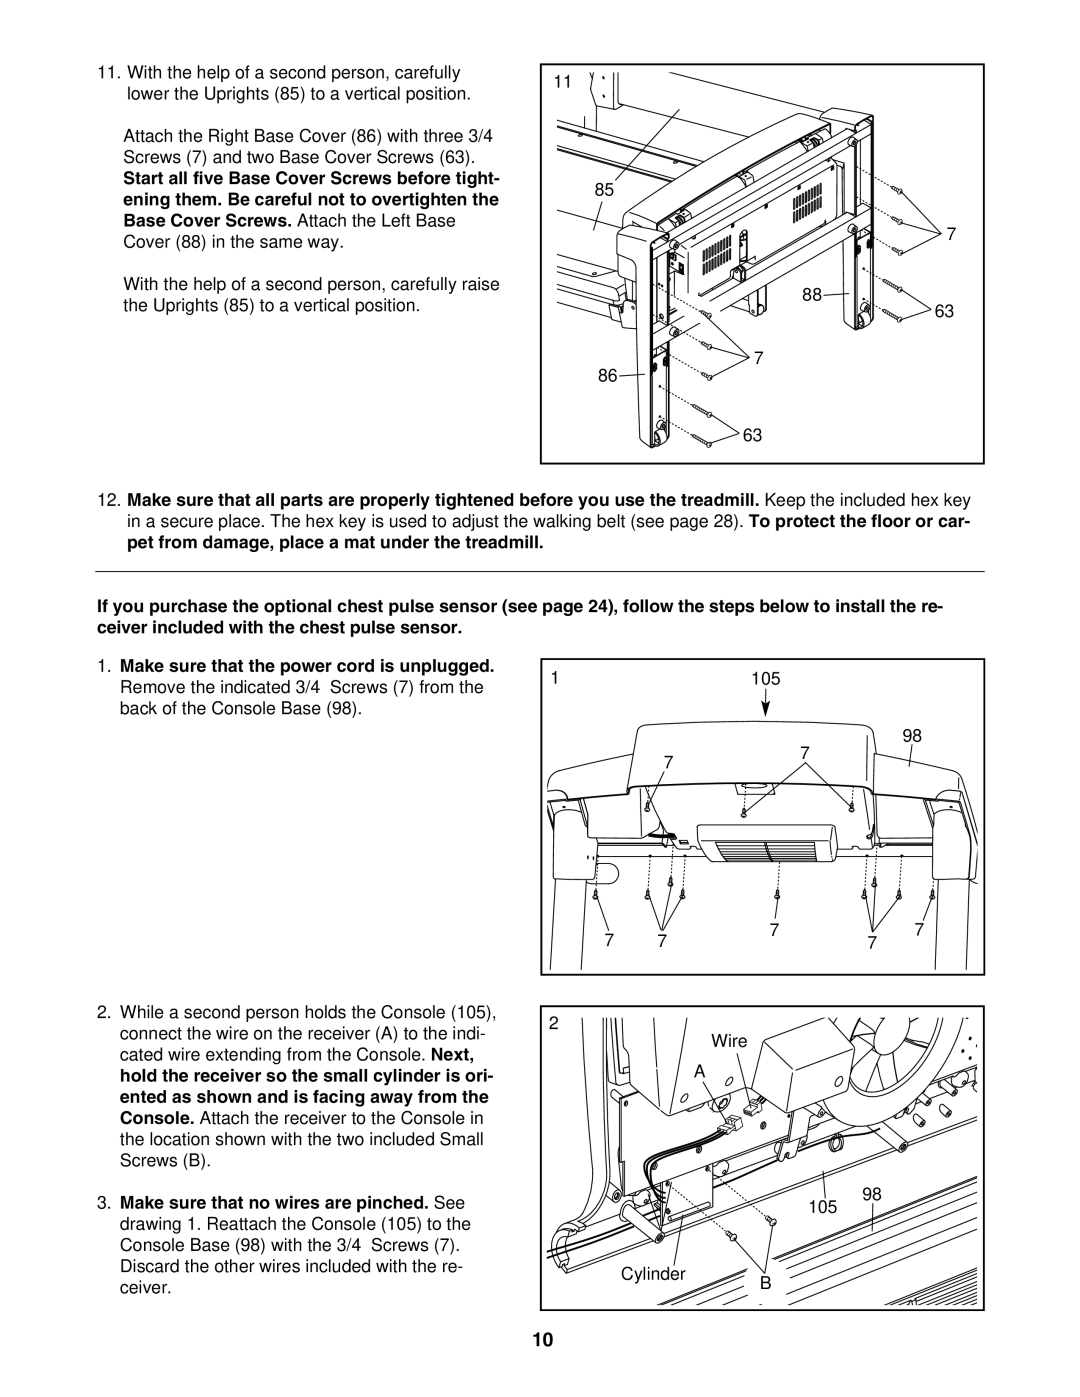
11. With the help of a second person, carefully | 11 | |
lower the Uprights (85) to a vertical position. | ||
| ||
Attach the Right Base Cover (86) with three 3/4” |
| |
Screws (7) and two Base Cover Screws (63). |
| |
Start all five Base Cover Screws before tight- | 85 | |
ening them. Be careful not to overtighten the | ||
| ||
Base Cover Screws. Attach the Left Base | 7 | |
Cover (88) in the same way. | ||
| ||
With the help of a second person, carefully raise | 88 | |
the Uprights (85) to a vertical position. | ||
63 | ||
| ||
| 7 | |
| 86 | |
| 63 |
12.Make sure that all parts are properly tightened before you use the treadmill. Keep the included hex key in a secure place. The hex key is used to adjust the walking belt (see page 28). To protect the floor or car- pet from damage, place a mat under the treadmill.
If you purchase the optional chest pulse sensor (see page 24), follow the steps below to install the re- ceiver included with the chest pulse sensor.
1. Make sure that the power cord is unplugged. | 1 |
| 105 |
| |
| Remove the indicated 3/4” Screws (7) from the |
|
| ||
|
|
|
|
| |
| back of the Console Base (98). |
|
|
|
|
|
|
|
|
| 98 |
|
|
| 7 |
| 7 |
|
|
|
|
| |
|
| 7 | 7 | 7 | 7 |
|
|
| 7 | ||
2. | While a second person holds the Console (105), | 2 |
|
|
|
| connect the wire on the receiver (A) to the indi- |
| Wire |
| |
|
|
|
| ||
| cated wire extending from the Console. Next, |
|
|
| |
|
|
| A |
| |
| hold the receiver so the small cylinder is ori- |
|
|
| |
| ented as shown and is facing away from the |
|
|
|
|
| Console. Attach the receiver to the Console in |
|
|
|
|
| the location shown with the two included Small |
|
|
|
|
| Screws (B). |
|
|
|
|
3. Make sure that no wires are pinched. See |
|
|
| 98 | |
|
|
| 105 | ||
| drawing 1. Reattach the Console (105) to the |
|
|
|
|
| Console Base (98) with the 3/4” Screws (7). |
|
|
|
|
| Discard the other wires included with the re- |
| Cylinder | B |
|
| ceiver. |
|
| ||
|
|
|
| ||
|
| 10 |
|
|
|