INSTALLATION
Blower/Fan
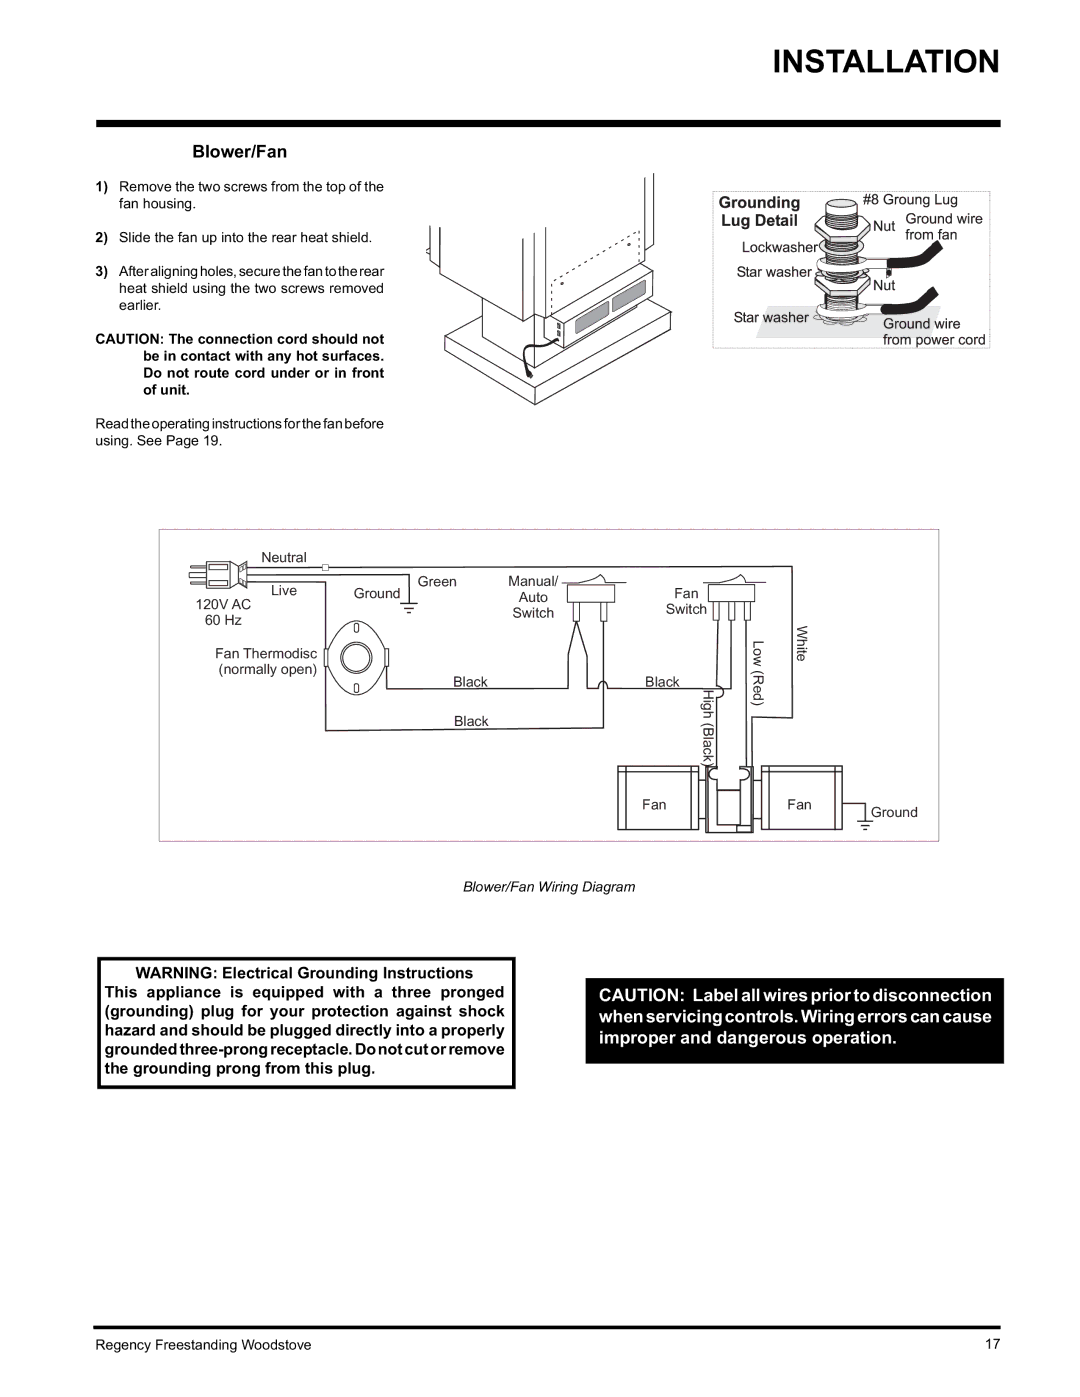
1)Remove the two screws from the top of the
fan housing.
2) Slide the fan up into the rear heat shield.
3) After aligning holes, secure the fan to the rear heat shield using the two screws removed earlier.
CAUTION: The connection cord should not be in contact with any hot surfaces. Do not route cord under or in front of unit.
Read the operating instructions for the fan before using. See Page 19.
Neutral |
|
|
|
|
|
|
Live | Green | Manual/ | Fan |
|
|
|
Ground | Auto |
|
|
| ||
120V AC |
| Switch | Switch |
|
|
|
60 Hz |
|
|
|
| ||
|
|
|
| White |
| |
Fan Thermodisc |
|
|
| Low |
| |
(normally open) | Black |
| Black | (Red) |
|
|
|
|
|
| |||
| Black |
| High |
|
| |
|
| (Black) |
|
|
| |
|
|
|
|
|
| |
|
|
| Fan |
| Fan | Ground |
|
|
|
|
|
|
Blower/Fan Wiring Diagram
WARNING: Electrical Grounding Instructions
This appliance is equipped with a three pronged (grounding) plug for your protection against shock hazard and should be plugged directly into a properly grounded
CAUTION: Label all wires prior to disconnection when servicing controls. Wiring errors can cause improper and dangerous operation.
Regency Freestanding Woodstove | 17 |
