How to Use
CHARGING YOUR HAIR
CLIPPER
Turn the clipper off
■Insert the adapter plug into the bottom of the clipper and plug the adapter unit into a power outlet. The red light will glow to indicate that it is charging.
■The clipper will be fully charged in 14-16 hours.
■The batteries cannot be overcharged, but we recommend that charging be discon- tinued if the clipper will not be used for a long period of time.
■It is advisable not to use this clipper directly from the power outlet when it has been fully charged, but if while using the clipper in cordless mode there is a noticeable drop in power, you can use directly from the power outlet. Never use under water when connected to the outlet.
■If the clipper has not been used for a month or longer, it is advisable to recharge it for
■To preserve the life of the batteries, discharge them by running the clipper until the blades move slowly. Switch off and fully recharge. Do this every six months.
■Charge the clipper at temperatures between
■
INSTRUCTIONS FOR HAIR CUTTING
Before starting the cut
1.Inspect the clipper making sure that it is free from hair and dirt.
2.Seat the person so that their head is approximately at your eye level.
3.Before cutting, always comb the hair so it is tangle free and as it is naturally worn.
4.Hair must be dry.
Reminders:
Cut the hair gradually using short strokes only to work gradually over the entire head. Always take off a little hair at a time. You can always trim off additional hair later.
As you work, comb the hair frequently back into the style that you are cutting. Each comb attachment is marked accoringly on its outside middle surface.
BEST TECHNIQUE
These instructions are only to be used as a guide. You may prefer to begin trimming with a longer comb attachment to avoid cutting hair too short. As you become familiar with the settings, you can select your desired length setting.
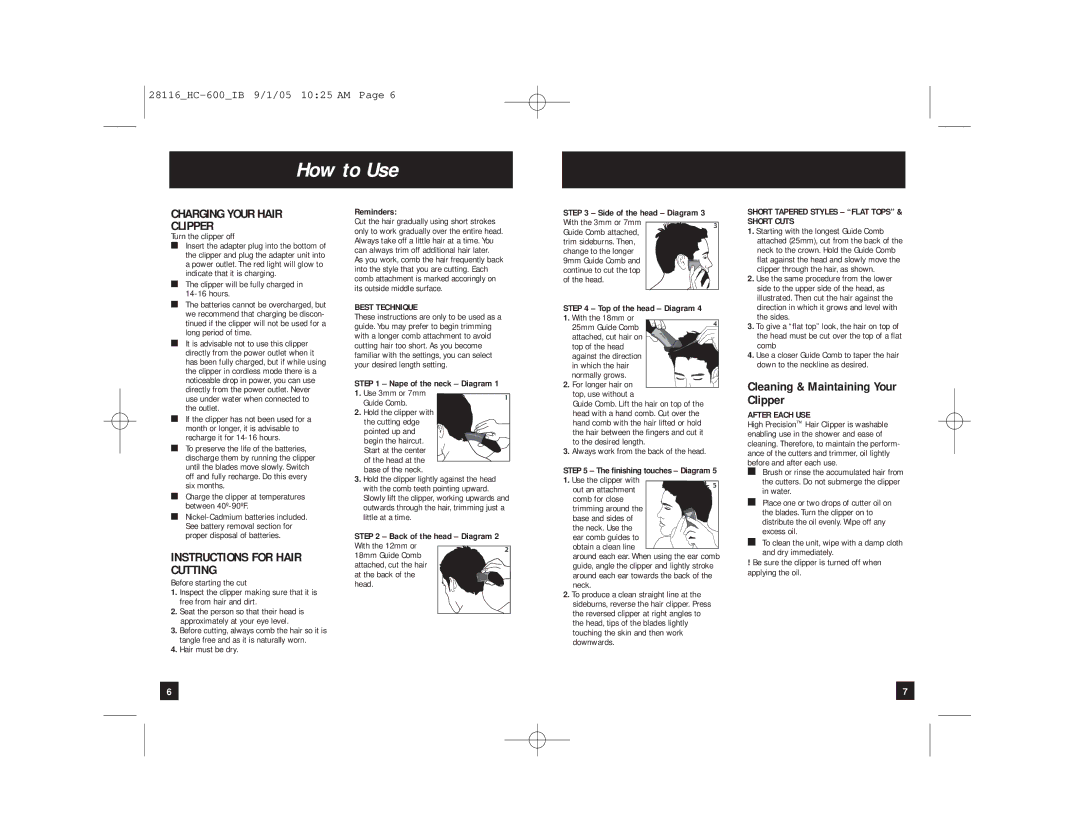
STEP 1 – Nape of the neck – Diagram 1
1. Use 3mm or 7mm1 Guide Comb.
2.Hold the clipper with the cutting edge
pointed up and begin the haircut. Start at the center of the head at the base of the neck.
3.Hold the clipper lightly against the head with the comb teeth pointing upward. Slowly lift the clipper, working upwards and outwards through the hair, trimming just a little at a time.
STEP 2 – Back of the head – Diagram 2 |
| |
With the 12mm or | 2 | |
18mm Guide Comb | ||
| ||
attached, cut the hair |
| |
at the back of the |
| |
head. |
|
STEP 3 – Side of the head – Diagram 3 |
| |
With the 3mm or 7mm | 3 | |
Guide Comb attached, | ||
| ||
trim sideburns. Then, |
| |
change to the longer |
| |
9mm Guide Comb and |
| |
continue to cut the top |
| |
of the head. |
|
STEP 4 – Top of the head – Diagram 4
1. With the 18mm or | 4 |
25mm Guide Comb | |
attached, cut hair on |
|
top of the head |
|
against the direction |
|
in which the hair |
|
normally grows. |
|
2.For longer hair on top, use without a
Guide Comb. Lift the hair on top of the head with a hand comb. Cut over the hand comb with the hair lifted or hold the hair between the fingers and cut it to the desired length.
3.Always work from the back of the head.
STEP 5 – The finishing touches – Diagram 5
1. Use the clipper with | 5 |
out an attachment | |
comb for close |
|
trimming around the |
|
base and sides of |
|
the neck. Use the |
|
ear comb guides to |
|
obtain a clean line |
|
around each ear. When using the ear comb | |
guide, angle the clipper and lightly stroke | |
around each ear towards the back of the |
|
neck. |
|
2.To produce a clean straight line at the sideburns, reverse the hair clipper. Press the reversed clipper at right angles to the head, tips of the blades lightly touching the skin and then work downwards.
SHORT TAPERED STYLES – “FLAT TOPS” & SHORT CUTS
1.Starting with the longest Guide Comb attached (25mm), cut from the back of the neck to the crown. Hold the Guide Comb flat against the head and slowly move the clipper through the hair, as shown.
2.Use the same procedure from the lower side to the upper side of the head, as illustrated. Then cut the hair against the direction in which it grows and level with the sides.
3.To give a “flat top” look, the hair on top of the head must be cut over the top of a flat comb
4.Use a closer Guide Comb to taper the hair down to the neckline as desired.
Cleaning & Maintaining Your Clipper
AFTER EACH USE
High Precision™ Hair Clipper is washable enabling use in the shower and ease of cleaning. Therefore, to maintain the perform- ance of the cutters and trimmer, oil lightly before and after each use.
■Brush or rinse the accumulated hair from the cutters. Do not submerge the clipper in water.
■Place one or two drops of cutter oil on the blades. Turn the clipper on to distribute the oil evenly. Wipe off any excess oil.
■To clean the unit, wipe with a damp cloth and dry immediately.
!Be sure the clipper is turned off when applying the oil.
6 |
| 7 |
|
|
|
