Usage Tips
Giving a Comfortable,
Even Cut
Allow the clipper to cut through the hair without moving it too quickly. Moving the clipper too quickly may create a pulling sensation.
Use short strokes when cutting, and initially use the longest trimming guide. You can always use a closer trimming guide later if you want a closer cut.
How to Give a Haircut
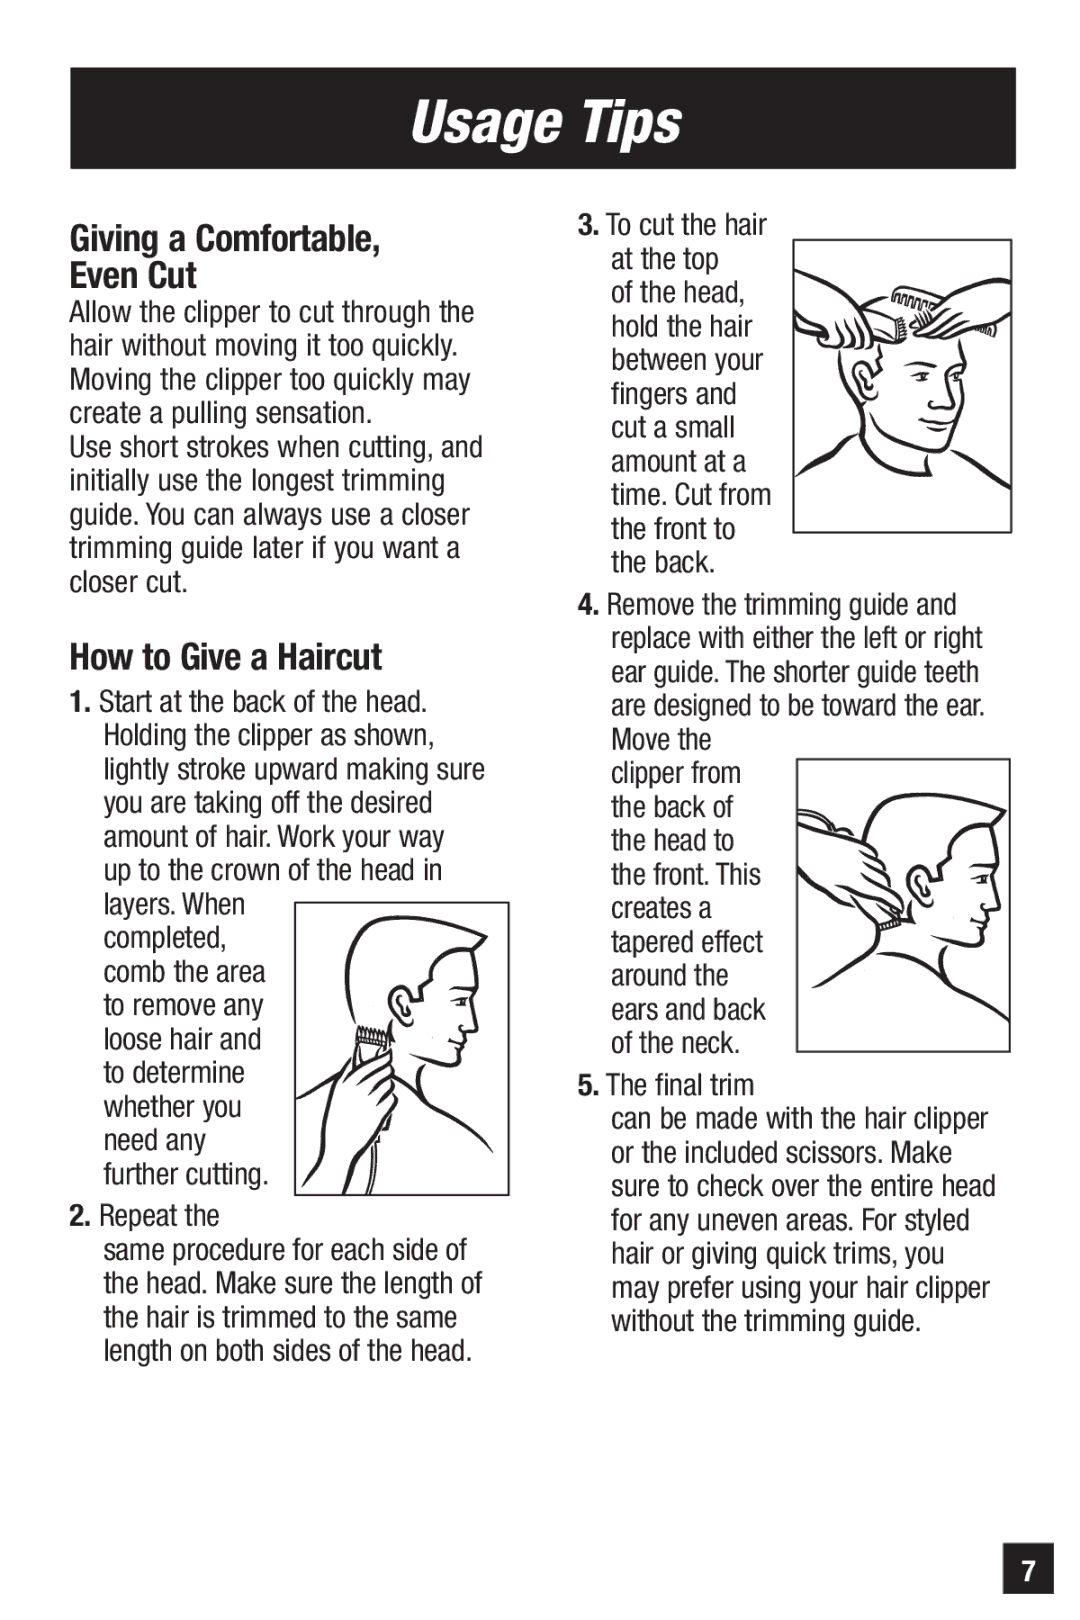
1.Start at the back of the head.
Holding the clipper as shown, lightly stroke upward making sure you are taking off the desired amount of hair. Work your way
up to the crown of the head in layers. When
completed, comb the area
to remove any loose hair and
to determine whether you need any further cutting.
2.Repeat the
same procedure for each side of the head. Make sure the length of the hair is trimmed to the same length on both sides of the head.
3.To cut the hair at the top
of the head, hold the hair between your fingers and cut a small amount at a time. Cut from the front to the back.
4.Remove the trimming guide and replace with either the left or right ear guide. The shorter guide teeth are designed to be toward the ear. Move the
clipper from
the back of the head to the front. This creates a tapered effect around the ears and back of the neck.
5.The final trim
can be made with the hair clipper or the included scissors. Make sure to check over the entire head for any uneven areas. For styled hair or giving quick trims, you may prefer using your hair clipper without the trimming guide.
7