MB-350 specifications
The Remington MB-350 is a versatile grooming tool designed to meet the needs of modern men looking for an efficient and effective solution for facial hair management. With its sleek and ergonomic design, the MB-350 stands out as a reliable partner for trimming beards, mustaches, and even body hair.One of the standout features of the Remington MB-350 is its powerful motor, which provides consistent performance for a smooth grooming experience. The unit is equipped with precision ground stainless steel blades that ensure a clean and even cut, minimizing the risk of irritation or pulling. These self-sharpening blades maintain their edge over time, reducing the need for costly replacements and ensuring long-lasting performance.
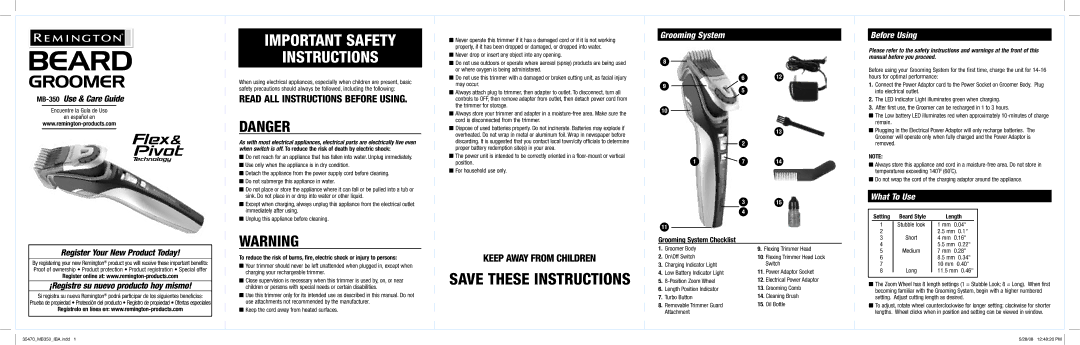
The MB-350 also offers multiple length settings, making it easy to customize the grooming experience. With various guard attachments, users can achieve a range of styles, from stubble to longer beards, allowing for ultimate versatility. The adjustable length settings allow for precise trimming, catering to individual preferences, and making it an ideal tool for creating distinct looks.
Another significant advantage of the Remington MB-350 is its dual power capability. The unit can be used both corded and cordless, making it convenient for use at home or while traveling. The rechargeable battery provides a reliable power source, offering extended run time for uninterrupted grooming sessions. Additionally, the quick charge feature ensures minimal downtime.
The MB-350 is designed with user comfort in mind. It features a lightweight and ergonomic body, which makes it easy to handle and maneuver, even in hard-to-reach areas. The textured grip ensures that the device remains securely in hand, preventing slips during use.
Cleaning and maintenance are straightforward, thanks to the washable blade design. Simply rinse the blades under running water, and the trimmer is ready for the next use, ensuring hygiene is maintained effortlessly.
In summary, the Remington MB-350 is an excellent choice for those seeking a reliable, efficient grooming solution. With its powerful motor, stainless steel blades, adjustable settings, dual power options, and ergonomic design, it caters to the grooming needs of modern men. Whether for daily maintenance or a complete grooming overhaul, the MB-350 proves to be a valuable addition to any grooming routine.