How To Use
TRIMMER GUARD ATTACHMENT
Remove Trimmer Guard Attachment to define hairline edges (e.g. sideburns, nape of neck, beard \ mustache lines). Also, remove guard to clean cutter assembly. To remove:
1.Be sure Groomer is in OFF position.
2.While holding Groomer in one hand, while holding Zoom Wheel with other hand, gently pull Trimmer Guard Attachment away from Groomer.
3.Replace Guard by repeating steps #1 and #2. (NOTE: Guard can only be placed on Groomer one way. If not fitting properly, simply remove and reverse).
FLEXING TRIMMER HEAD
The Grooming System is equipped with a locking switch to secure the flexing trimmer head for detail trimming. To lock:
1.Be sure Groomer is in OFF position.
2.Be sure Trimmer Head is in natural “unflexed” position.
3.Slide Head Lock Switch downward. Should Trimmer fail to lock, simply unlock switch, readjust Trimmer to its natural unflexed position, and reset lock.
4.To unlock Head, repeat step #1 followed by sliding Head Lock Switch upward.
Grooming Tips
HAIR:
■Should be dry and free of lotions or other liquids.
■Comb outward to obtain maximum height/length and facing in the same direction.
BEARD:
■When TRIMMING, add Trimmer Guard Attachment. For maximum control, lock Trimmer Head to define lines. Front side of Groomer should be facing away from face. Starting beneath chin, follow jaw line back toward ear with upward motion. Allow Trimmer Guard Attachment to follow natural contours of face. Trim either against or with the direction of beard growth, whichever is preferred.
■When THINNING or TAPERING, remove Trimmer Guard Attachment. Using the Styling Comb, hold beard hairs in place while Trimming.
■To Create the STUBBLE LOOK, add Trimmer Guard Attachment and set to setting #1 or #2. While holding Trimmer horizontally, trim hairs by using an upward or downward motion (against or with direction of hair growth, as
preferred). For an even closer Stubble Look, remove Trimmer Guard Attachment altogether and repeat previous steps.
MUSTACHE:
■Use Grooming Comb to first straighten hairs for trimming.
■With Trimmer Guard Attachment removed and Trimmer Head locked, trim hairs using an upward motion. After achieving desired length, use downward motion to blend mustache hairs.
SIDEBURNS:
■Use Grooming Comb to first straighten hairs for trimming.
■With Trimmer Guard Attachment added and holding Groomer vertically, simply trim using a downward motion.
NAPE OF NECK:
■Using a hand-held mirror is necessary if self-trimming.
■Remove Trimmer Guard Attachment and lock Trimmer Head for maximum precision and control.
■Lift hair off neck, using index finger to cover & protect those hairs NOT needing trimming.
■Carefully touch cutting blade to neck, slowly moving the groomer in an upward direction until stopped by index finger.
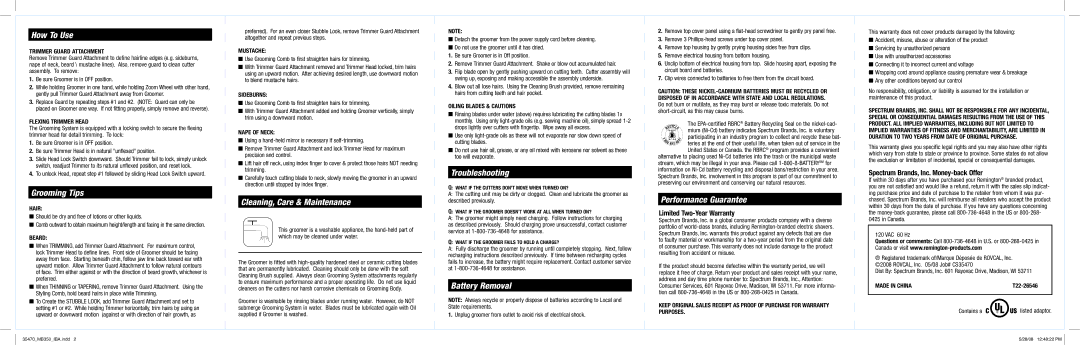
Cleaning, Care & Maintenance
This groomer is a washable appliance, the hand-held part of which may be cleaned under water.
The Groomer is fitted with high-quality hardened steel or ceramic cutting blades that are permanently lubricated. Cleaning should only be done with the soft Cleaning Brush supplied. Always clean Grooming System attachments regularly to ensure maximum performance and a proper operating life. Do not use liquid cleaners on the cutters nor harsh corrosive chemicals on Grooming Body.
Groomer is washable by rinsing blades under running water. However, do NOT submerge Grooming System in water. Blades must be lubricated again with Oil supplied if Groomer is washed.
NOTE:
■Detach the groomer from the power supply cord before cleaning.
■Do not use the groomer until it has dried.
1.Be sure Groomer is in Off position.
2.Remove Trimmer Guard Attachment. Shake or blow out accumulated hair.
3.Flip blade open by gently pushing upward on cutting teeth. Cutter assembly will swing up, exposing and making accessible the assembly underside.
4.Blow out all lose hairs. Using the Cleaning Brush provided, remove remaining hairs from cutting teeth and hair pocket.
OILING BLADES & CAUTIONS
■Rinsing blades under water (above) requires lubricating the cutting blades 1x monthly. Using only light-grade oils (e.g. sewing machine oil), simply spread 1-2 drops lightly over cutters with fingertip. Wipe away all excess.
■Use only light-grade oils as these will not evaporate nor slow down speed of cutting blades.
■Do not use hair oil, grease, or any oil mixed with kerosene nor solvent as these too will evaporate.
Troubleshooting
Q: WHAT IF THE CUTTERS DON’T MOVE WHEN TURNED ON?
A:The cutting unit may be dirty or clogged. Clean and lubricate the groomer as described previously.
Q: WHAT IF THE GROOMER DOESN’T WORK AT ALL WHEN TURNED ON?
A:The groomer might simply need charging. Follow instructions for charging as described previously. Should charging prove unsuccessful, contact customer service at 1-800-736-4648 for assistance.
Q: WHAT IF THE GROOMER FAILS TO HOLD A CHARGE?
A:Fully discharge the groomer by running until completely stopping. Next, follow recharging instructions described previously. If time between recharging cycles fails to increase, the battery might require replacement. Contact customer service at 1-800-736-4648 for assistance.
Battery Removal
NOTE: Always recycle or properly dispose of batteries according to Local and State requirements.
1.Unplug groomer from outlet to avoid risk of electrical shock.
2.Remove top cover panel using a flat-head screwdriver to gently pry panel free.
3.Remove 3 Phillips-head screws under top cover panel.
4.Remove top housing by gently prying housing sides free from clips.
5.Remove electrical housing from bottom housing.
6.Unclip bottom of electrical housing from top. Slide housing apart, exposing the circuit board and batteries.
7.Clip wires connected to batteries to free them from the circuit board.
CAUTION: THESE NICKEL-CADMIUM BATTERIES MUST BE RECYCLED OR DISPOSED OF IN ACCORDANCE WITH STATE AND LOCAL REGULATIONS.
Do not burn or mutilate, as they may burst or release toxic materials. Do not short-circuit, as this may cause burns.
The EPA-certified RBRC® Battery Recycling Seal on the nickel-cad- mium (Ni-Cd) battery indicates Spectrum Brands, Inc. is voluntary participating in an industry program to collect and recycle these bat- teries at the end of their useful life, when taken out of service in the United States or Canada. the RBRC® program provides a convenient
alternative to placing used Ni-Cd batteries into the trash or the municipal waste stream, which may be illegal in your area. Please call 1-800-8-BATTERYSMfor information on Ni-Cd battery recycling and disposal bans/restriction in your area. Spectrum Brands, Inc. involvement in this program is part of our commitment to preserving our environment and conserving our natural resources.
Performance Guarantee
Limited Two-Year Warranty
Spectrum Brands, Inc. is a global consumer products company with a diverse portfolio of world-class brands, including Remington-branded electric shavers. Spectrum Brands, Inc. warrants this product against any defects that are due to faulty material or workmanship for a two-year period from the original date of consumer purchase. This warranty does not include damage to the product resulting from accident or misuse.
If the product should become defective within the warranty period, we will replace it free of charge. Return your product and sales receipt with your name, address and day time phone number to: Spectrum Brands, Inc., Attention: Consumer Services, 601 Rayovac Drive, Madison, WI 53711. For more informa- tion call 800-736-4648 in the US or 800-268-0425 in Canada.
KEEP ORIGINAL SALES RECEIPT AS PROOF OF PURCHASE FOR WARRANTY PURPOSES.
This warranty does not cover products damaged by the following:
■Accident, misuse, abuse or alteration of the product
■Servicing by unauthorized persons
■Use with unauthorized accessories
■Connecting it to incorrect current and voltage
■Wrapping cord around appliance causing premature wear & breakage
■Any other conditions beyond our control
No responsibility, obligation, or liability is assumed for the installation or maintenance of this product.
SPECTRUM BRANDS, INC. SHALL NOT BE RESPONSIBLE FOR ANY INCIDENTAL, SPECIAL OR CONSEQUENTIAL DAMAGES RESULTING FROM THE USE OF THIS PRODUCT. ALL IMPLIED WARRANTIES, INCLUDING BUT NOT LIMITED TO IMPLIED WARRANTIES OF FITNESS AND MERCHANTABILITY, ARE LIMITED IN DURATION TO TWO YEARS FROM DATE OF ORIGINAL PURCHASE.
This warranty gives you specific legal rights and you may also have other rights which vary from state to state or province to province. Some states do not allow the exclusion or limitation of incidental, special or consequential damages.
Spectrum Brands, Inc. Money-back Offer
If within 30 days after you have purchased your Remington® branded product, you are not satisfied and would like a refund, return it with the sales slip indicat- ing purchase price and date of purchase to the retailer from whom it was pur- chased. Spectrum Brands, Inc. will reimburse all retailers who accept the product within 30 days from the date of purchase. If you have any questions concerning the money-back guarantee, please call 800-736-4648 in the US or 800-268- 0425 in Canada.
120 VAC 60 Hz
Questions or comments: Call 800-736-4648 in U.S. or 800-268-0425 in Canada or visit www.remington-products.com
®Registered trademark of/Marque Déposée de ROVCAL, Inc. ©2008 ROVCAL, Inc. 05/08 Job# CS35470
Dist By: Spectrum Brands, Inc. 601 Rayovac Drive, Madison, WI 53711
Contains a 

 listed adaptor.