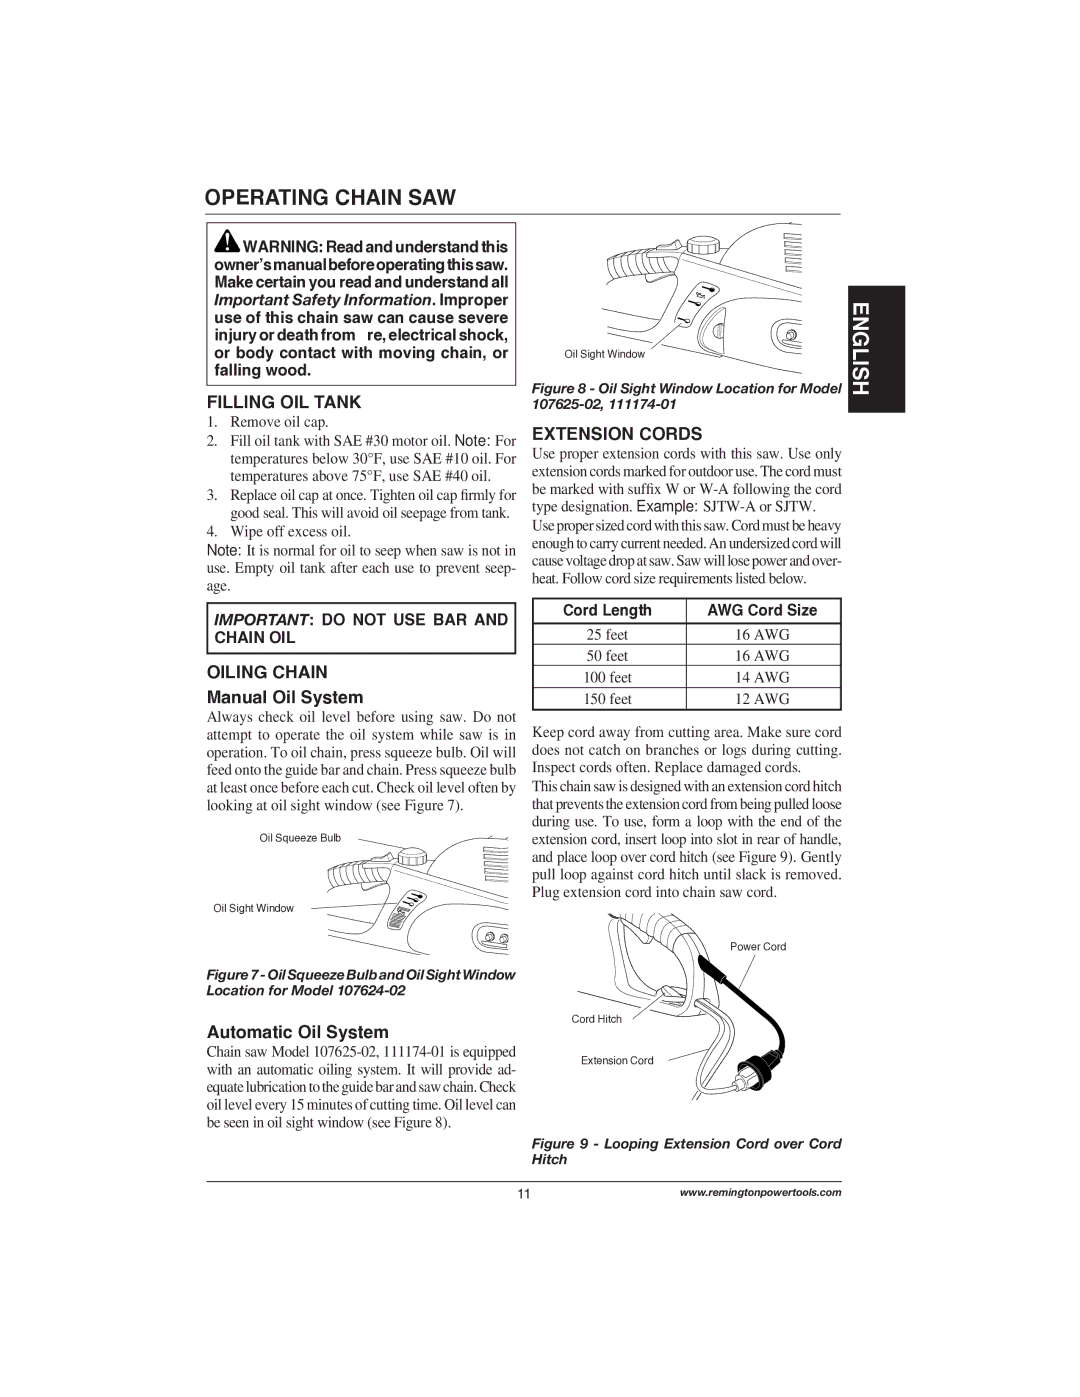
111174-01, 107624-02, 107625-02 specifications
Remington Power Tools has established a strong reputation for providing high-quality outdoor power equipment. Among its notable offerings are the models 107625-02, 107624-02, and 111174-01. Each of these tools is designed to deliver powerful performance, ergonomic design, and innovative technology to meet the diverse needs of homeowners and professional landscapers alike.The Remington model 107625-02 is a robust gas-powered string trimmer, which stands out for its exceptional cutting capabilities. This trimmer features a 25cc two-cycle engine, providing ample power for tackling thick grass and overgrown weeds. One of the key benefits of this model is its QuickStart technology, which ensures easy starting with minimal effort. Its lightweight design and adjustable handle enhance maneuverability, making it easy to navigate tight spaces. The 107625-02 also includes a bump feed head, allowing users to quickly and efficiently extend the cutting line by simply tapping the head on the ground, a time-saving feature that many users appreciate.
The 107624-02 model is a versatile hedge trimmer that excels in both residential and commercial settings. Powered by a 22cc engine, this tool is engineered to tackle dense hedges and shrubs with precision. One of its standout features is the 24-inch dual-sided blade, designed to provide a clean and precise cut while minimizing the risk of blade binding. Its rotating handle offers enhanced comfort and control, allowing users to trim at various angles without straining their wrists. This hedge trimmer also incorporates anti-vibration technology, making it easier to handle during extended use and reducing operator fatigue.
Finally, the 111174-01 model is a powerful chainsaw that prioritizes both performance and safety. Equipped with a 12-amp electric motor, this chainsaw produces substantial cutting power for felling small to medium trees and performing routine maintenance tasks. It features an automatic oiling system that ensures the chain is consistently lubricated for optimal performance and longevity. The tool's safety features include a chain brake and a safety lock button to prevent accidental starts, making it suitable for both seasoned users and novices alike. Lightweight and easy to handle, the 111174-01 chainsaw is an excellent choice for those looking to maintain their property effortlessly.
Each of these Remington power tools is designed with an emphasis on efficiency, user-friendly features, and durability, making them ideal companions for any outdoor project. Whether you're landscaping your garden or managing a larger property, these tools provide the performance and reliability needed to get the job done right.