ASSEMBLY
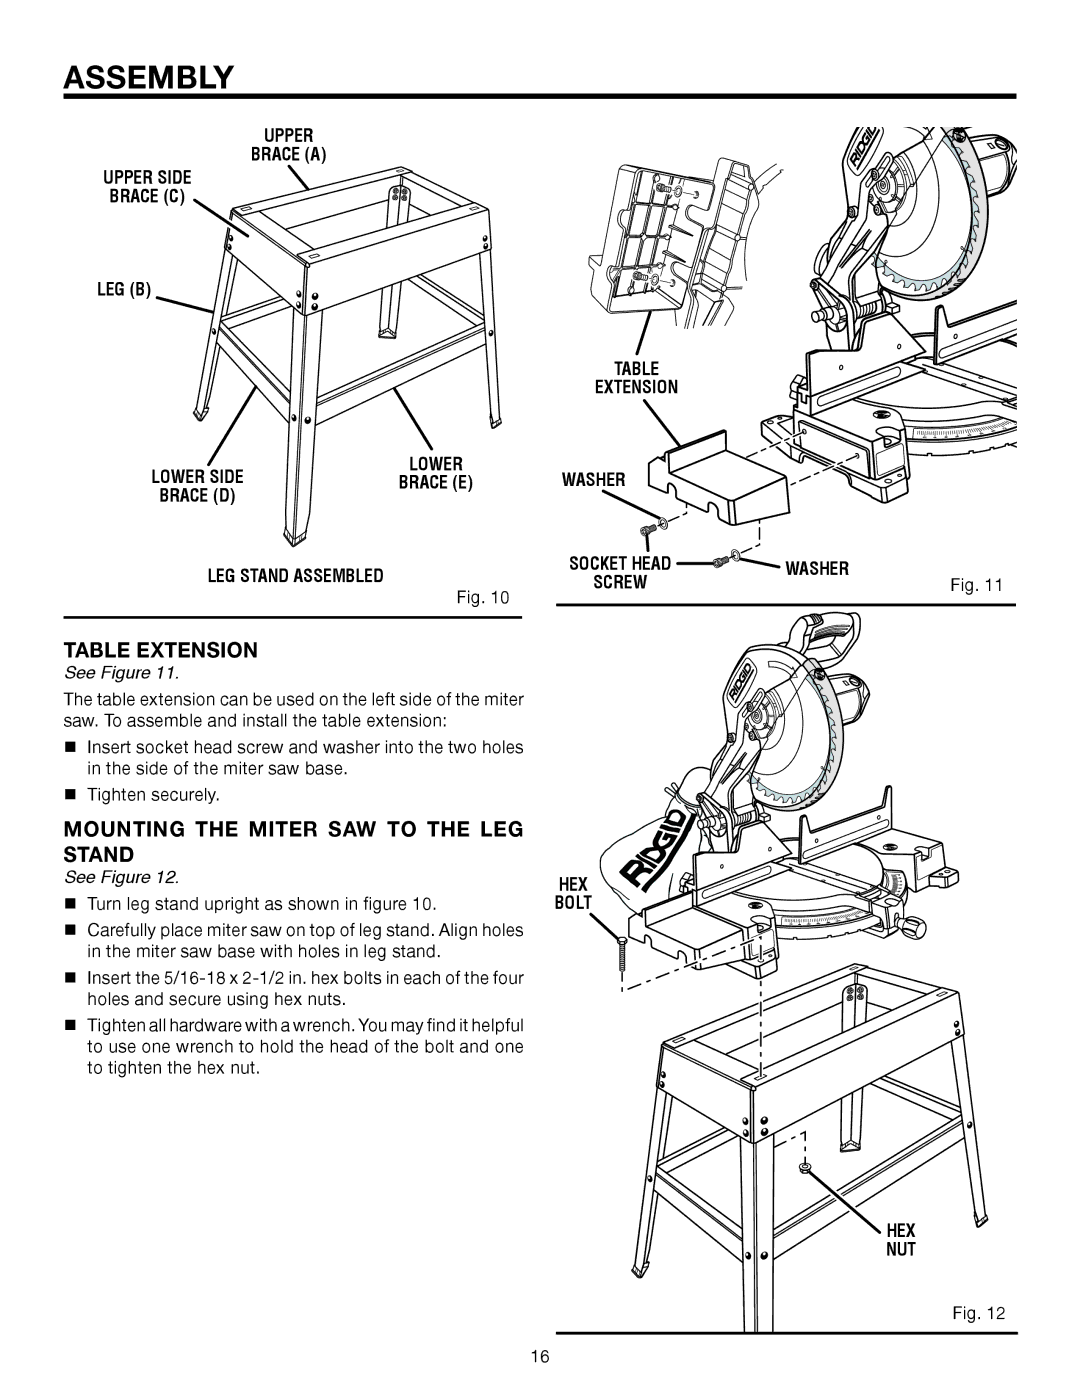
UPPER
BRACE (A)
UPPER SIDE
BRACE (C)
LEG (B)
|
| TABLE |
|
|
| EXTENSION |
|
LOWER SIDE | LOWER | WASHER |
|
BRACE (E) |
| ||
BRACE (D) |
|
|
|
LEG STAND ASSEMBLED |
| SOCKET HEAD | WASHER |
| SCREW | Fig. 11 | |
| Fig. 10 | ||
|
|
|
TABLE EXTENSION
See Figure 11.
The table extension can be used on the left side of the miter saw. To assemble and install the table extension:
nInsert socket head screw and washer into the two holes in the side of the miter saw base.
nTighten securely.
MOUNTING THE MITER SAW TO THE LEG STAND
See Figure 12.
nTurn leg stand upright as shown in figure 10.
nCarefully place miter saw on top of leg stand. Align holes in the miter saw base with holes in leg stand.
nInsert the
nTighten all hardware with a wrench. You may find it helpful to use one wrench to hold the head of the bolt and one to tighten the hex nut.
HEX
BOLT
HEX
NUT
Fig. 12
16