OPERATION
ADJUSTING THE ORBIT DIAMETER
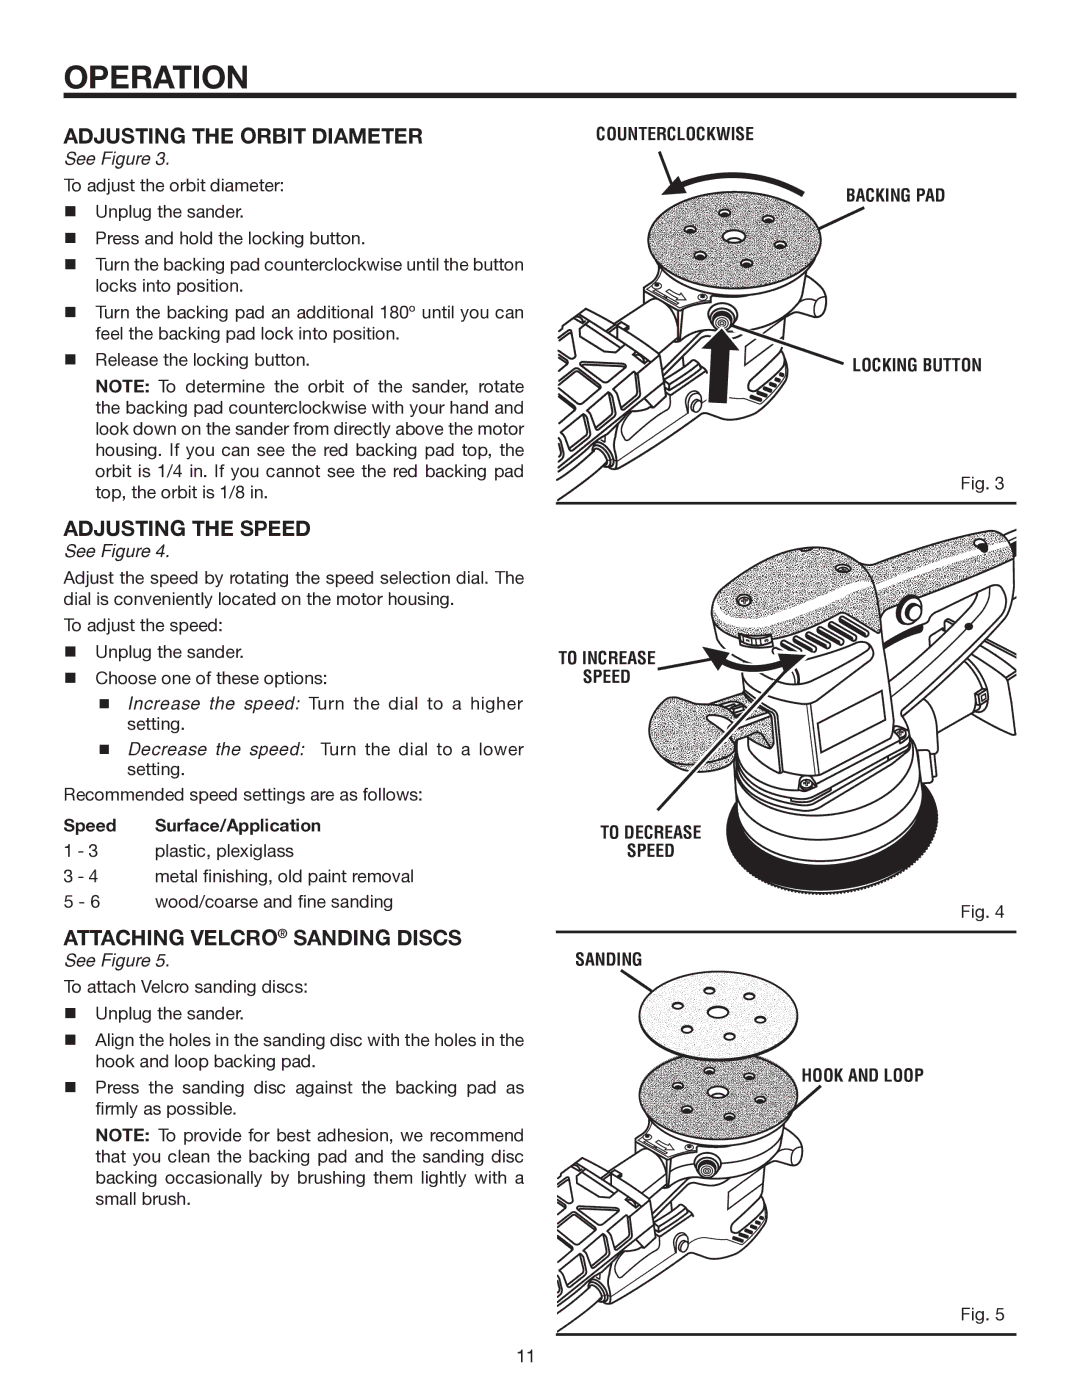
See Figure 3.
To adjust the orbit diameter:
nUnplug the sander.
nPress and hold the locking button.
nTurn the backing pad counterclockwise until the button locks into position.
nTurn the backing pad an additional 180º until you can feel the backing pad lock into position.
nRelease the locking button.
NOTE: To determine the orbit of the sander, rotate the backing pad counterclockwise with your hand and look down on the sander from directly above the motor housing. If you can see the red backing pad top, the orbit is 1/4 in. If you cannot see the red backing pad top, the orbit is 1/8 in.
ADJUSTING THE SPEED
See Figure 4.
Adjust the speed by rotating the speed selection dial. The dial is conveniently located on the motor housing.
To adjust the speed:
nUnplug the sander.
nChoose one of these options:
nIncrease the speed: Turn the dial to a higher setting.
nDecrease the speed: Turn the dial to a lower setting.
Recommended speed settings are as follows:
Speed Surface/Application
1 - 3 plastic, plexiglass
3 - 4 metal finishing, old paint removal
5 - 6 wood/coarse and fine sanding
ATTACHING VELCRO® SANDING DISCS
See Figure 5.
To attach Velcro sanding discs:
nUnplug the sander.
nAlign the holes in the sanding disc with the holes in the hook and loop backing pad.
nPress the sanding disc against the backing pad as firmly as possible.
NOTE: To provide for best adhesion, we recommend that you clean the backing pad and the sanding disc backing occasionally by brushing them lightly with a small brush.
COUNTERCLOCKWISE
BACKING PAD
 LOCKING BUTTON
Fig. 3
TO INCREASE
SPEED
TO DECREASE
SPEED
Fig. 4
SANDING
HOOK AND LOOP
Fig. 5
11