OPERATION
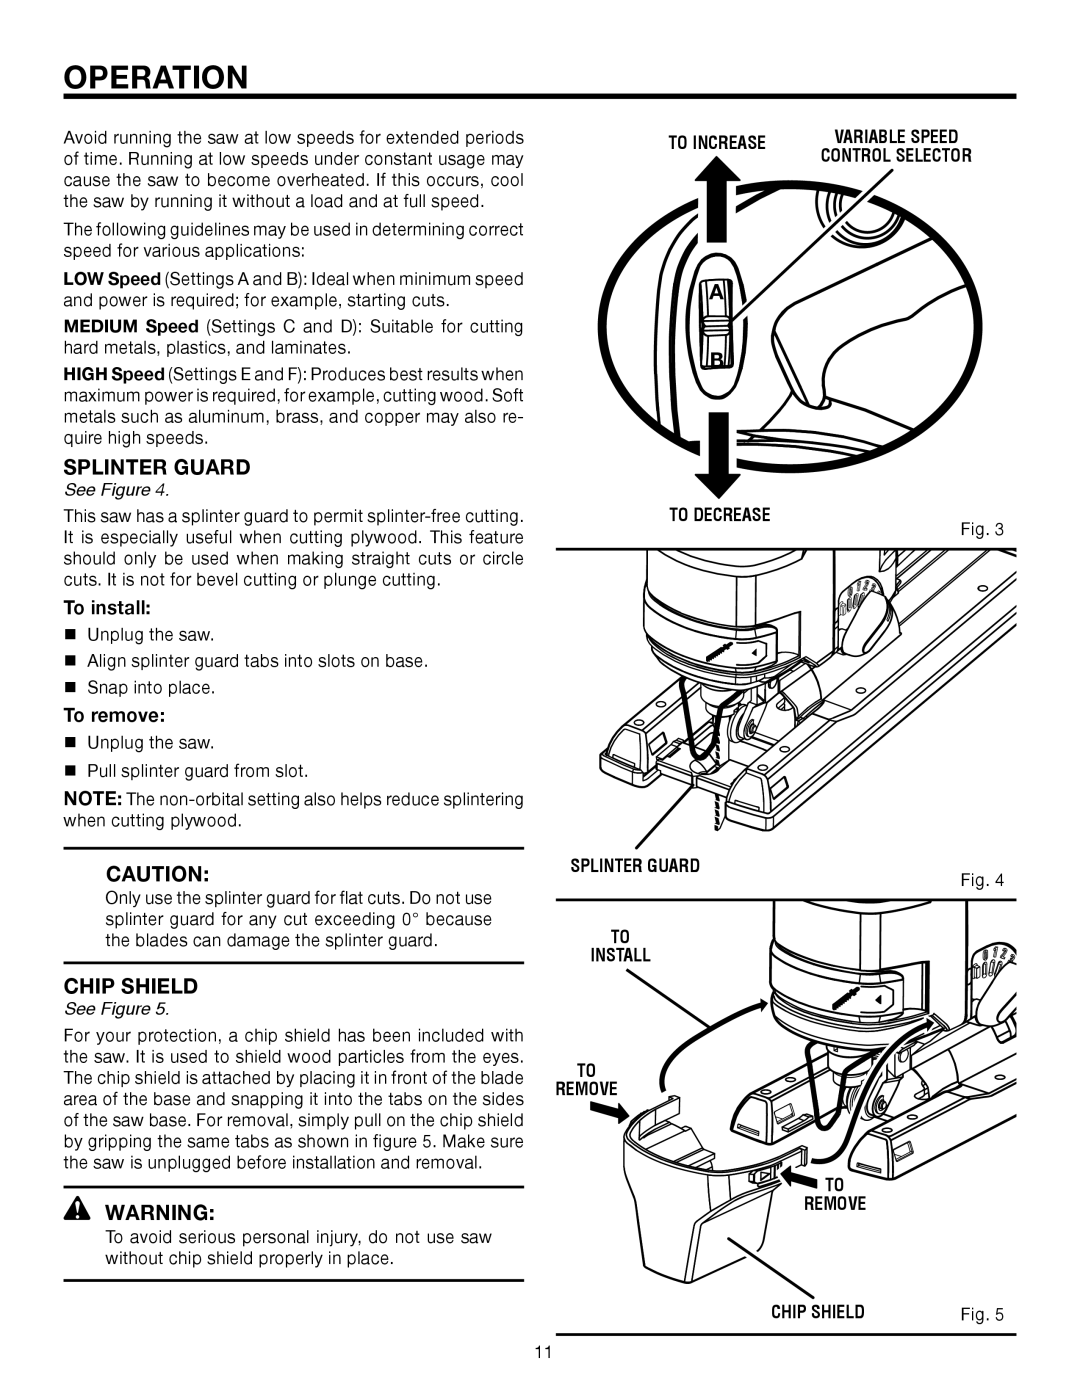
Avoid running the saw at low speeds for extended periods of time. Running at low speeds under constant usage may cause the saw to become overheated. If this occurs, cool the saw by running it without a load and at full speed.
The following guidelines may be used in determining correct speed for various applications:
LOW Speed (Settings A and B): Ideal when minimum speed and power is required; for example, starting cuts.
MEDIUM Speed (Settings C and D): Suitable for cutting hard metals, plastics, and laminates.
HIGH Speed (Settings E and F): Produces best results when maximum power is required, for example, cutting wood. Soft metals such as aluminum, brass, and copper may also re- quire high speeds.
SPLINTER GUARD
See Figure 4.
TO INCREASE
A |
B |
VARIABLE SPEED
CONTROL SELECTOR
This saw has a splinter guard to permit
To install:
Unplug the saw.
Align splinter guard tabs into slots on base.
�Snap into place.
To remove:
Unplug the saw.
Pull splinter guard from slot.
NOTE: The
TO DECREASE
Fig. 3
CAUTION:
Only use the splinter guard for flat cuts. Do not use splinter guard for any cut exceeding 0° because the blades can damage the splinter guard.
CHIP SHIELD
See Figure 5.
For your protection, a chip shield has been included with the saw. It is used to shield wood particles from the eyes. The chip shield is attached by placing it in front of the blade area of the base and snapping it into the tabs on the sides of the saw base. For removal, simply pull on the chip shield by gripping the same tabs as shown in figure 5. Make sure
SPLINTER GUARD
TO
INSTALL
TO
REMOVE
Fig. 4
the saw is unplugged before installation and removal.
WARNING:
To avoid serious personal injury, do not use saw without chip shield properly in place.
![]()
![]()
![]()
![]()
![]() TO
TO ![]()
![]()
![]()
REMOVE
CHIP SHIELD | Fig. 5 |
11
