ASSEMBLY
![]() WARNING:
WARNING:
The tool should never be connected to a power supply when you are assembling parts, making ad- justments, cleaning, performing maintenance, or when the tool is not in use. Disconnecting the tool will prevent accidental starting that could cause serious injury.
![]() WARNING:
WARNING:
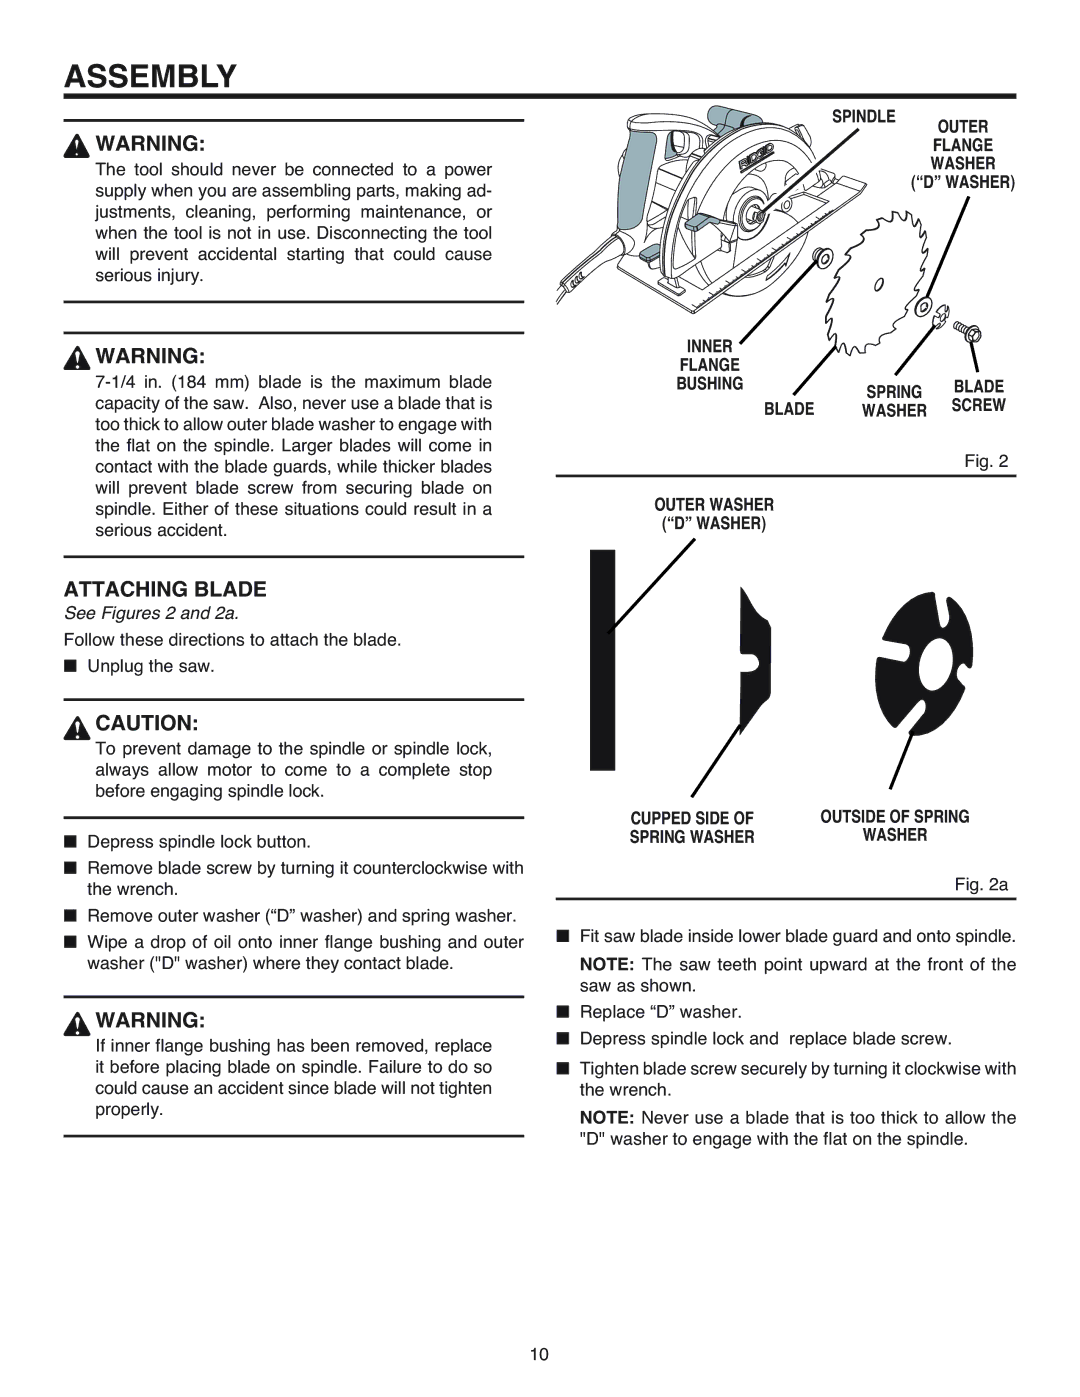
SPINDLE
OUTER
FLANGE
WASHER
(“D” WASHER)
INNER
FLANGE
BUSHINGSPRING BLADE
BLADE WASHER SCREW
Fig. 2
OUTER WASHER
(“D” WASHER)
ATTACHING BLADE
See Figures 2 and 2a.
Follow these directions to attach the blade.
■Unplug the saw.
CAUTION:
To prevent damage to the spindle or spindle lock, always allow motor to come to a complete stop before engaging spindle lock.
■Depress spindle lock button.
■Remove blade screw by turning it counterclockwise with the wrench.
■Remove outer washer (“D” washer) and spring washer.
■Wipe a drop of oil onto inner flange bushing and outer washer ("D" washer) where they contact blade.
![]() WARNING:
WARNING:
If inner flange bushing has been removed, replace it before placing blade on spindle. Failure to do so could cause an accident since blade will not tighten properly.
CUPPED SIDE OF | OUTSIDE OF SPRING |
SPRING WASHER | WASHER |
Fig. 2a
■Fit saw blade inside lower blade guard and onto spindle.
NOTE: The saw teeth point upward at the front of the saw as shown.
■Replace “D” washer.
■Depress spindle lock and replace blade screw.
■Tighten blade screw securely by turning it clockwise with the wrench.
NOTE: Never use a blade that is too thick to allow the "D" washer to engage with the flat on the spindle.
10