OPERATION
ADJUSTING BLADE DEPTH
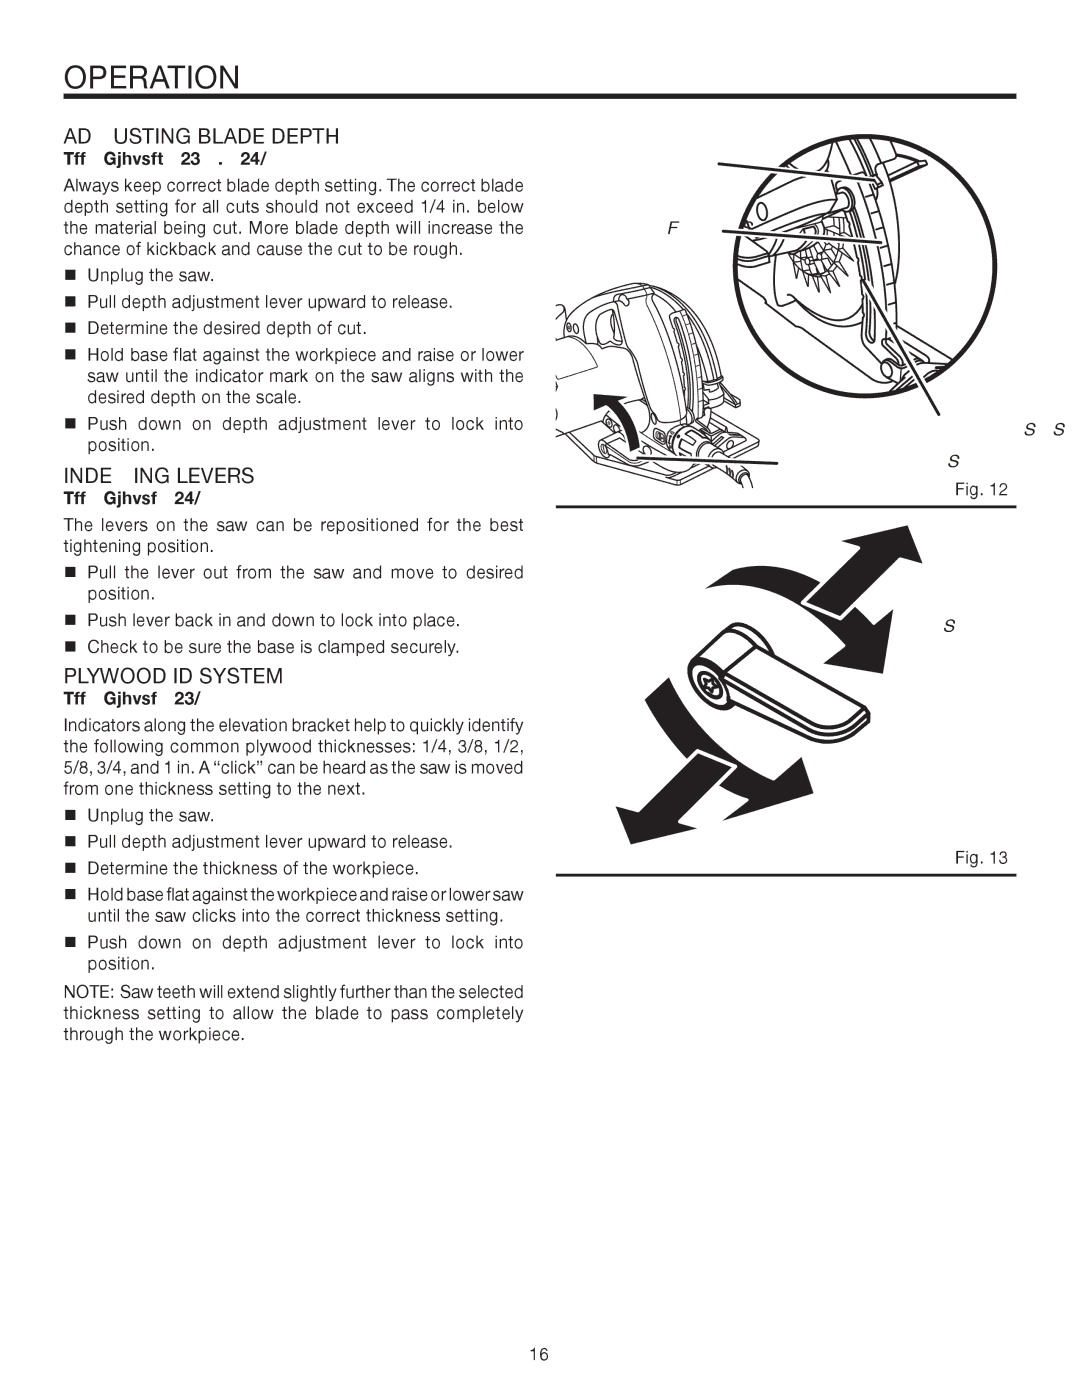
See Figures 12 - 13.
Always keep correct blade depth setting. The correct blade depth setting for all cuts should not exceed 1/4 in. below the material being cut. More blade depth will increase the chance of kickback and cause the cut to be rough.
Unplug the saw.
Pull depth adjustment lever upward to release.
Determine the desired depth of cut.
Hold base flat against the workpiece and raise or lower saw until the indicator mark on the saw aligns with the desired depth on the scale.
Push down on depth adjustment lever to lock into position.
INDEXING LEVERS
See Figure 13.
The levers on the saw can be repositioned for the best tightening position.
Pull the lever out from the saw and move to desired position.
Push lever back in and down to lock into place.
Check to be sure the base is clamped securely.
PLYWOOD ID SYSTEM
See Figure 12.
Indicators along the elevation bracket help to quickly identify the following common plywood thicknesses: 1/4, 3/8, 1/2, 5/8, 3/4, and 1 in. A “click” can be heard as the saw is moved from one thickness setting to the next.
Unplug the saw.
Pull depth adjustment lever upward to release.
Determine the thickness of the workpiece.
Hold base flat against the workpiece and raise or lower saw until the saw clicks into the correct thickness setting.
Push down on depth adjustment lever to lock into position.
NOTE: Saw teeth will extend slightly further than the selected thickness setting to allow the blade to pass completely through the workpiece.
DEPTH INDICATOR
DEPTH OF CUT SCALE
PLYWOOD ID SYSTEM
DEPTH ADJUSTMENT |
|
LEVER | Fig. 12 |
|
PUSH IN AND
DOWN TO LOCK
PULL OUT AND UP |
|
TO RATCHET | Fig. 13 |
|
16