OPERATION
![]() WARNING:
WARNING:
Always wear safety goggles or safety glasses with side shields when operating this tool. Failure to do so could result in dust, shavings, or loose par- ticles being thrown into your eyes, resulting in possible serious injury.
SWITCH
See Figure 2.
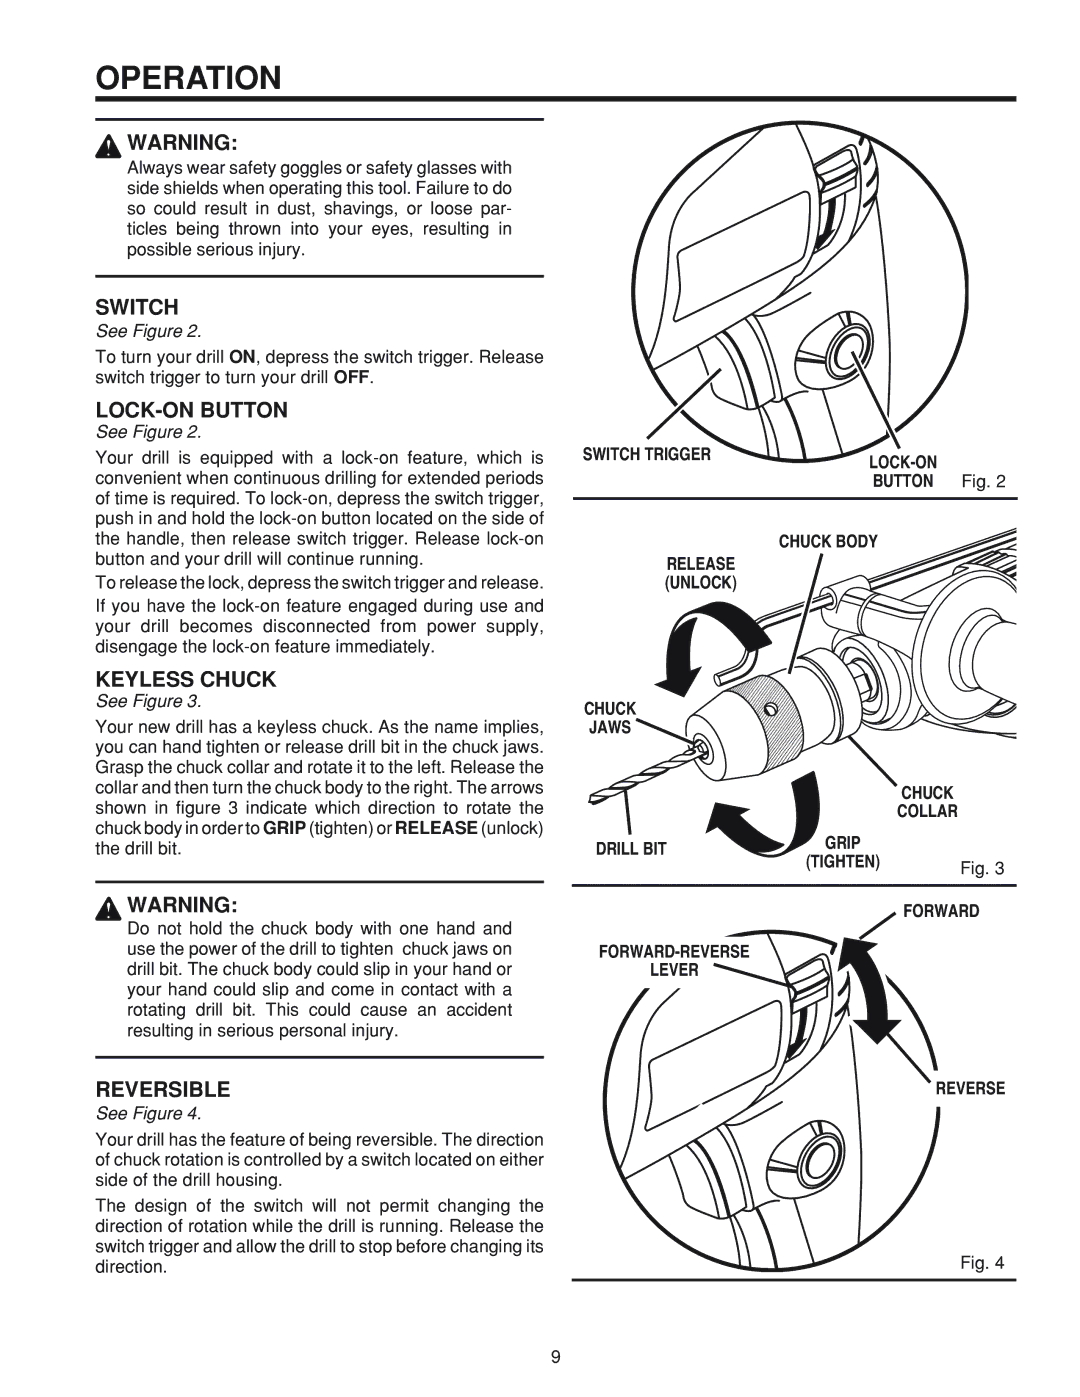
To turn your drill ON, depress the switch trigger. Release switch trigger to turn your drill OFF.
LOCK-ON BUTTON
See Figure 2.
Your drill is equipped with a
To release the lock, depress the switch trigger and release. If you have the
KEYLESS CHUCK
See Figure 3.
Your new drill has a keyless chuck. As the name implies, you can hand tighten or release drill bit in the chuck jaws. Grasp the chuck collar and rotate it to the left. Release the collar and then turn the chuck body to the right. The arrows shown in figure 3 indicate which direction to rotate the chuck body in order to GRIP (tighten) or RELEASE (unlock) the drill bit.
![]() WARNING:
WARNING:
Do not hold the chuck body with one hand and use the power of the drill to tighten chuck jaws on drill bit. The chuck body could slip in your hand or your hand could slip and come in contact with a rotating drill bit. This could cause an accident resulting in serious personal injury.
REVERSIBLE
See Figure 4.
Your drill has the feature of being reversible. The direction of chuck rotation is controlled by a switch located on either side of the drill housing.
The design of the switch will not permit changing the direction of rotation while the drill is running. Release the switch trigger and allow the drill to stop before changing its direction.
SWITCH TRIGGER | |
| BUTTON Fig. 2 |
CHUCK BODY
RELEASE (UNLOCK)
CHUCK
JAWS ![]()
|
| CHUCK | |
|
| COLLAR | |
DRILL BIT | GRIP |
| |
(TIGHTEN) | Fig. 3 | ||
| |||
|
| ||
|
| FORWARD | |
|
| ||
LEVER |
|
|
REVERSE |
Fig. 4
9