ASSEMBLY
WARNING:
The tool should never be connected to a power supply when you are assembling parts, making adjustments, cleaning, performing maintenance, or when the tool is not in use. Disconnecting the tool will prevent accidental starting that could cause serious injury.
INSTALLING AUXILIARY HANDLE
See Figure 2.
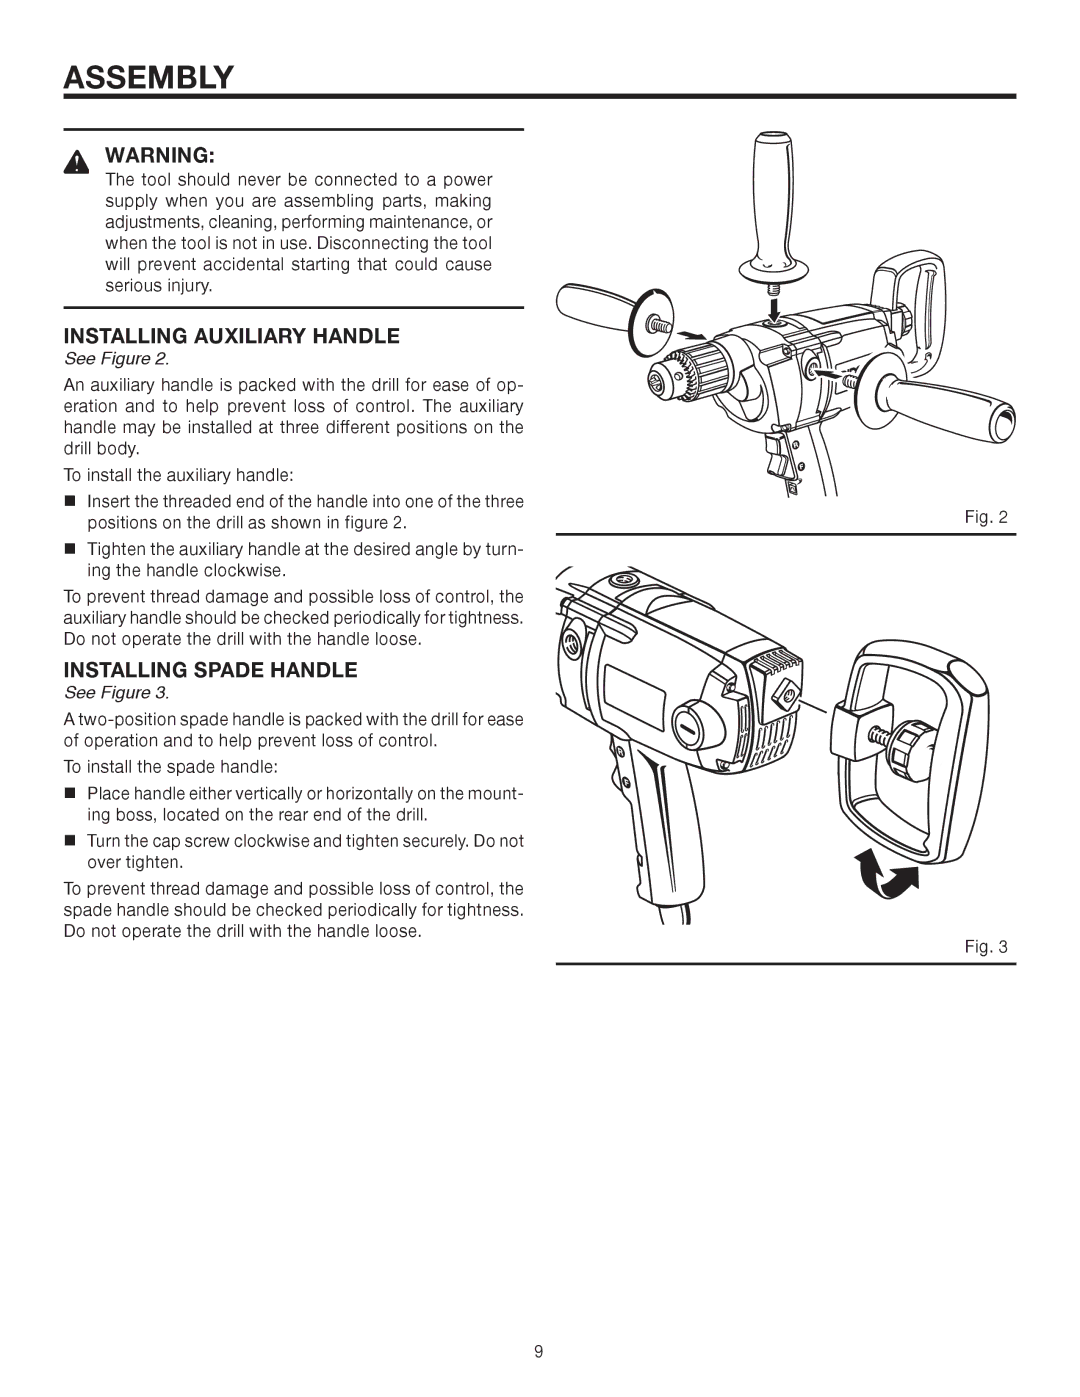
An auxiliary handle is packed with the drill for ease of op- eration and to help prevent loss of control. The auxiliary handle may be installed at three different positions on the drill body.
To install the auxiliary handle:
Insert the threaded end of the handle into one of the three positions on the drill as shown in figure 2.
Tighten the auxiliary handle at the desired angle by turn- ing the handle clockwise.
To prevent thread damage and possible loss of control, the auxiliary handle should be checked periodically for tightness. Do not operate the drill with the handle loose.
INSTALLING SPADE HANDLE
See Figure 3.
A
To install the spade handle:
Place handle either vertically or horizontally on the mount- ing boss, located on the rear end of the drill.
Turn the cap screw clockwise and tighten securely. Do not over tighten.
To prevent thread damage and possible loss of control, the spade handle should be checked periodically for tightness. Do not operate the drill with the handle loose.
Fig. 2
R
F
Fig. 3
9