OPERATION
CAUTION:
To prevent gear damage, always allow the chuck to come to a complete stop before changing the direction of rotation.
To stop the drill, release the switch trigger and allow the chuck to come to a complete stop.
NOTE: The drill will not run unless the direction of rotation selector is pushed fully to the left or right.
Avoid running the drill at low speeds for extended periods of time. Running at low speeds under constant usage may cause the drill to become overheated. If this occurs, cool the drill by running it without a load and at full speed.
KEYLESS CHUCK
See Figure 4.
The drill has a keyless chuck to tighten or release drill bits in the chuck jaws. The arrows on the chuck indicate which direction to rotate the chuck body in order to GRIP (tighten) or OPEN (release) the drill bit.
WARNING:
Do not hold the chuck body with one hand and use the power of the drill to tighten the chuck jaws on the drill bit. The chuck body could slip in your hand, or your hand could slip and come in contact with the rotating drill bit. This could cause an accident resulting in serious personal injury.
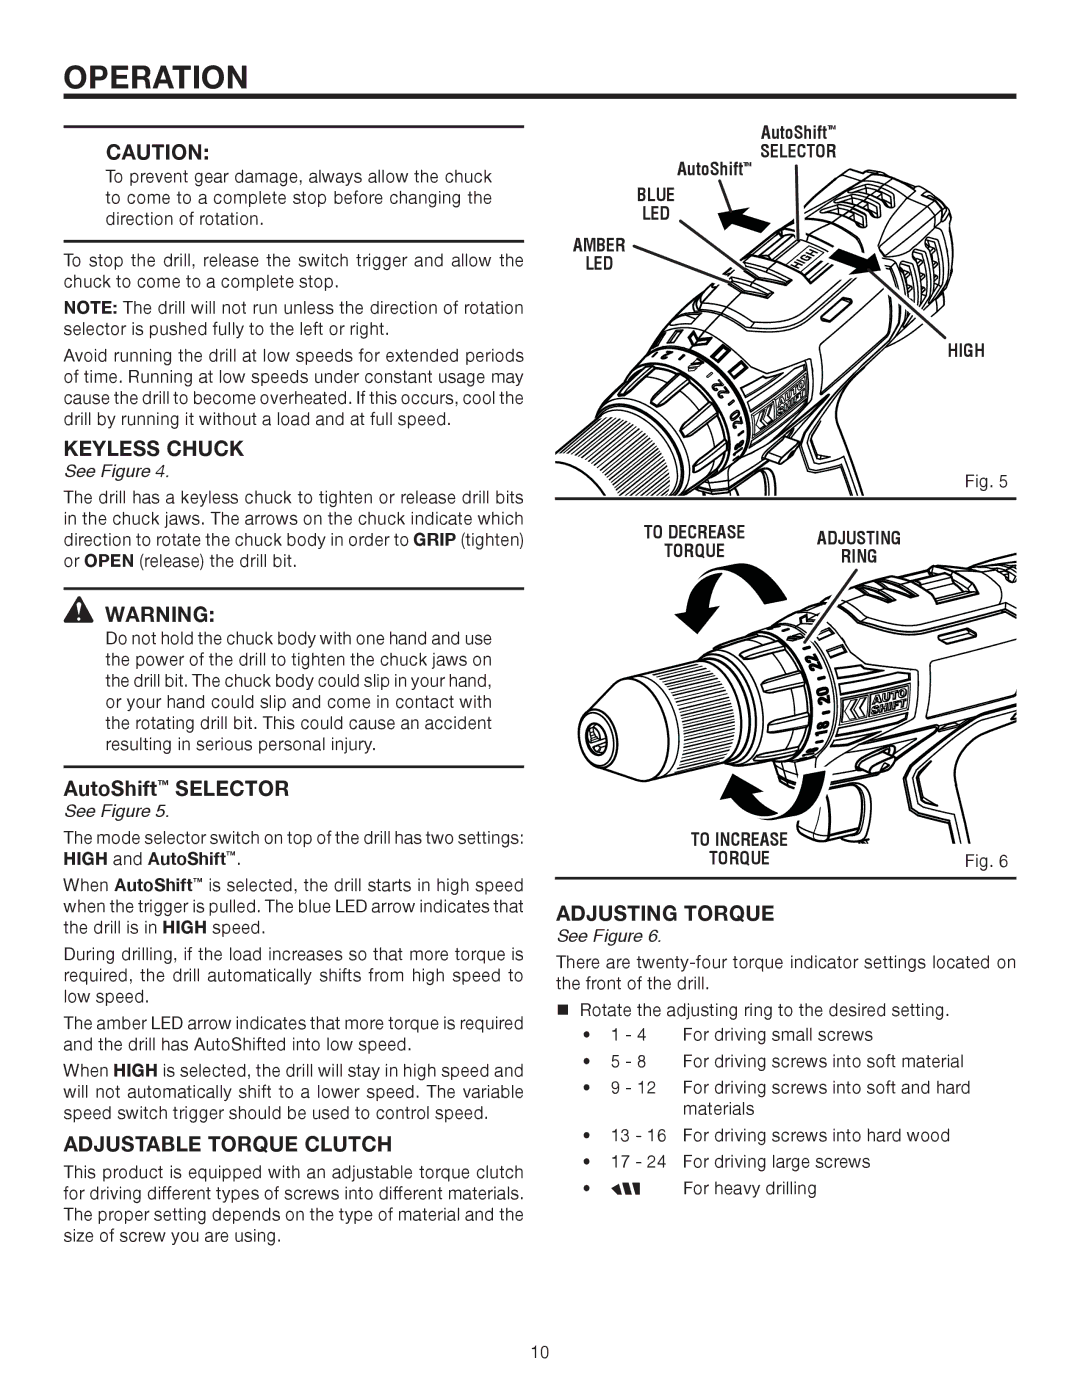
AutoShift™ SELECTOR
See Figure 5.
The mode selector switch on top of the drill has two settings: HIGH and AutoShift™.
When AutoShift™ is selected, the drill starts in high speed when the trigger is pulled. The blue LED arrow indicates that the drill is in HIGH speed.
During drilling, if the load increases so that more torque is required, the drill automatically shifts from high speed to low speed.
The amber LED arrow indicates that more torque is required and the drill has AutoShifted into low speed.
When HIGH is selected, the drill will stay in high speed and will not automatically shift to a lower speed. The variable speed switch trigger should be used to control speed.
adjustable torque clutch
This product is equipped with an adjustable torque clutch for driving different types of screws into different materials. The proper setting depends on the type of material and the size of screw you are using.
AutoShift™
SELECTOR
AutoShift™
BLUE LED
AMBER LED
HIGH
Fig. 5
TO DECREASE | ADJUSTING | |
TORQUE | ||
RING | ||
|
TO INCREASE |
|
TORQUE | Fig. 6 |
Adjusting TORQUE
See Figure 6.
There are
Rotate the adjusting ring to the desired setting.
•1 - 4 For driving small screws
•5 - 8 For driving screws into soft material
•9 - 12 For driving screws into soft and hard materials
•13 - 16 For driving screws into hard wood
•17 - 24 For driving large screws
• | For heavy drilling |
10