Model
Do not leave the unit unattended while in use.
1.Make sure unit is turned OFF. Plug unit into a ground- ed 15 amp outlet making sure to position the power cord along the clear path selected earlier.
2.Thoroughly clean the copper tube and fitting and apply the flux (Figure 3).
NOTE! When using the
Figure 3 – Cleaning Copper Tube and Fittings
Figure 4 – Control Switch
3.Turn the unit ON (Figure 4). Use the following guide- lines for choosing between the HIGH and LOW set- tings:
LOW | 3/8″ | – 11/2″ 50/50 Soldering | |
| 3/8″ | – 1/2″ | 95/5 Soldering |
HIGH | 11/2″ – 3″ | 50/50 Soldering | |
| 1/2″ | – 3″ 95/5 Soldering | |
50′ Maximum Extension Cord
NOTE! On HIGH setting, the maximum length of exten- sion cord should be 50′!
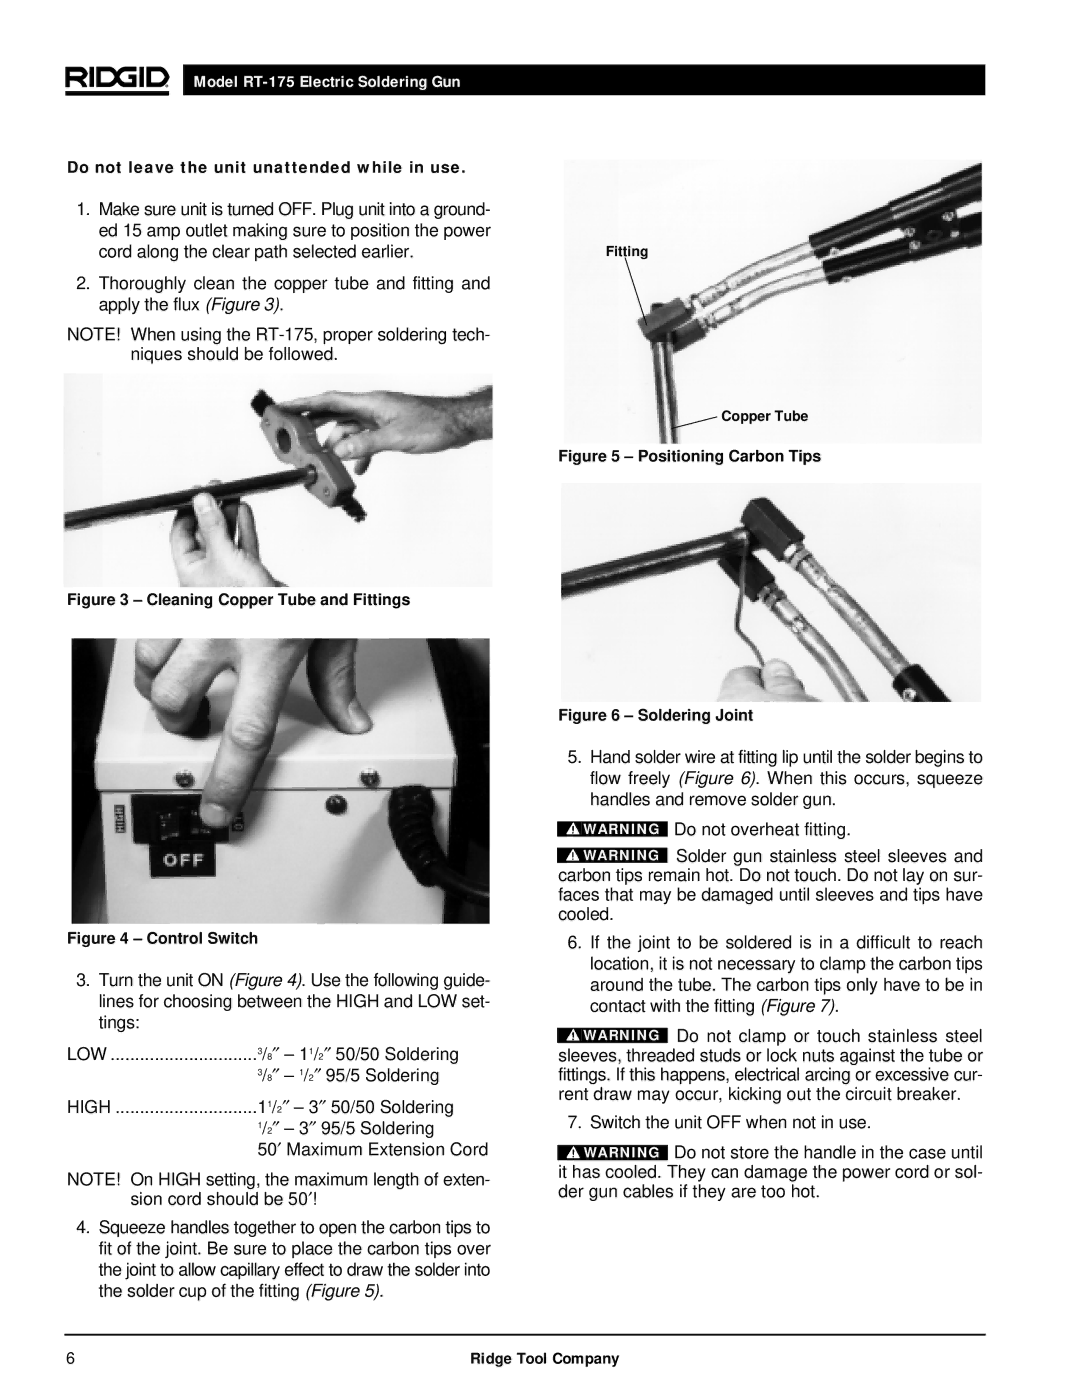
4.Squeeze handles together to open the carbon tips to fit of the joint. Be sure to place the carbon tips over the joint to allow capillary effect to draw the solder into the solder cup of the fitting (Figure 5).
Fitting
Copper Tube
Figure 5 – Positioning Carbon Tips
Figure 6 – Soldering Joint
5.Hand solder wire at fitting lip until the solder begins to flow freely (Figure 6). When this occurs, squeeze handles and remove solder gun.
![]() WARNING Do not overheat fitting.
WARNING Do not overheat fitting.
![]() WARNING Solder gun stainless steel sleeves and carbon tips remain hot. Do not touch. Do not lay on sur- faces that may be damaged until sleeves and tips have cooled.
WARNING Solder gun stainless steel sleeves and carbon tips remain hot. Do not touch. Do not lay on sur- faces that may be damaged until sleeves and tips have cooled.
6.If the joint to be soldered is in a difficult to reach location, it is not necessary to clamp the carbon tips around the tube. The carbon tips only have to be in contact with the fitting (Figure 7).
![]() WARNING Do not clamp or touch stainless steel sleeves, threaded studs or lock nuts against the tube or fittings. If this happens, electrical arcing or excessive cur- rent draw may occur, kicking out the circuit breaker.
WARNING Do not clamp or touch stainless steel sleeves, threaded studs or lock nuts against the tube or fittings. If this happens, electrical arcing or excessive cur- rent draw may occur, kicking out the circuit breaker.
7. Switch the unit OFF when not in use.
![]() WARNING Do not store the handle in the case until it has cooled. They can damage the power cord or sol- der gun cables if they are too hot.
WARNING Do not store the handle in the case until it has cooled. They can damage the power cord or sol- der gun cables if they are too hot.
6 | Ridge Tool Company |
