Passenger Compart- ment Mounting
Under the seat or floor mounting will work as long as there is a minimum of 1” (2.5cm) of air gap above the amplifer's heatsink.
Vertical mounting is still the best, and under dash mount- ing is satisfactory as well.
WIRING THE PUNCH
Preparing
Wires and
Fuses
Caution! Be sure to avoid running the power wires near the input cabling antenna, power leads, sensi- tive equipment or harnesses. The power wires carry substantial currents and can induce noise.
The following instructions explain how to prepare the wires for connecting the fuses and connectors. We suggest you perform these procedures prior to wiring and mounting your new Punch amplifier.
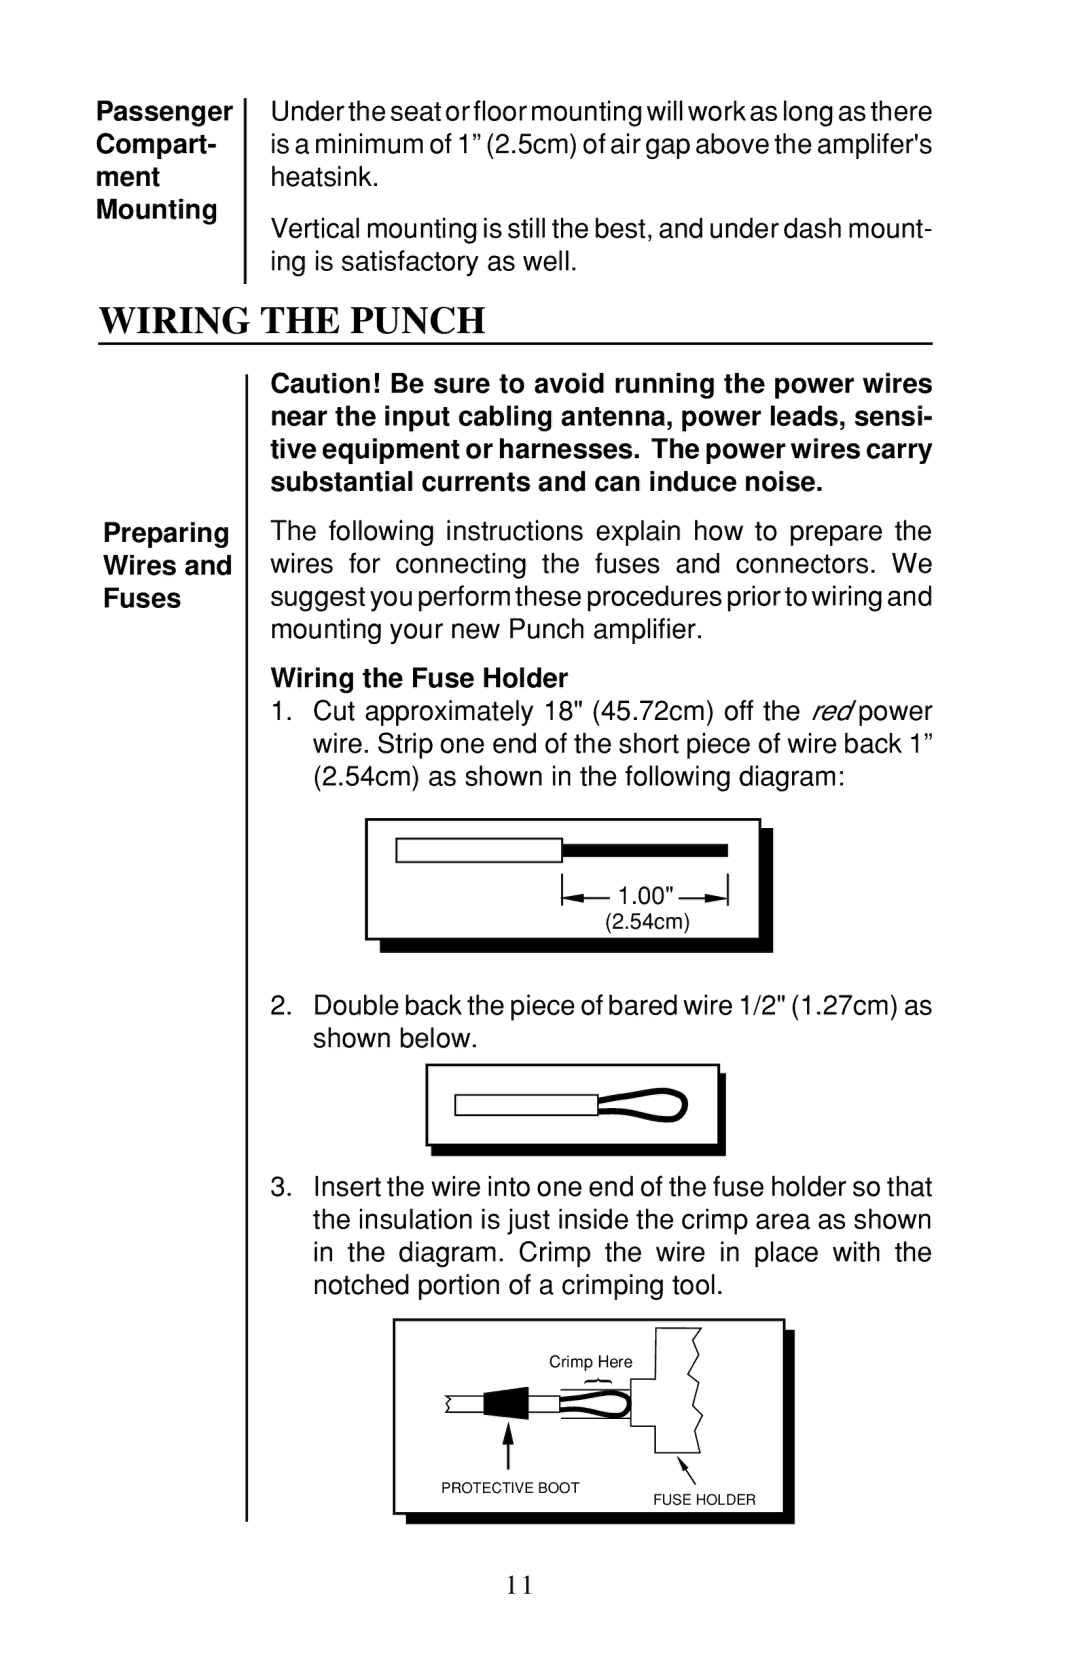
Wiring the Fuse Holder
1.Cut approximately 18" (45.72cm) off the red power wire. Strip one end of the short piece of wire back 1” (2.54cm) as shown in the following diagram:
![]() 1.00"
1.00" ![]()
![]()
(2.54cm)
2.Double back the piece of bared wire 1/2" (1.27cm) as shown below.
3.Insert the wire into one end of the fuse holder so that the insulation is just inside the crimp area as shown in the diagram. Crimp the wire in place with the notched portion of a crimping tool.
Crimp Here
{
PROTECTIVE BOOT
FUSE HOLDER
11