Creating a SonicCell Editor Track
You’ll need to do this first so you have an easy way to select patches for your SonicCell synth tracks.
1Select an unused audio track in your project, or add a new one.
2Click the track’s Restore Strip Size button to display its settings.
If the new track doesn’t look like what you see here, click the All tab at the bottom of the tracks area to reveal all of the track’s settings.
3
4The SonicCell Editor launches and retrieves SonicCell’s current settings.
Changes you make to SonicCell using the Editor affect SonicCell’s current performance,
5To close the Editor window at any time, click its Minimize
Once you’ve set up the editor, you can click its track’s Minimize Strip button to shrink the track vertically.
We recommend renaming the track “Editor” to make it easy to locate as your arrangement grows in complexity.
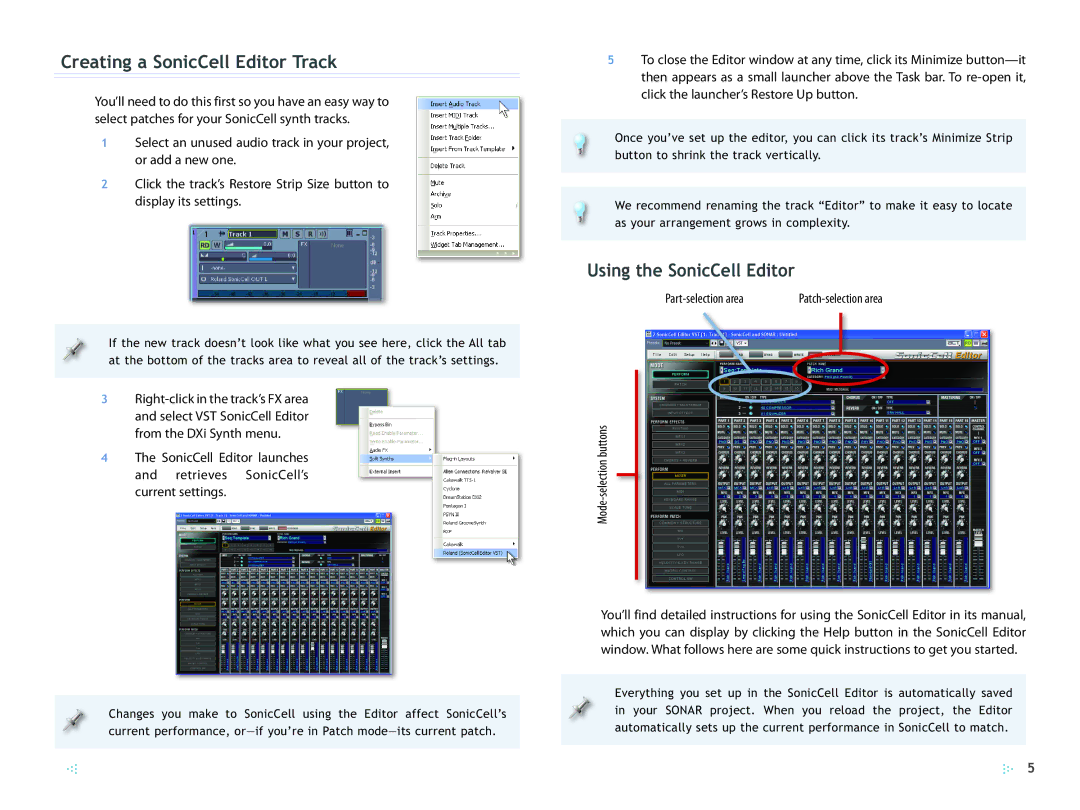
Using the SonicCell Editor
| |||||||
|
|
|
|
|
|
|
|
|
|
|
|
|
|
|
|
|
|
|
|
|
|
|
|
|
|
|
|
|
|
|
|
|
|
|
|
|
|
|
|
|
|
|
|
|
|
|
|
You’ll find detailed instructions for using the SonicCell Editor in its manual, which you can display by clicking the Help button in the SonicCell Editor window. What follows here are some quick instructions to get you started.
Everything you set up in the SonicCell Editor is automatically saved in your SONAR project. When you reload the project, the Editor automatically sets up the current performance in SonicCell to match.
5
