PIR Solar Spotlight/PIR Solaire Lumière
1 PIR Solar Spotlight parts
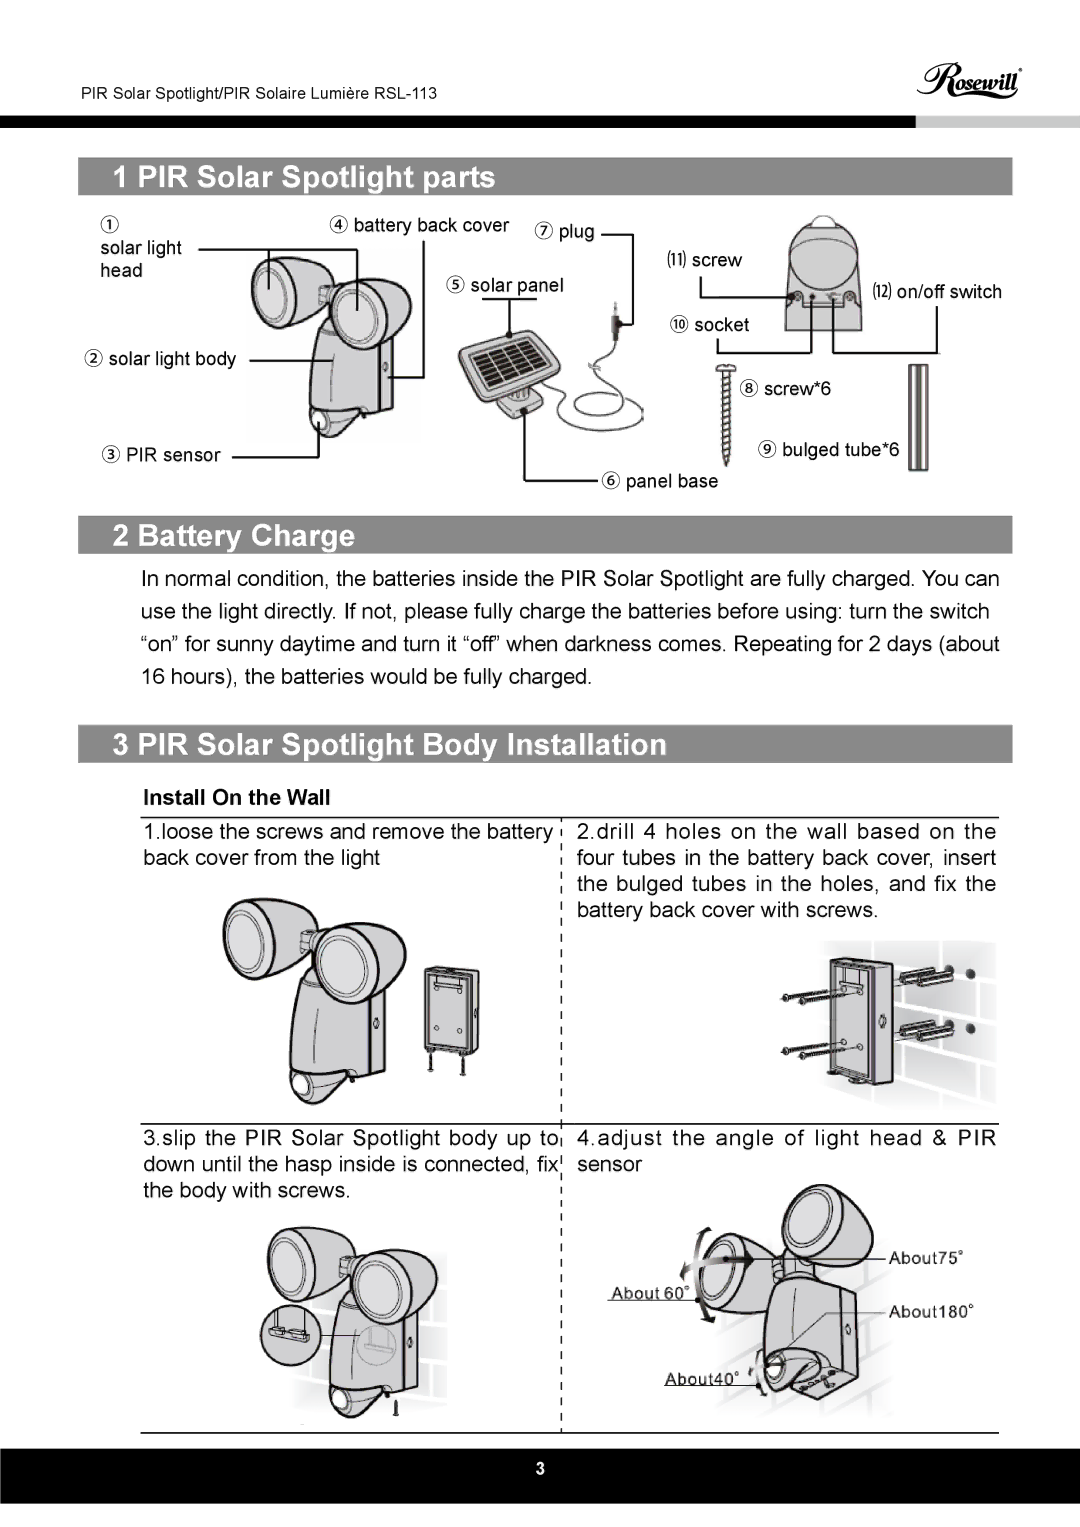
①
solar light head
②solar light body
③PIR sensor ![]()
④ battery back cover ⑦ plug |
|
| ⑾ screw | |||||||||||
|
|
| ⑤ solar panel |
|
| |||||||||
|
|
| ||||||||||||
|
|
|
|
|
|
|
|
|
|
| ⑿ on/off switch | |||
|
|
|
|
|
|
|
|
|
|
| ||||
|
|
|
|
|
|
| ⑩ socket |
|
|
| ||||
|
|
|
|
|
|
|
|
|
| |||||
|
|
|
|
|
|
| ||||||||
|
|
|
|
|
|
|
|
|
|
|
|
|
| |
|
|
|
|
|
|
|
|
|
|
|
|
|
|
|
|
|
|
|
|
|
|
|
| ⑧ screw*6 | |||||
|
|
|
|
| ||||||||||
|
|
|
|
|
|
|
|
| ⑨ bulged tube*6 | |||||
⑥panel base
2 Battery Charge
In normal condition, the batteries inside the PIR Solar Spotlight are fully charged. You can use the light directly. If not, please fully charge the batteries before using: turn the switch “on” for sunny daytime and turn it “off” when darkness comes. Repeating for 2 days (about 16 hours), the batteries would be fully charged.
3 PIR Solar Spotlight Body Installation
Install On the Wall
1.loose the screws and remove the battery back cover from the light
2.drill 4 holes on the wall based on the four tubes in the battery back cover, insert the bulged tubes in the holes, and fix the battery back cover with screws.
3.slip the PIR Solar Spotlight body up to down until the hasp inside is connected, fix the body with screws.![]()
4.adjust the angle of light head & PIR sensor
3