ASSEMBLY INSTRUCTIONS
INSTALLING THE HANDLEBAR
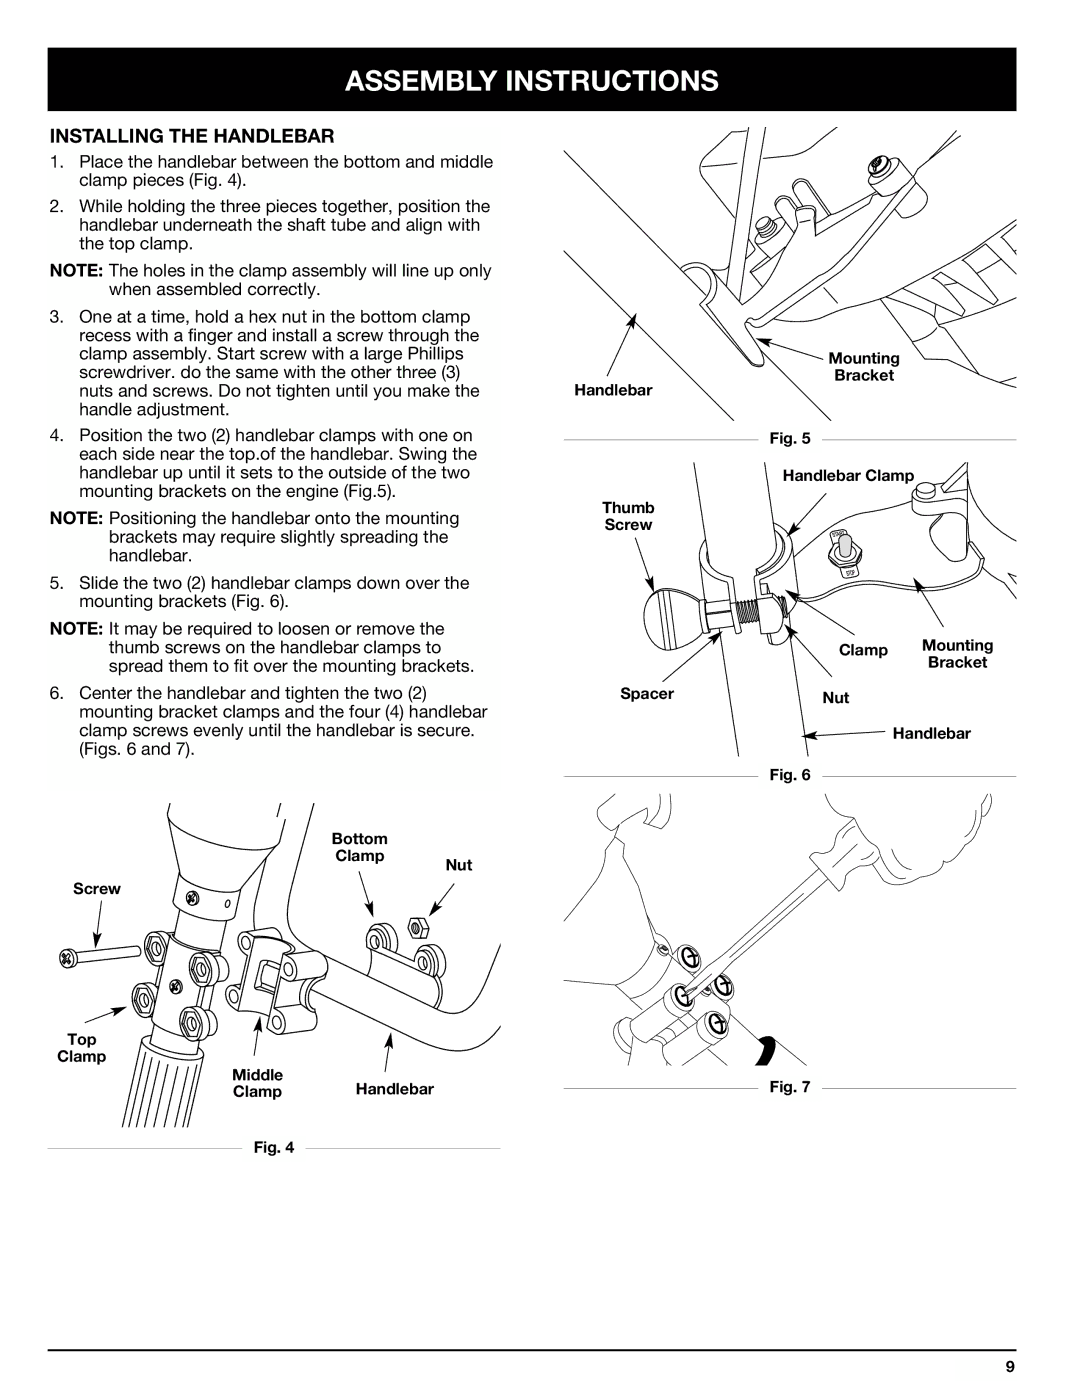
1.Place the handlebar between the bottom and middle clamp pieces (Fig. 4).
2.While holding the three pieces together, position the handlebar underneath the shaft tube and align with the top clamp.
NOTE: The holes in the clamp assembly will line up only when assembled correctly.
3.One at a time, hold a hex nut in the bottom clamp recess with a finger and install a screw through the clamp assembly. Start screw with a large Phillips screwdriver. do the same with the other three (3) nuts and screws. Do not tighten until you make the handle adjustment.
4.Position the two (2) handlebar clamps with one on each side near the top.of the handlebar. Swing the handlebar up until it sets to the outside of the two mounting brackets on the engine (Fig.5).
NOTE: Positioning the handlebar onto the mounting brackets may require slightly spreading the handlebar.
5.Slide the two (2) handlebar clamps down over the mounting brackets (Fig. 6).
NOTE: It may be required to loosen or remove the thumb screws on the handlebar clamps to spread them to fit over the mounting brackets.
6.Center the handlebar and tighten the two (2) mounting bracket clamps and the four (4) handlebar clamp screws evenly until the handlebar is secure. (Figs. 6 and 7).
Bottom
Handlebar
Thumb
Screw
Spacer
![]() Mounting
Mounting
Bracket
Fig. 5
Handlebar Clamp
Clamp Mounting
Bracket
Nut
Handlebar
Fig. 6
Clamp
Screw
Nut
Top
Clamp
Middle
ClampHandlebar
Fig. 4
Fig. 7
9
