OPERATION
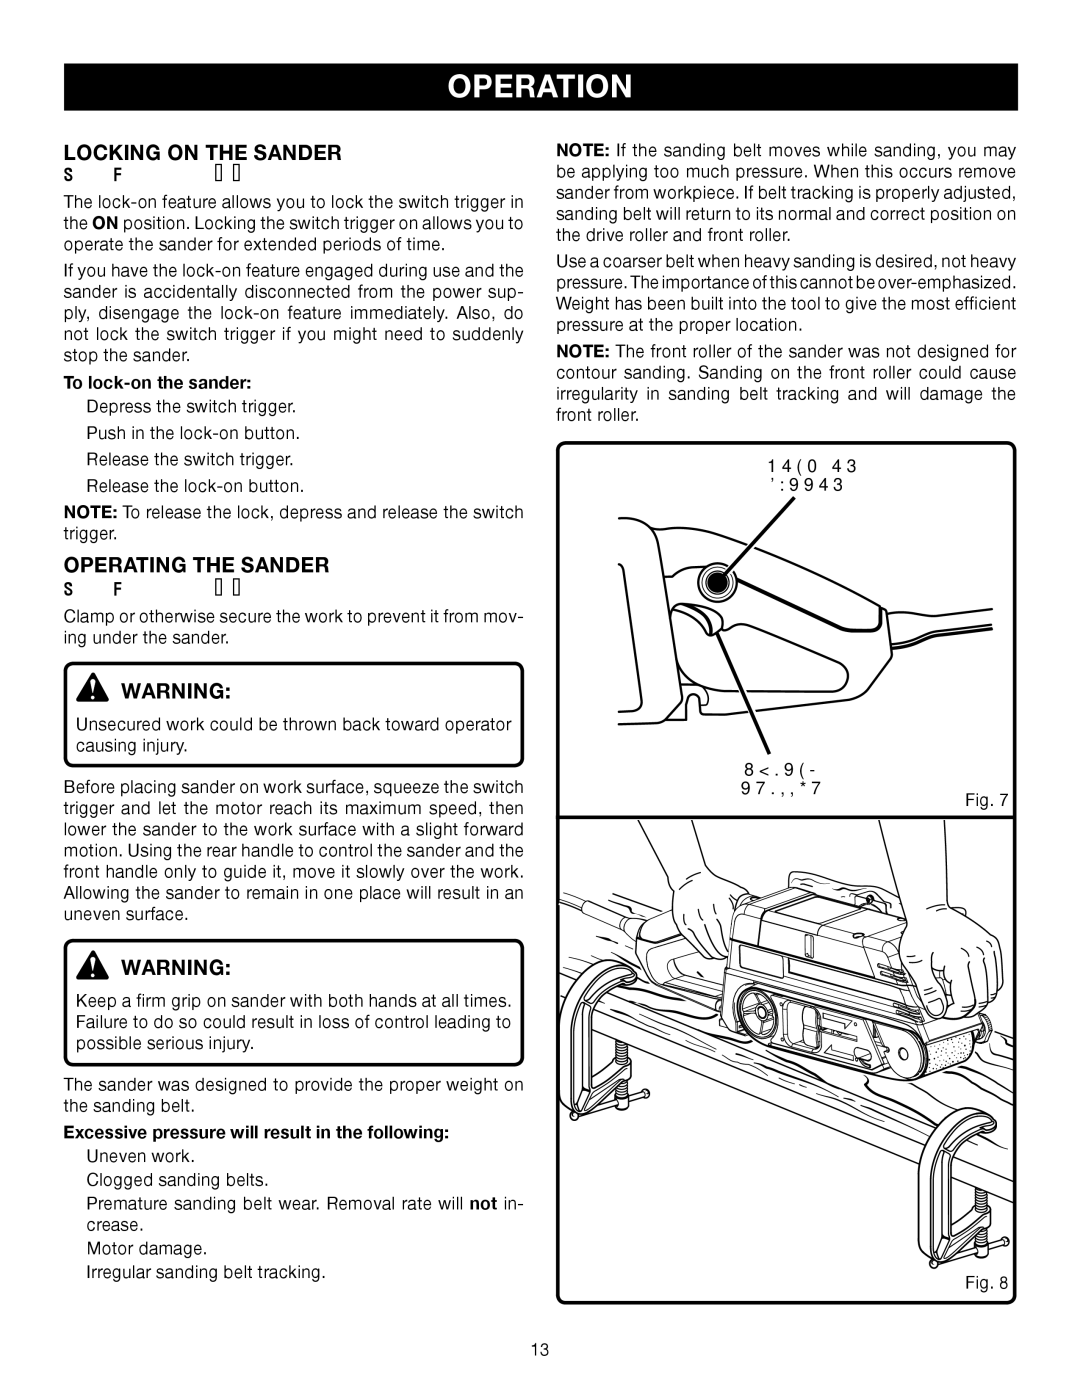
LOCKING ON THE SANDER
See Figure 7.
The
If you have the
To lock-on the sander:
nDepress the switch trigger.
nPush in the
nRelease the switch trigger.
nRelease the
NOTE: To release the lock, depress and release the switch trigger.
OPERATING THE SANDER
See Figure 8.
Clamp or otherwise secure the work to prevent it from mov- ing under the sander.
WARNING:
Unsecured work could be thrown back toward operator causing injury.
Before placing sander on work surface, squeeze the switch trigger and let the motor reach its maximum speed, then lower the sander to the work surface with a slight forward motion. Using the rear handle to control the sander and the front handle only to guide it, move it slowly over the work. Allowing the sander to remain in one place will result in an uneven surface.
WARNING:
Keep a firm grip on sander with both hands at all times. Failure to do so could result in loss of control leading to possible serious injury.
The sander was designed to provide the proper weight on the sanding belt.
Excessive pressure will result in the following:
nUneven work.
nClogged sanding belts.
nPremature sanding belt wear. Removal rate will not in- crease.
nMotor damage.
nIrregular sanding belt tracking.
NOTE: If the sanding belt moves while sanding, you may be applying too much pressure. When this occurs remove sander from workpiece. If belt tracking is properly adjusted, sanding belt will return to its normal and correct position on the drive roller and front roller.
Use a coarser belt when heavy sanding is desired, not heavy pressure. The importance of this cannot be
NOTE: The front roller of the sander was not designed for contour sanding. Sanding on the front roller could cause irregularity in sanding belt tracking and will damage the front roller.
BUTTON
SWITCH |
|
TRIGGER | Fig. 7 |
|
Fig. 8
13
