OPERATION
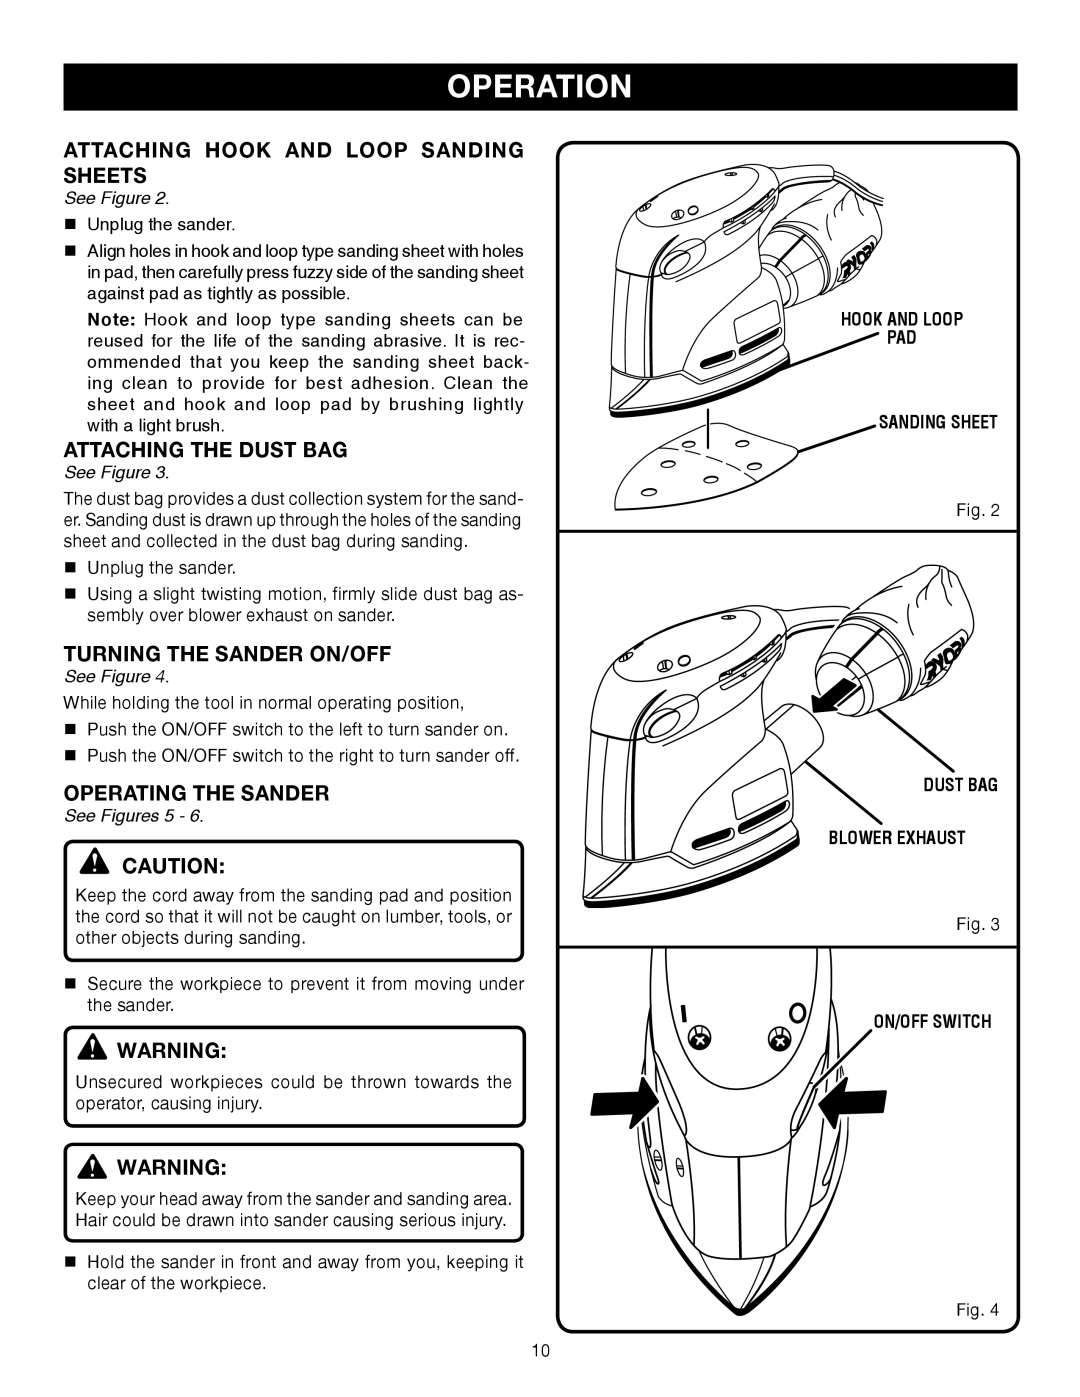
ATTACHING HOOK AND LOOP SANDING SHEETS
See Figure 2.
nUnplug the sander.
nAlign holes in hook and loop type sanding sheet with holes in pad, then carefully press fuzzy side of the sanding sheet against pad as tightly as possible.
Note: Hook and loop type sanding sheets can be reused for the life of the sanding abrasive. It is rec- ommended that you keep the sanding sheet back- ing clean to provide for best adhesion. Clean the sheet and hook and loop pad by brushing lightly with a light brush.
ATTACHING THE DUST BAG
See Figure 3.
The dust bag provides a dust collection system for the sand- er. Sanding dust is drawn up through the holes of the sanding sheet and collected in the dust bag during sanding.
nUnplug the sander.
�n Using a slight twisting motion, firmly slide dust bag as- sembly over blower exhaust on sander.
TURNING THE SANDER ON/OFF
See Figure 4.
While holding the tool in normal operating position,
�n Push the ON/OFF switch to the left to turn sander on. �n Push the ON/OFF switch to the right to turn sander off.
OPERATING THE SANDER
See Figures 5 - 6.
CAUTION:
Keep the cord away from the sanding pad and position the cord so that it will not be caught on lumber, tools, or other objects during sanding.
�n Secure the workpiece to prevent it from moving under the sander.
![]() WARNING:
WARNING:
Unsecured workpieces could be thrown towards the operator, causing injury.
![]() WARNING:
WARNING:
Keep your head away from the sander and sanding area. Hair could be drawn into sander causing serious injury.
�n Hold the sander in front and away from you, keeping it clear of the workpiece.
HOOK AND LOOP
![]() PAD
PAD
SANDING SHEET
Fig. 2
DUST BAG
BLOWER EXHAUST
Fig. 3
ON/OFF SWITCH
Fig. 4
10
