OPERATION
Emptying the Dust Bag
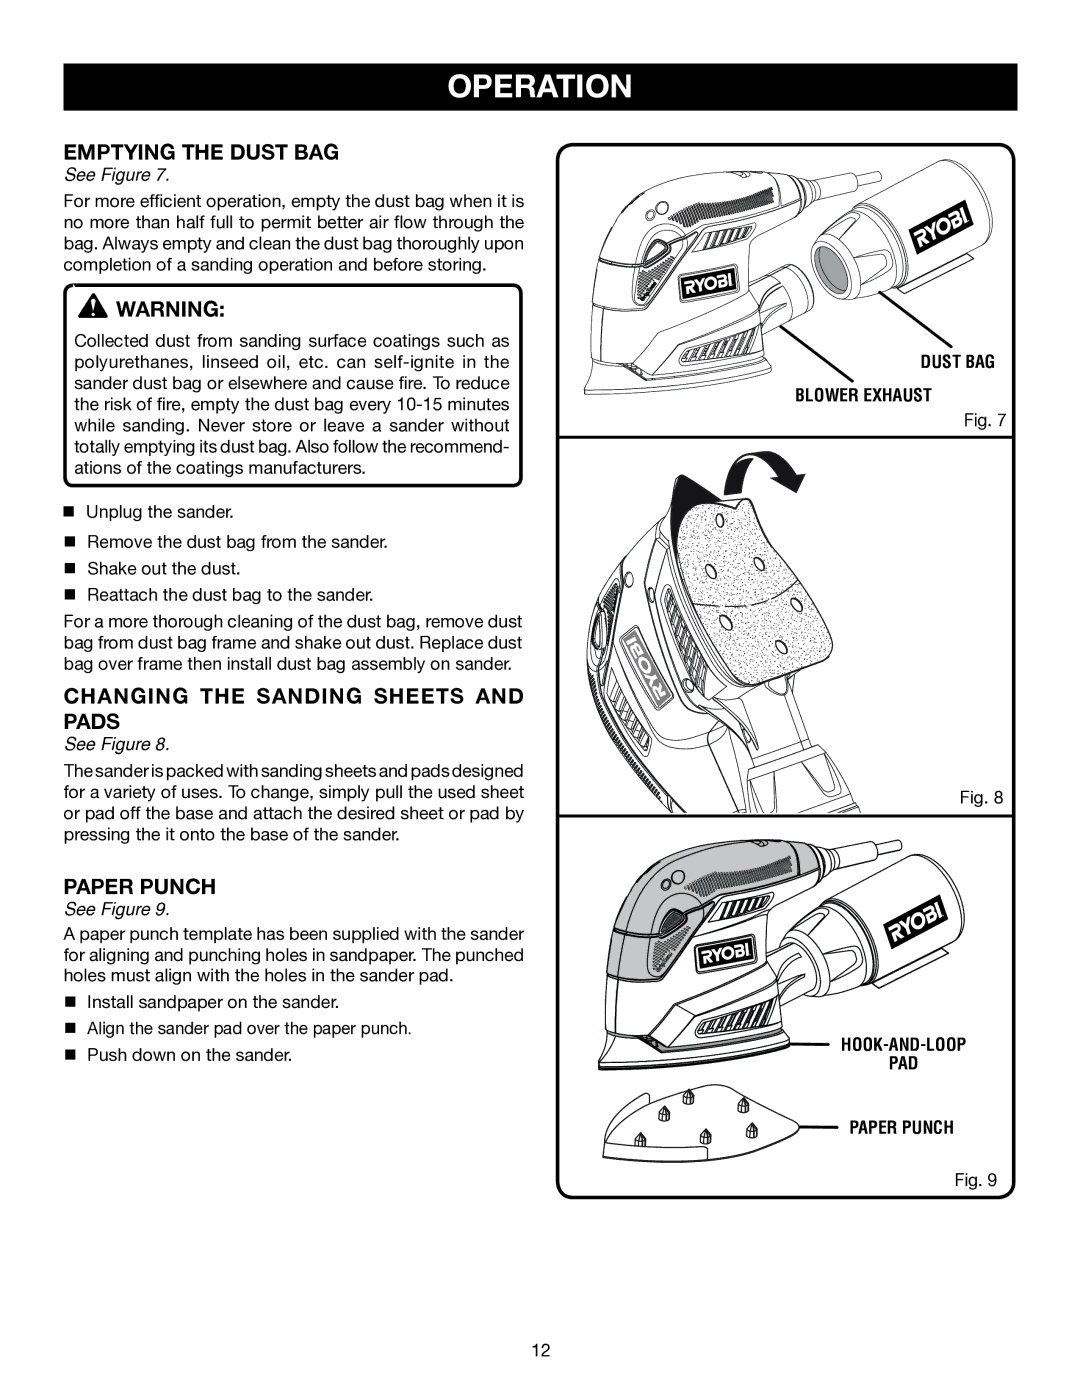
See Figure 7.
For more efficient operation, empty the dust bag when it is no more than half full to permit better air flow through the bag. Always empty and clean the dust bag thoroughly upon completion of a sanding operation and before storing.
![]() WARNING:
WARNING:
Collected dust from sanding surface coatings such as polyurethanes, linseed oil, etc. can
Unplug the sander.
Remove the dust bag from the sander. Shake out the dust.
Reattach the dust bag to the sander.
For a more thorough cleaning of the dust bag, remove dust bag from dust bag frame and shake out dust. Replace dust bag over frame then install dust bag assembly on sander.
CHANGING the sanding sheets and pads
See Figure 8.
The sander is packed with sanding sheets and pads designed for a variety of uses. To change, simply pull the used sheet or pad off the base and attach the desired sheet or pad by pressing the it onto the base of the sander.
PAPER PUNCH
See Figure 9.
A paper punch template has been supplied with the sander for aligning and punching holes in sandpaper. The punched holes must align with the holes in the sander pad.
Install sandpaper on the sander.
Align the sander pad over the paper punch. Push down on the sander.
dust bag
blower exhaust
Fig. 7
Fig. 8
hook-and-loop
pad
paper punch
Fig. 9
12