ASSEMBLY
NOTE: Never use a blade that is too thick to allow the “D” washer to engage with the flat on the spindle.
REMOVING BLADE
See Figures 2 - 4.
Unplug the saw.
Depress and hold spindle lock button.
Remove blade screw by turning it counterclockwise with the blade wrench, while keeping the spindle lock button depressed.
Remove spring washer and outer blade washer (“D” washer).
Lift lower blade guard.
Remove blade.
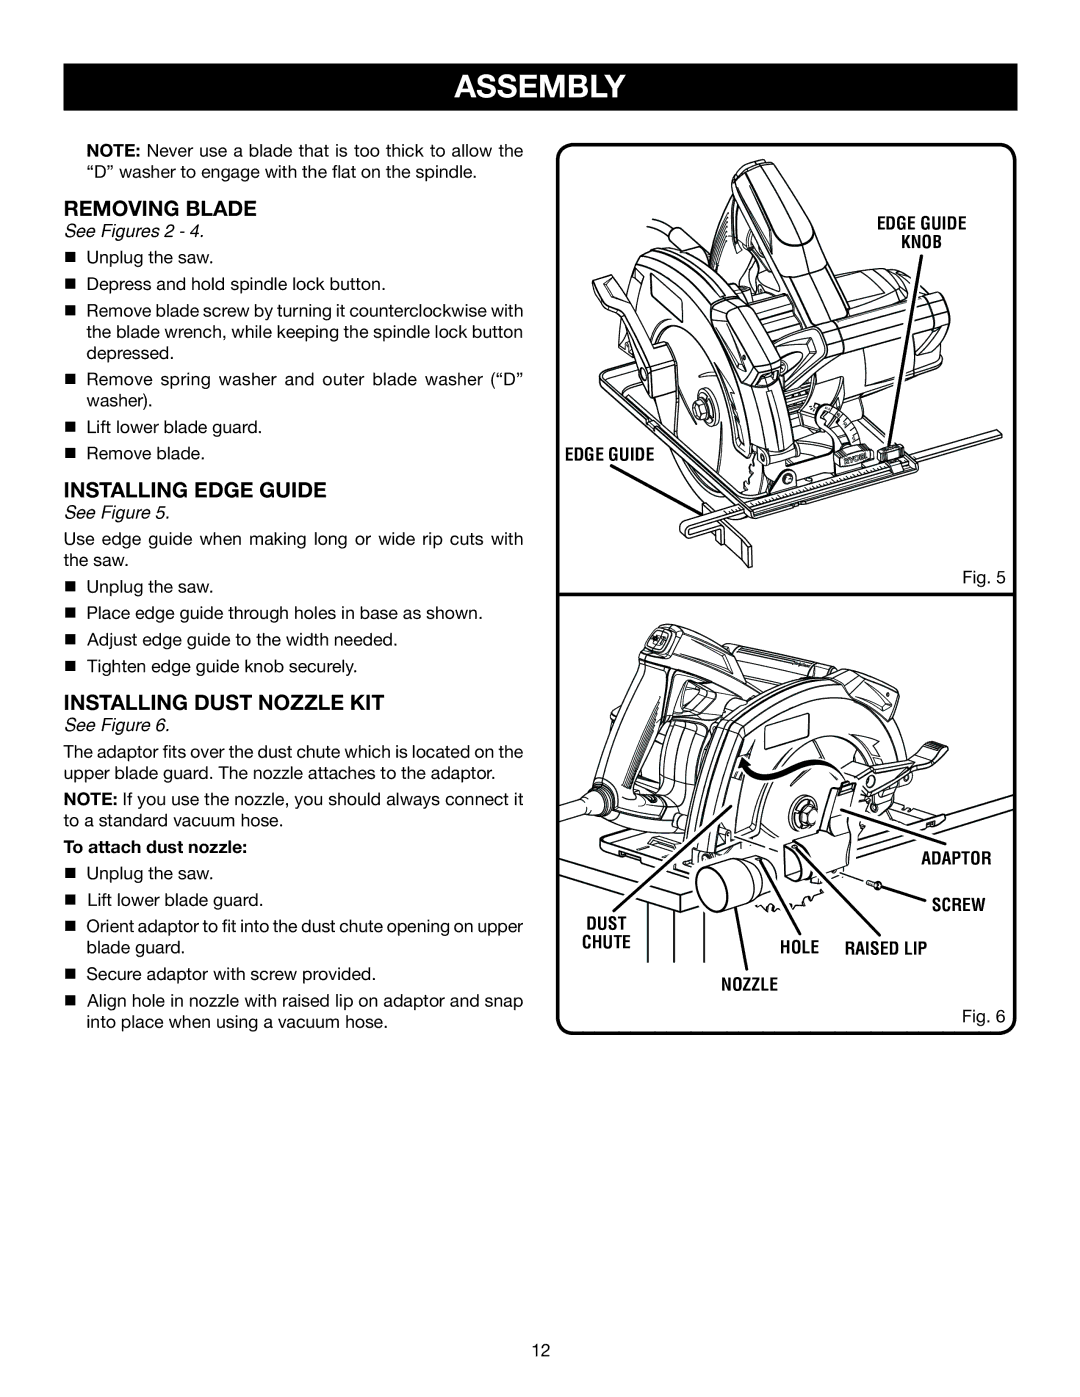
installing Edge guide
See Figure 5.
Use edge guide when making long or wide rip cuts with the saw.
Unplug the saw.
Place edge guide through holes in base as shown.
Adjust edge guide to the width needed.
Tighten edge guide knob securely.
installing DUST NOZZLE KIT
See Figure 6.
The adaptor fits over the dust chute which is located on the upper blade guard. The nozzle attaches to the adaptor.
NOTE: If you use the nozzle, you should always connect it to a standard vacuum hose.
To attach dust nozzle:
Unplug the saw.
Lift lower blade guard.
Orient adaptor to fit into the dust chute opening on upper blade guard.
Secure adaptor with screw provided.
Align hole in nozzle with raised lip on adaptor and snap into place when using a vacuum hose.
Edge guide
knob
51.5![]()
![]()
![]()
45 ![]()
![]()
30
15
Edge guide
Fig. 5
adaptor
![]() screw
screw
dust |
|
chute | hole RAISED LIP |
nozzle
Fig. 6
12