adjustments
![]() WARNING:
WARNING:
Before performing any adjustment, make sure the product is unplugged from the power supply and the switch is in the OFF position. Failure to heed this warning could result in serious personal injury.
![]() WARNING:
WARNING:
DO NOT point the laser at yourself or others. Class IIIa lasers will burn the retinas and could cause serious injury to the eyes.
![]() WARNING:
WARNING:
Use of controls or adjustments or performance other than those specified herein could result in hazardous radiation exposure.
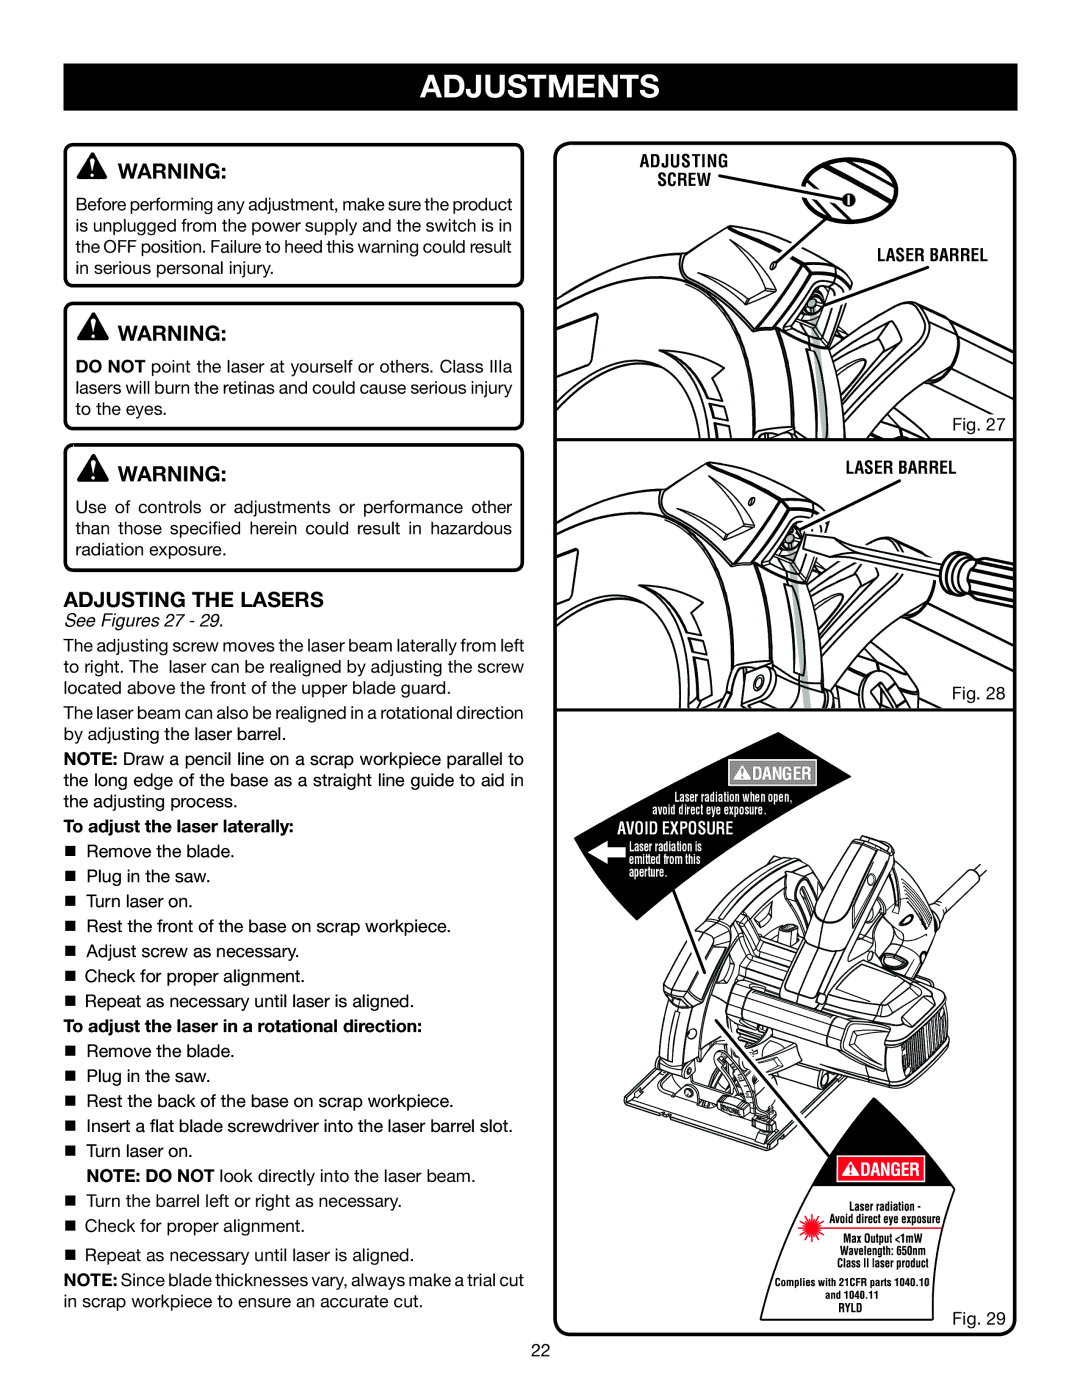
ADJUSTING THE LASERS
See Figures 27 - 29.
The adjusting screw moves the laser beam laterally from left to right. The laser can be realigned by adjusting the screw located above the front of the upper blade guard.
The laser beam can also be realigned in a rotational direction by adjusting the laser barrel.
NOTE: Draw a pencil line on a scrap workpiece parallel to the long edge of the base as a straight line guide to aid in the adjusting process.
To adjust the laser laterally:
Remove the blade.
Plug in the saw.
Turn laser on.
Rest the front of the base on scrap workpiece.
Adjust screw as necessary.
Check for proper alignment.
Repeat as necessary until laser is aligned.
To adjust the laser in a rotational direction:
Remove the blade.
Plug in the saw.
Rest the back of the base on scrap workpiece.
Insert a flat blade screwdriver into the laser barrel slot.
Turn laser on.
NOTE: DO NOT look directly into the laser beam.
Turn the barrel left or right as necessary.
Check for proper alignment.
Repeat as necessary until laser is aligned.
NOTE: Since blade thicknesses vary, always make a trial cut in scrap workpiece to ensure an accurate cut.
ADJUSTING
SCREW 
laser barrel
Fig. 27
laser barrel
Fig. 28![]()
![]() DANGER
DANGER
Laser radiation when open, avoid direct eye exposure.
AVOID EXPOSURE
Laser radiation is emitted from this aperture.
51. 5 ![]()
45 ![]() 30
30
![]() 15
15 ![]()
![]()
![]()
Fig. 29
22