ADJUSTMENTS
WARNING:
Before performing any adjustment, make sure the drill press is unplugged from the power supply and the switch is in the OFF position. Failure to heed this warning could result in serious personal injury.
ADJUSTING TABLE HEIGHT
See Figure 11.
■Hold the table with one hand then loosen the table lock handle.
■To raise the table, turn the table adjustment handle clockwise.
■To lower the table, turn the table adjustment handle counterclockwise.
■Once the table is in the desired position, retighten the table lock handle.
1 | 2 Drill |
| Press |
| ON |
0
![]() TABLE LOCK
TABLE LOCK
HANDLE
TABLE ADJUSTMENT
HANDLE
Fig. 11
BEVEL ADJUSTMENT
See Figure 12.
Your drill press is equipped with a tilting table that allows you to drill angled holes. The table can be tilted left or right, from
To tilt the table:
■Loosen the large hex bolt located beneath the table.
■Use the bevel scale to tilt the table to the desired angle.
■Retighten the hex bolt securely.
HEX
BOLT
TABLE LOCK
HANDLE
| 40 30 |
| 20 |
| 10 |
0 | 0 |
| 10 |
| 20 |
| 30 |
| 40 |
BEVEL | Fig. 12 |
SCALE |
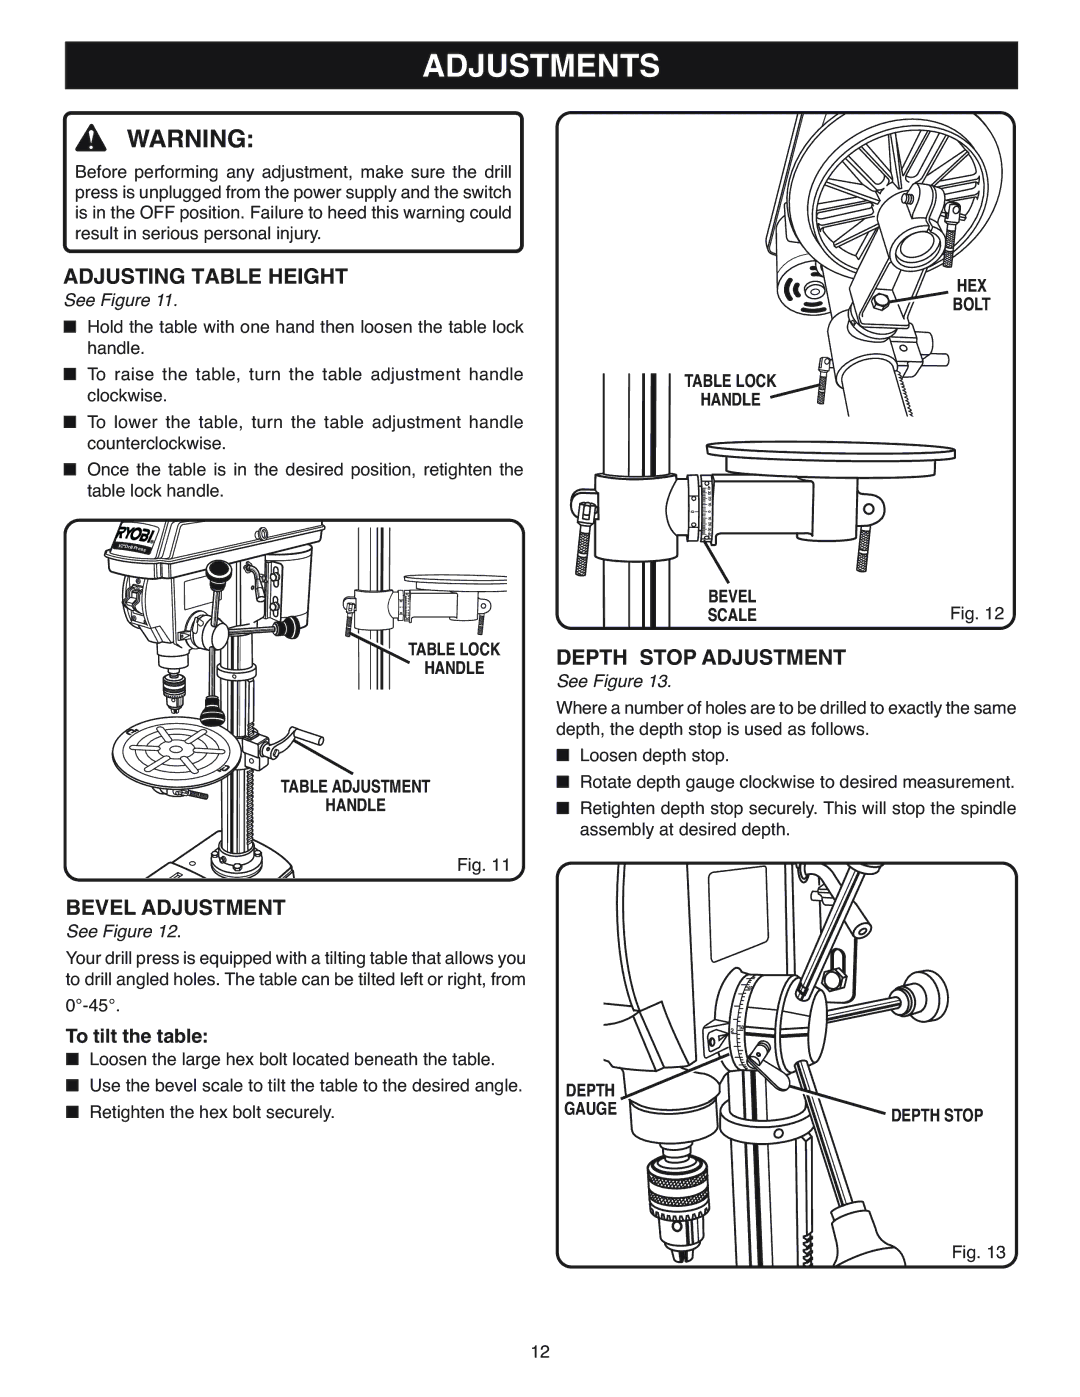
DEPTH STOP ADJUSTMENT
See Figure 13.
Where a number of holes are to be drilled to exactly the same depth, the depth stop is used as follows.
■Loosen depth stop.
■Rotate depth gauge clockwise to desired measurement.
■Retighten depth stop securely. This will stop the spindle assembly at desired depth.
40
2 | 50 |
DEPTH |
|
GAUGE | DEPTH STOP |
|
Fig. 13
12