ADJUSTMENTS
INSTALLING 1/2 INCH (12.7 mm) SANDING SLEEVES
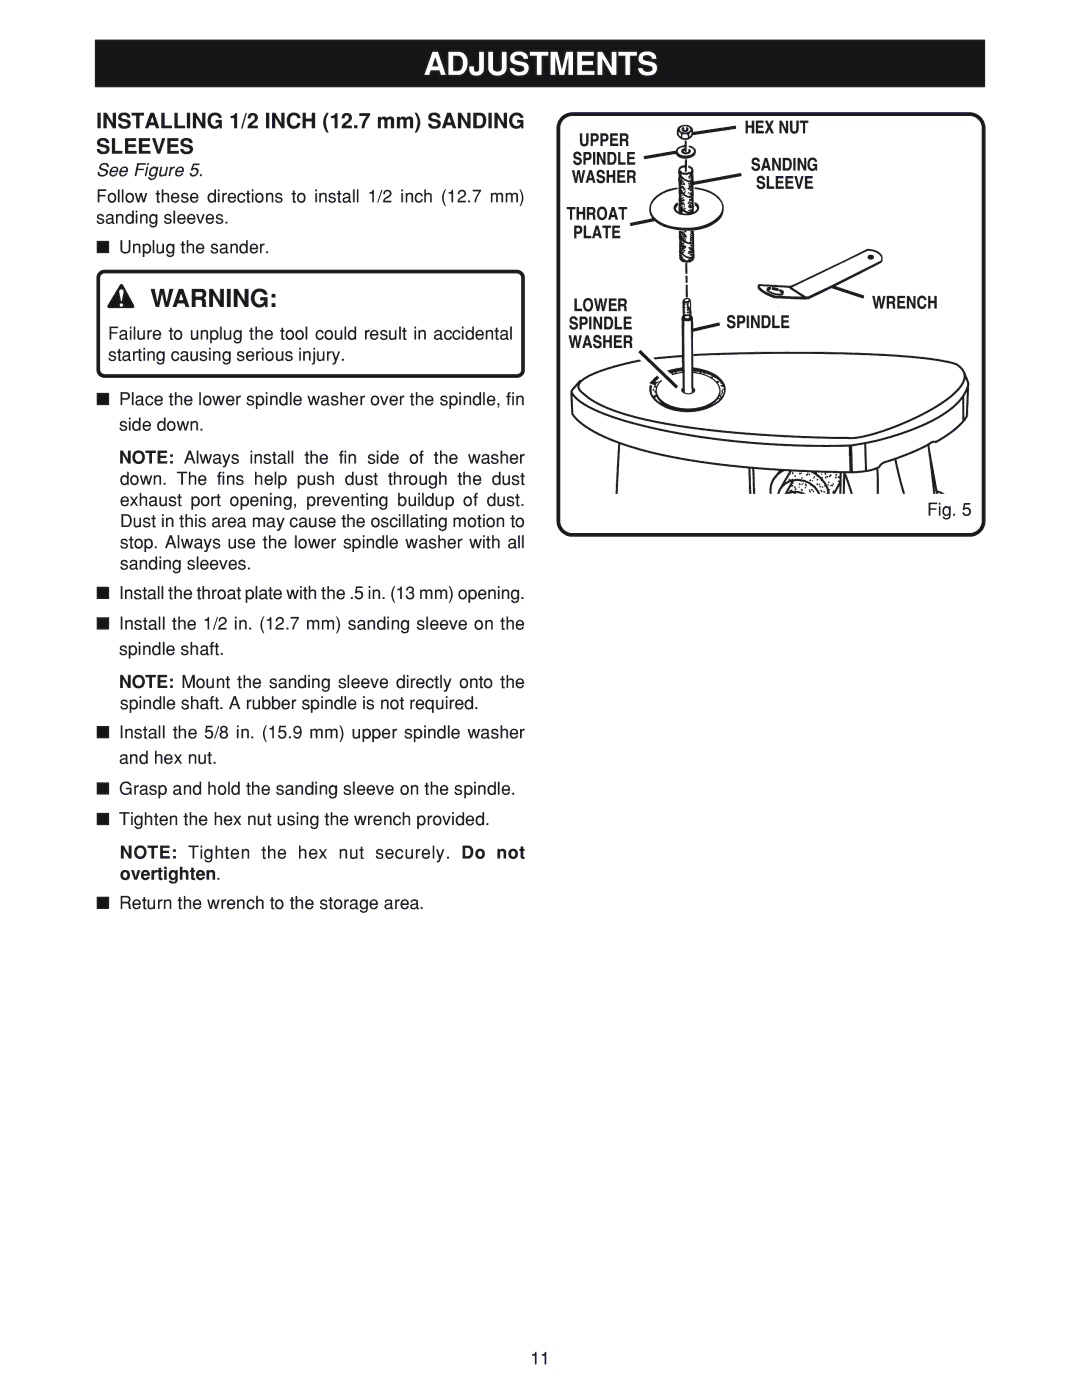
See Figure 5.
Follow these directions to install 1/2 inch (12.7 mm) sanding sleeves.
■Unplug the sander.
![]() WARNING:
WARNING:
Failure to unplug the tool could result in accidental starting causing serious injury.
■Place the lower spindle washer over the spindle, fin side down.
NOTE: Always install the fin side of the washer down. The fins help push dust through the dust exhaust port opening, preventing buildup of dust. Dust in this area may cause the oscillating motion to stop. Always use the lower spindle washer with all sanding sleeves.
■Install the throat plate with the .5 in. (13 mm) opening.
■Install the 1/2 in. (12.7 mm) sanding sleeve on the spindle shaft.
NOTE: Mount the sanding sleeve directly onto the spindle shaft. A rubber spindle is not required.
■Install the 5/8 in. (15.9 mm) upper spindle washer and hex nut.
■Grasp and hold the sanding sleeve on the spindle.
■Tighten the hex nut using the wrench provided.
NOTE: Tighten the hex nut securely. Do not overtighten.
■Return the wrench to the storage area.
UPPER | HEX NUT | |
| ||
SPINDLE | SANDING | |
WASHER | ||
SLEEVE | ||
| ||
THROAT |
| |
PLATE |
| |
LOWER | WRENCH | |
SPINDLE | SPINDLE | |
WASHER |
|
Fig. 5
11