Manuals
/
Ryobi
/
Lawn and Garden
/
Edger
Ryobi
P2005
manuel dutilisation
Operation, Assembly, See Figure
Models:
P2005
1
9
34
34
Download
34 pages
38.45 Kb
6
7
8
9
10
11
12
13
Troubleshooting
Signal
Symboles
Warranty
Maintenance
Corrección De Problemas
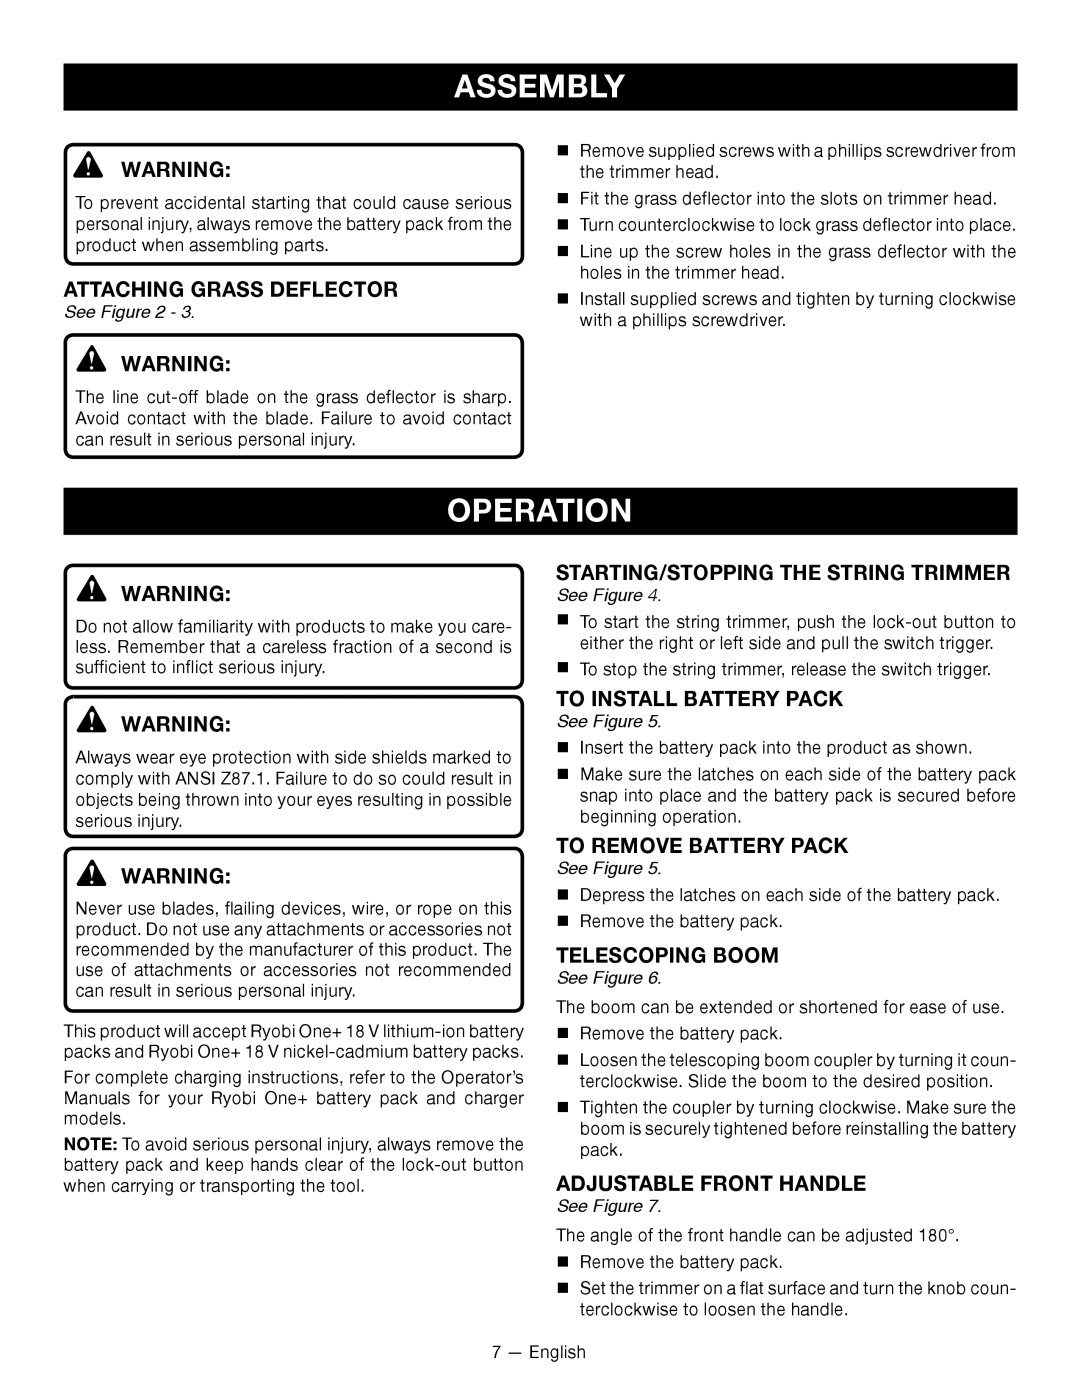
Assembly
Safety
Page 9
Image 9
Page 8
Page 10
Page 9
Image 9
Page 8
Page 10
Contents
P2005
18 VOLT STRING TRIMMER/EDGER
SAVE THIS MANUAL FOR FUTURE REFERENCE
18 V TONDEUSE À FOUET/TAILLE-BORDURE
Vea esta sección de la página desplegable para
POUR TAILLE-HAIES
PROPER TRIMMER OPERATING POSITION
DE LA CORTADORA
POSICIÓN CORRECTA PARA EL MANEJO
INTRODUCTION
TABLE OF CONTENTS
TABLE DES MATIÈRES / ÍNDICE DE CONTENIDO
INTRODUCTION / INTRODUCCIÓN
READ ALL INSTRUCTIONS
IMPORTANT SAFETY INSTRUCTIONS
Store out of the reach of children
SYMBOL
SYMBOLS
SYMBOL
SIGNAL
ASSEMBLY
FEATURES
See Figure
OPERATION
Follow these tips when using the string trimmer
If grass becomes wrapped around the string head
See Figures
SPOOL REPLACEMENT
MAINTENANCE
GENERAL MAINTENANCE
STRING REPLACEMENT
CALL US FIRST
TROUBLESHOOTING
PROBLEM
SOLUTION
LIMITED WARRANTY STATEMENT
WARRANTY
12 - English
INSTRUCTIONS IMPORTANTES CONCERNANT LA SÉCURITÉ
AVERTISSEMENT
LIRE TOUTES LES INSTRUCTIONS
4 - Français
SYMBOLE
SYMBOLES
SIGNAL
SIGNIFICATION
ASSEMBLAGE
CARACTÉRISTIQUES
UTILISATION
Voir les figures
Si l’herbe s’enroule autour de la tête de coupe
ENTRETIEN
DÉPANNAGE
NOUS APPELER D’ABORD
4050
PROBLÈME
ÉNONCÉ DE LA GARANTIE LIMITÉE
GARANTIE
12 - Français
INSTRUCCIONES DE SEGURIDAD IMPORTANTES
ADVERTENCIA
LEA TODAS LAS INSTRUCCIONES
4 - Español
SÍMBOLO SEÑAL
SÍMBOLOS
SIGNIFICADO
SÍMBOLO
ARMADO
CARACTERÍSTICAS
FUNCIONAMIENTO
Vea las figuras
Si la hierba se enrolla en el cabezal del hilo
MANTENIMIENTO
CORRECCIÓN DE PROBLEMAS
LLÁMENOS PRIMERO
4050
DECLARACIÓN DE LA GARANTÍA LIMITADA
GARANTÍA
18 VOLT STRING TRIMMER/EDGER
OPERATOR’S MANUAL
AVERTISSEMENT
ADVERTENCIA
Top
Page
Image
Contents