OPERATION
TO SET DEPTH OF CUT
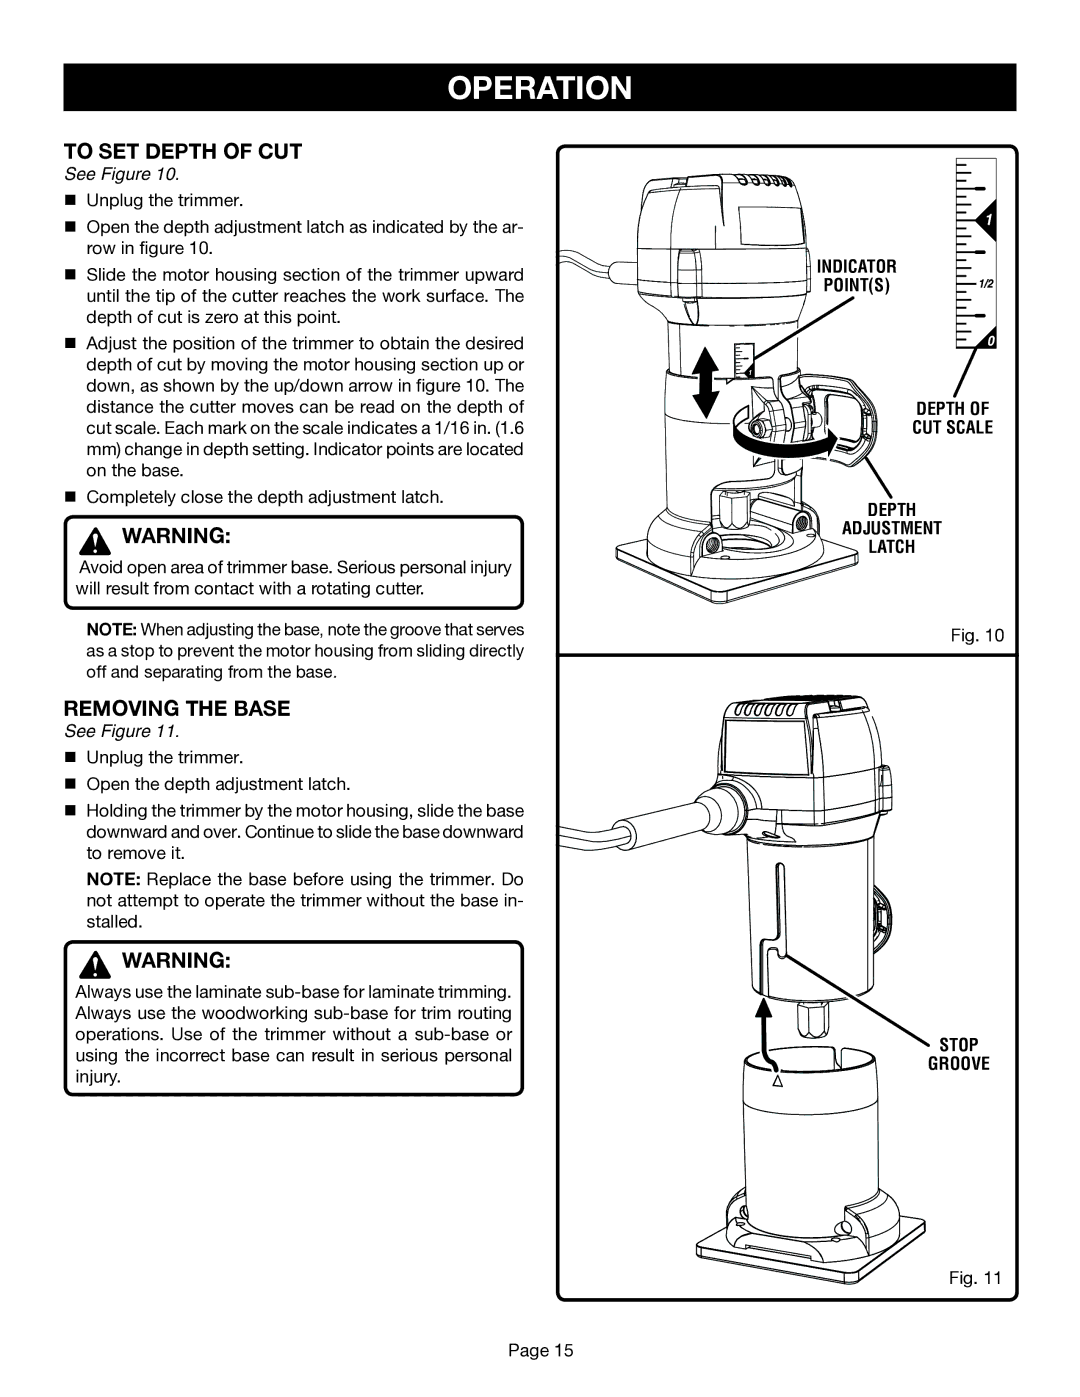
See Figure 10.
nUnplug the trimmer.
nOpen the depth adjustment latch as indicated by the ar- row in figure 10.
nSlide the motor housing section of the trimmer upward until the tip of the cutter reaches the work surface. The depth of cut is zero at this point.
nAdjust the position of the trimmer to obtain the desired depth of cut by moving the motor housing section up or down, as shown by the up/down arrow in figure 10. The distance the cutter moves can be read on the depth of cut scale. Each mark on the scale indicates a 1/16 in. (1.6 mm) change in depth setting. Indicator points are located on the base.
nCompletely close the depth adjustment latch.
![]() WARNING:
WARNING:
Avoid open area of trimmer base. Serious personal injury will result from contact with a rotating cutter.
NOTE: When adjusting the base, note the groove that serves as a stop to prevent the motor housing from sliding directly off and separating from the base.
REMOVING THE BASE
See Figure 11.
nUnplug the trimmer.
nOpen the depth adjustment latch.
nHolding the trimmer by the motor housing, slide the base downward and over. Continue to slide the base downward to remove it.
NOTE: Replace the base before using the trimmer. Do not attempt to operate the trimmer without the base in- stalled.
![]() WARNING:
WARNING:
Always use the laminate
![]()
![]() INDICATOR
INDICATOR
POINT(S)
DEPTH OF
CUT SCALE
DEPTH
ADJUSTMENT
LATCH
Fig. 10
STOP
GROOVE
Fig. 11
Page 15
