ASSEMBLY
UNPACKING
This product requires assembly.
Carefully lift miter saw base from the carton by the “D” handle and the saw base, and place it on a level work surface.
WARNING:
Do not connect to power supply until assembly is complete. Failure to comply could result in accidental starting and possible serious personal injury.
WARNING:
Do not use this product if any parts on the Loose Parts List are already assembled to your product when you unpack it. Parts on this list are not assembled to the product by the manufacturer and require customer installation. Use of a product that may have been improperly assembled could result in serious personal injury.
If factory assembled, the saw has been shipped with the saw arm secured in the down position. To release the saw arm, push down on the top of the saw arm, cut the
Lift the saw arm by the handle. Hand pressure should remain on the saw arm to prevent sudden rise upon release of the tie wrap.
Inspect the tool carefully to make sure no breakage or damage occurred during shipping.
Do not discard the packing material until you have care- fully inspected and satisfactorily operated the tool.
The saw is factory set for accurate cutting. After assembling it, check for accuracy. If shipping has influenced the settings, refer to specific procedures explained in this manual.
If any parts are damaged or missing, please call
WARNING:
Do not start the compound miter saw without checking for interference between the blade and the miter fence. Damage could result to the blade if it strikes the miter fence during operation of the saw.
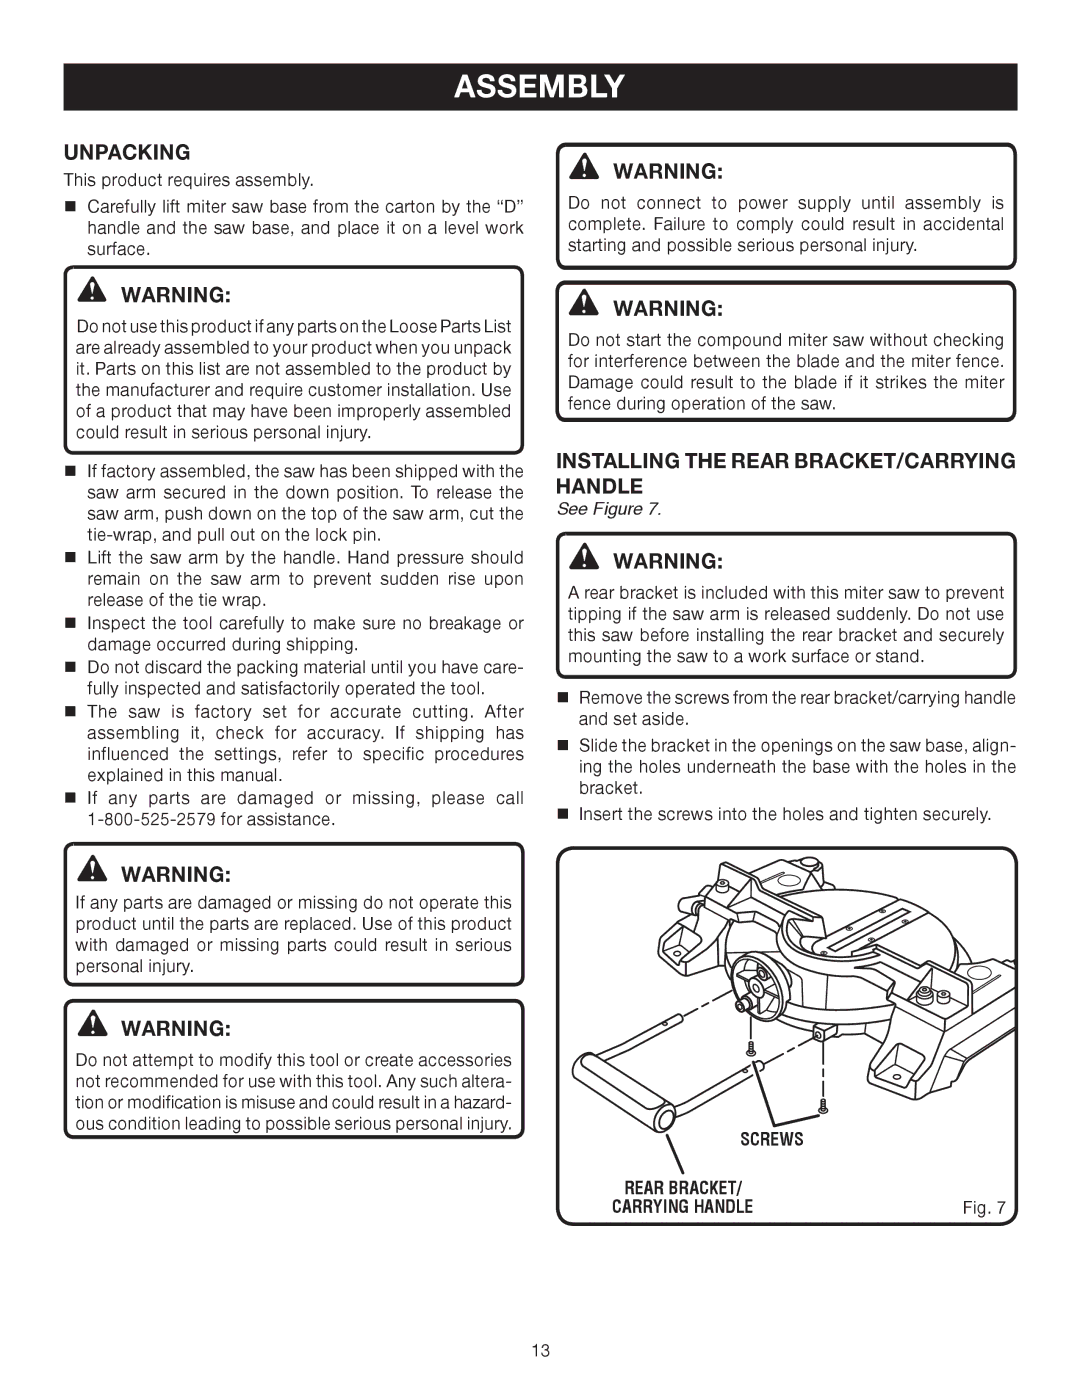
installing the rear bracket/carrying handle
See Figure 7.
WARNING:
A rear bracket is included with this miter saw to prevent tipping if the saw arm is released suddenly. Do not use this saw before installing the rear bracket and securely mounting the saw to a work surface or stand.
Remove the screws from the rear bracket/carrying handle and set aside.
Slide the bracket in the openings on the saw base, align- ing the holes underneath the base with the holes in the bracket.
Insert the screws into the holes and tighten securely.
Warning:
If any parts are damaged or missing do not operate this product until the parts are replaced. Use of this product with damaged or missing parts could result in serious personal injury.
warning:
Do not attempt to modify this tool or create accessories not recommended for use with this tool. Any such altera- tion or modification is misuse and could result in a hazard- ous condition leading to possible serious personal injury.
screws
rear bracket/ |
|
carrying handle | Fig. 7 |
13