OPERATION
Place the workpiece flat on the miter table with one edge securely against the fence. If the board is warped, place
the convex side against the fence. If the concave edge of a board is placed against the fence, the board could collapse on the blade at the end of the cut, jamming the blade.
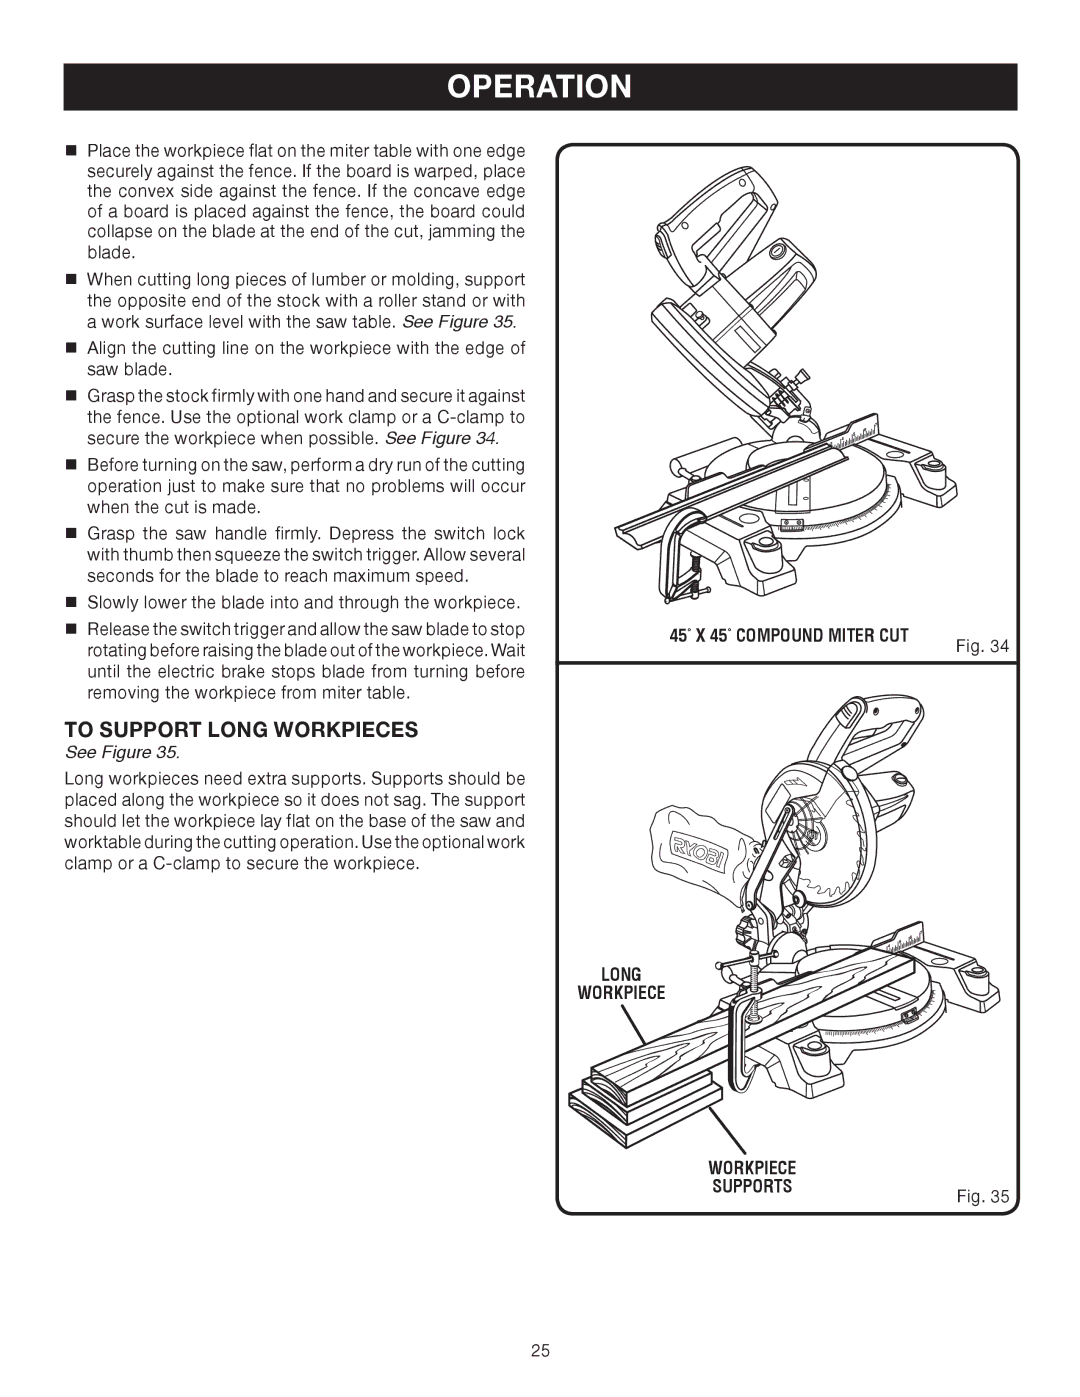
When cutting long pieces of lumber or molding, support the opposite end of the stock with a roller stand or with a work surface level with the saw table. See Figure 35.
Align the cutting line on the workpiece with the edge of
saw blade.
Grasp the stock firmly with one hand and secure it against the fence. Use the optional work clamp or a
Before turning on the saw, perform a dry run of the cutting operation just to make sure that no problems will occur when the cut is made.
Grasp the saw handle firmly. Depress the switch lock with thumb then squeeze the switch trigger. Allow several seconds for the blade to reach maximum speed.
| Slowly lower the blade into and through the workpiece. |
|
|
Release the switch trigger and allow the saw blade to stop | 45° x 45° COMPOUND MITER CUT | Fig. 34 | |
| rotating before raising the blade out of the workpiece. Wait |
| |
until the electric brake stops blade from turning before removing the workpiece from miter table.
to SUPPORT LONG WORKPIECES
See Figure 35.
Long workpieces need extra supports. Supports should be placed along the workpiece so it does not sag. The support should let the workpiece lay flat on the base of the saw and worktable during the cutting operation. Use the optional work clamp or a
Long
workpiece
Workpiece |
|
supports | Fig. 35 |
|
25
