ADJUSTMENTS
WARNING:
Before performing any adjustment, make sure the tool is unplugged from the power supply. Failure to heed this warning could result in serious personal injury.
The compound miter saw has been adjusted at the factory for making very accurate cuts. However, some of the components might have been jarred out of alignment during shipping. Also, over a period of time, readjustment will probably become necessary due to wear. After unpacking the saw, check the following adjustments before you begin using saw. Make any readjustments that are necessary and periodically check the parts alignment to make sure that the saw is cutting accurately.
CAUTION:
Do not start the compound miter saw without checking for interference between the blade and the throat plate. Damage could result to the blade if it strikes the throat plate during operation of the saw.
PIVOT ADJUSTMENTS
NOTE: These adjustments were made at the factory and normally do not require readjustment.
TRAVEL PIVOT ADJUSTMENT
nThe saw arm should rise completely to the up position by itself.
nIf the saw arm does not raise by itself or if there is play in the pivot joints, have saw repaired by at your nearest
RYOBI AUTHORIZED SERVICE CENTER.
BEVEL PIVOT ADJUSTMENT
nThe compound miter saw should bevel easily by loosening the bevel lock knob and tilting the saw arm to the left.
nIf movement is tight or if there is play in the pivot, have saw repaired by at your nearest RYOBI AUTHORIZED
SERVICE CENTER.
DEPTH STOP
The depth stop limits the blade’s downward travel. It allows the blade to go below the miter table enough to maintain full cutting capacities. The depth stop positions the blade 1/4 in. from the miter table support.
NOTE: The miter table support is located inside the miter table.
The depth stop is factory set to provide maximum cut- ting capacity for the 10 in. blade provided with the saw. Therefore, the saw with blade provided should never need adjustments.
However, when the diameter of the blade has been reduced due to sharpening, it may be necessary to adjust the depth stop to provide maximum cutting capacity. Also, when a new blade is installed, it is necessary to check the clearance of the blade to the miter table support before starting the saw. Make adjust- ments if needed.
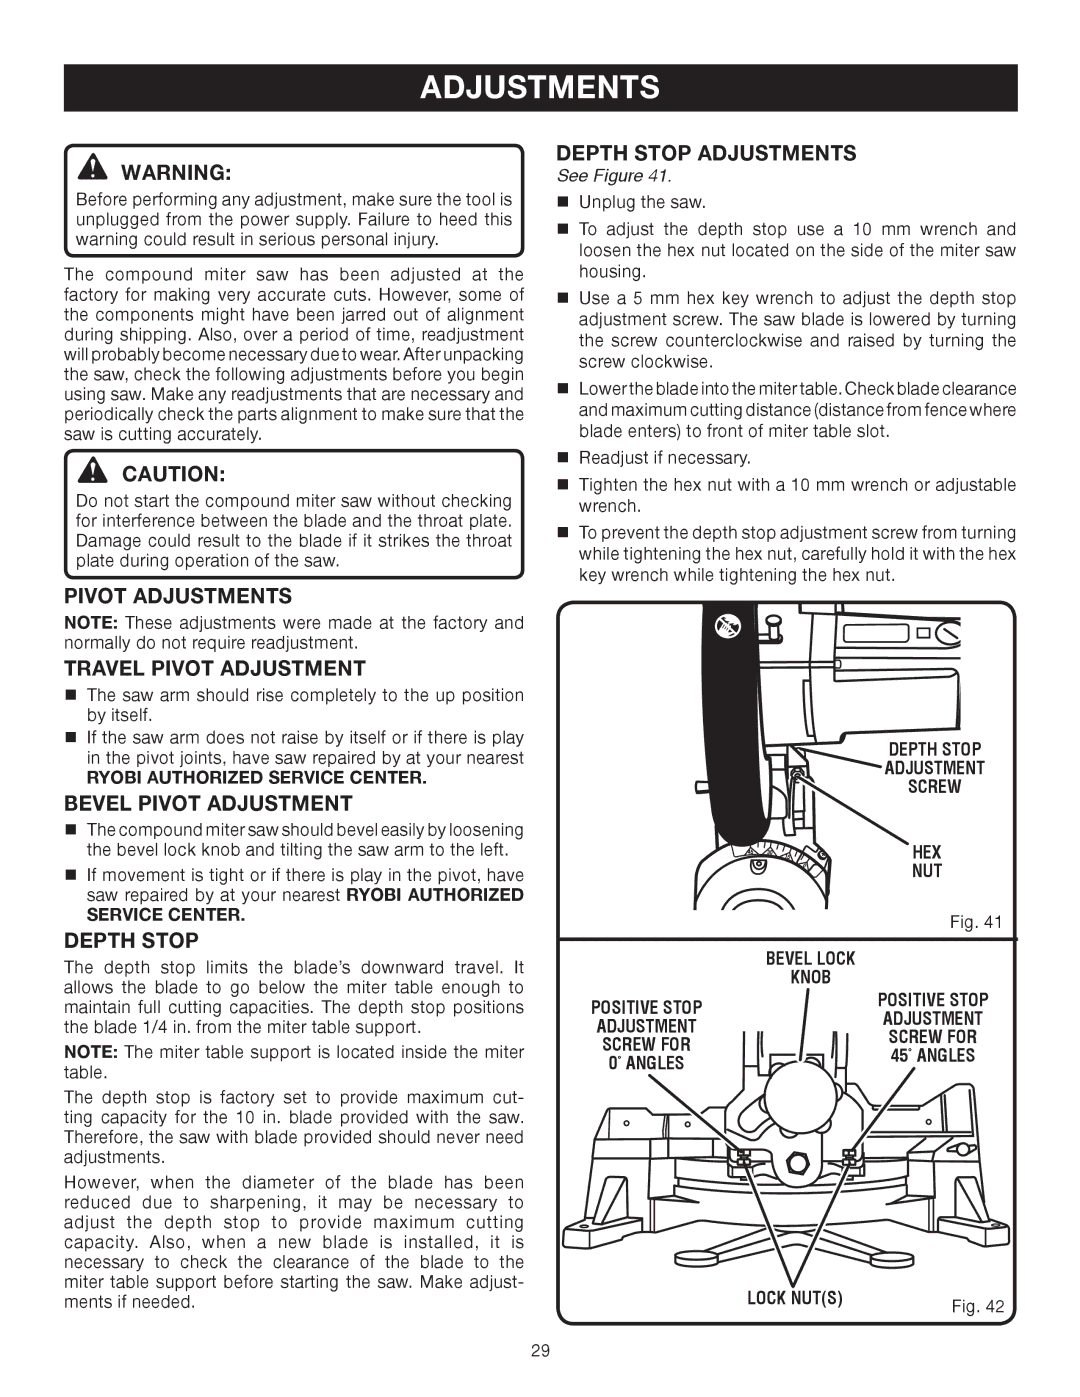
DEPTH STOP ADJUSTMENTS
See Figure 41.
nUnplug the saw.
nTo adjust the depth stop use a 10 mm wrench and loosen the hex nut located on the side of the miter saw housing.
nUse a 5 mm hex key wrench to adjust the depth stop adjustment screw. The saw blade is lowered by turning the screw counterclockwise and raised by turning the screw clockwise.
nLower the blade into the miter table. Check blade clearance and maximum cutting distance (distance from fence where blade enters) to front of miter table slot.
nReadjust if necessary.
nTighten the hex nut with a 10 mm wrench or adjustable wrench.
nTo prevent the depth stop adjustment screw from turning while tightening the hex nut, carefully hold it with the hex key wrench while tightening the hex nut.
| DEPTH STOP | |
| ADJUSTMENT | |
| SCREW | |
| HEX | |
| NUT | |
| Fig. 41 | |
| BEVEL LOCK | |
| KNOB | |
POSITIVE STOP | POSITIVE STOP | |
ADJUSTMENT | ||
ADJUSTMENT | ||
SCREW FOR | ||
SCREW FOR | ||
45° ANGLES | ||
0° ANGLES |
LOCK NUT(S) | Fig. 42 |
|
29