Ryobi Outdoor 875r manual Assembly Instructions, Adjusting The J-Handle

Models: 875r

1 30
Download 30 pages 12.52 Kb
Page 9
Image 9
ASSEMBLY INSTRUCTIONS

ASSEMBLY INSTRUCTIONS

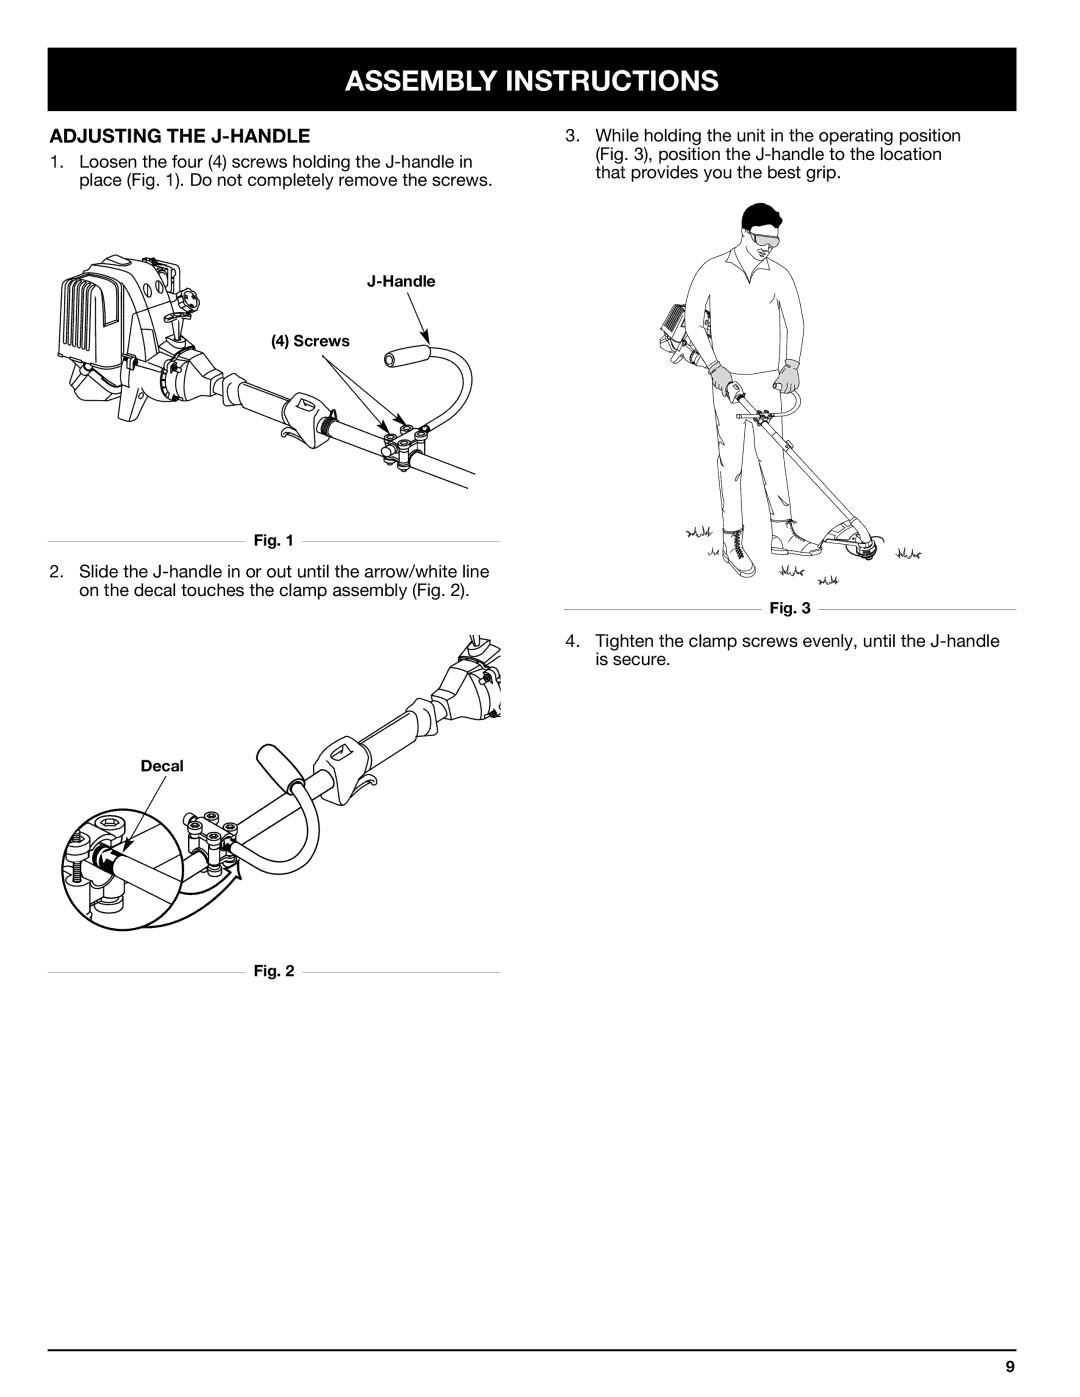
ADJUSTING THE J-HANDLE

1.Loosen the four (4) screws holding the J-handle in place (Fig. 1). Do not completely remove the screws.

3.While holding the unit in the operating position (Fig. 3), position the J-handle to the location that provides you the best grip.

J-Handle

(4) Screws

Fig. 1

2. Slide the J-handle in or out until the arrow/white line on the decal touches the clamp assembly (Fig. 2).

Fig. 3

4. Tighten the clamp screws evenly, until the J-handle is secure.

Decal

Fig. 2

9

Page 9
Image 9
Ryobi Outdoor 875r manual Assembly Instructions, Adjusting The J-Handle