![]()
POLARIZED PLUG
This appliance has a polarized plug (one blade is wider than the other). To reduce the risk of electric shock, this plug will fit in a polarized outlet only one way. If the plug does not fit fully in the outlet, reverse the plug. If it still does not fit, contact a qualified electrician. Do not modify the plug in any way.
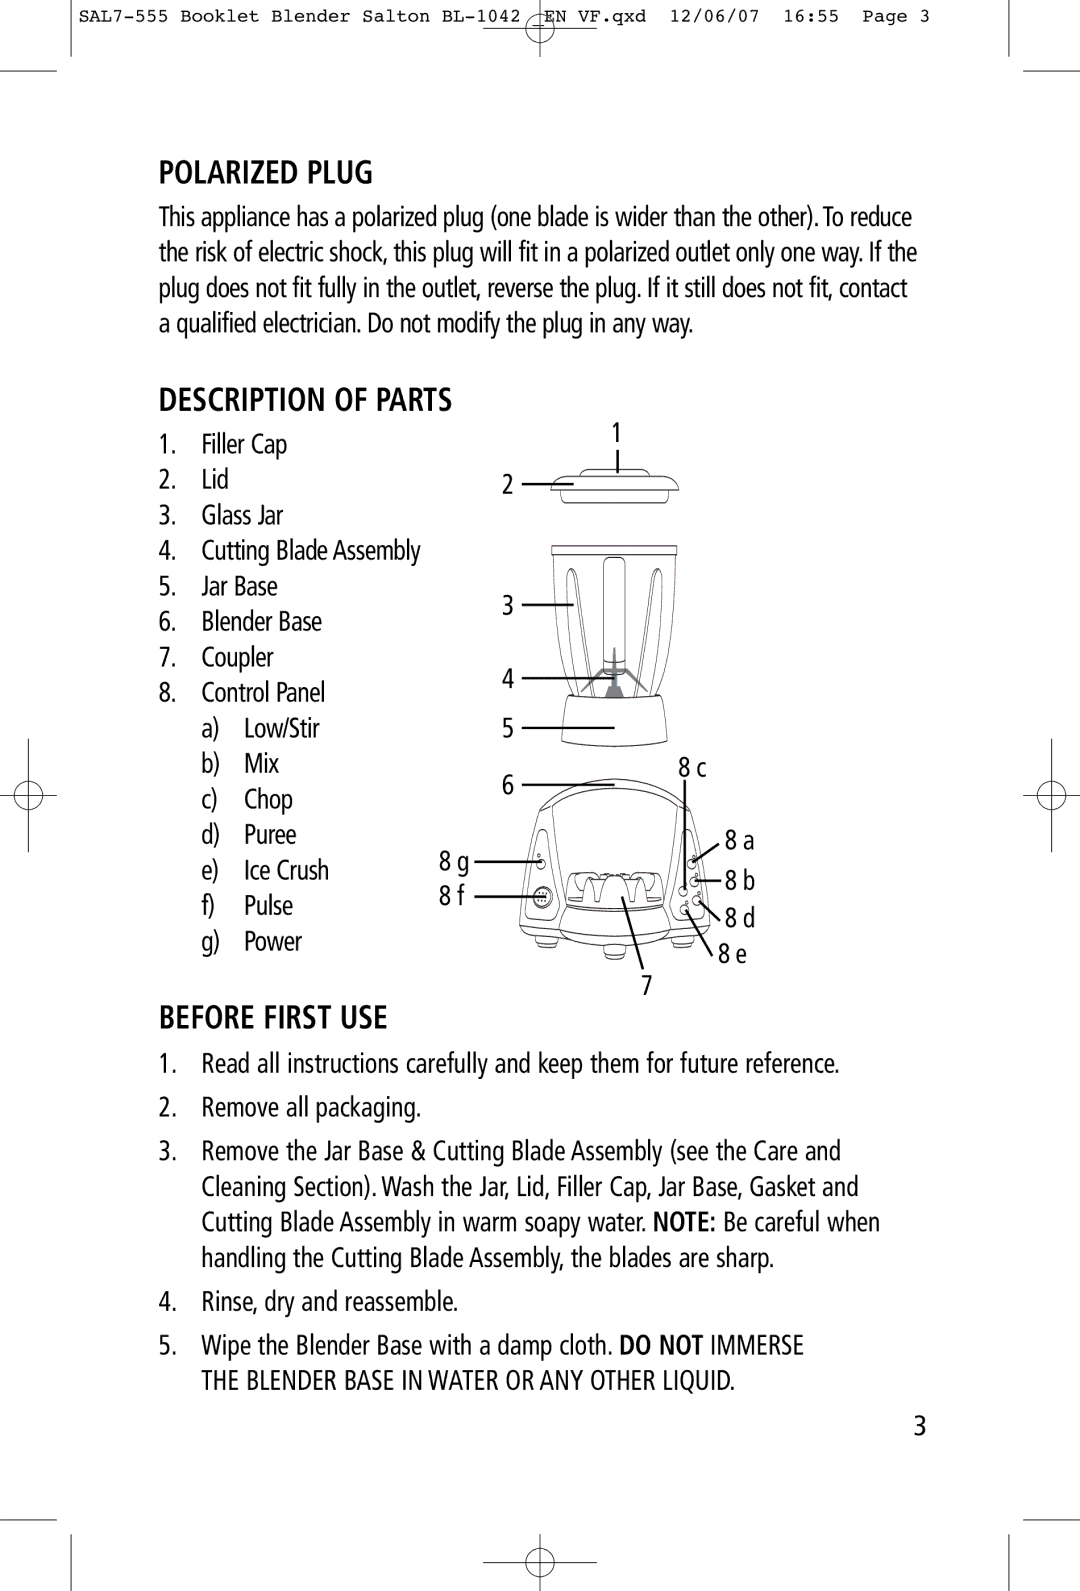
DESCRIPTION OF PARTS
1. | Filler Cap |
|
| 1 | |
|
|
| |||
2. | Lid |
|
| 2 |
|
3. | Glass Jar |
|
|
| |
4. | Cutting Blade Assembly |
|
|
| |
5. | Jar Base |
| 3 |
| |
6. | Blender Base |
|
| ||
|
|
| |||
7. | Coupler |
| 4 |
| |
8. | Control Panel |
|
| ||
|
|
| |||
| a) | Low/Stir |
| 5 |
|
| b) | Mix |
| 6 | 8 c |
| c) | Chop |
|
| |
|
|
|
| ||
| d) | Puree | 8 g |
| 8 a |
| e) | Ice Crush |
| 8 b | |
| 8 f |
| |||
| f) | Pulse |
| ||
|
| 8 d | |||
|
|
| |||
| g) | Power |
|
| |
|
|
| 8 e | ||
|
|
|
|
| |
|
|
|
|
| 7 |
BEFORE FIRST USE
1.Read all instructions carefully and keep them for future reference.
2.Remove all packaging.
3.Remove the Jar Base & Cutting Blade Assembly (see the Care and Cleaning Section). Wash the Jar, Lid, Filler Cap, Jar Base, Gasket and Cutting Blade Assembly in warm soapy water. NOTE: Be careful when handling the Cutting Blade Assembly, the blades are sharp.
4.Rinse, dry and reassemble.
5.Wipe the Blender Base with a damp cloth. DO NOT IMMERSE THE BLENDER BASE IN WATER OR ANY OTHER LIQUID.
3
