2
Notes
Need
Photo 4
Photo 5
Photo 6
Photo 7
Photo 8
ML 2250 Technical Instructions
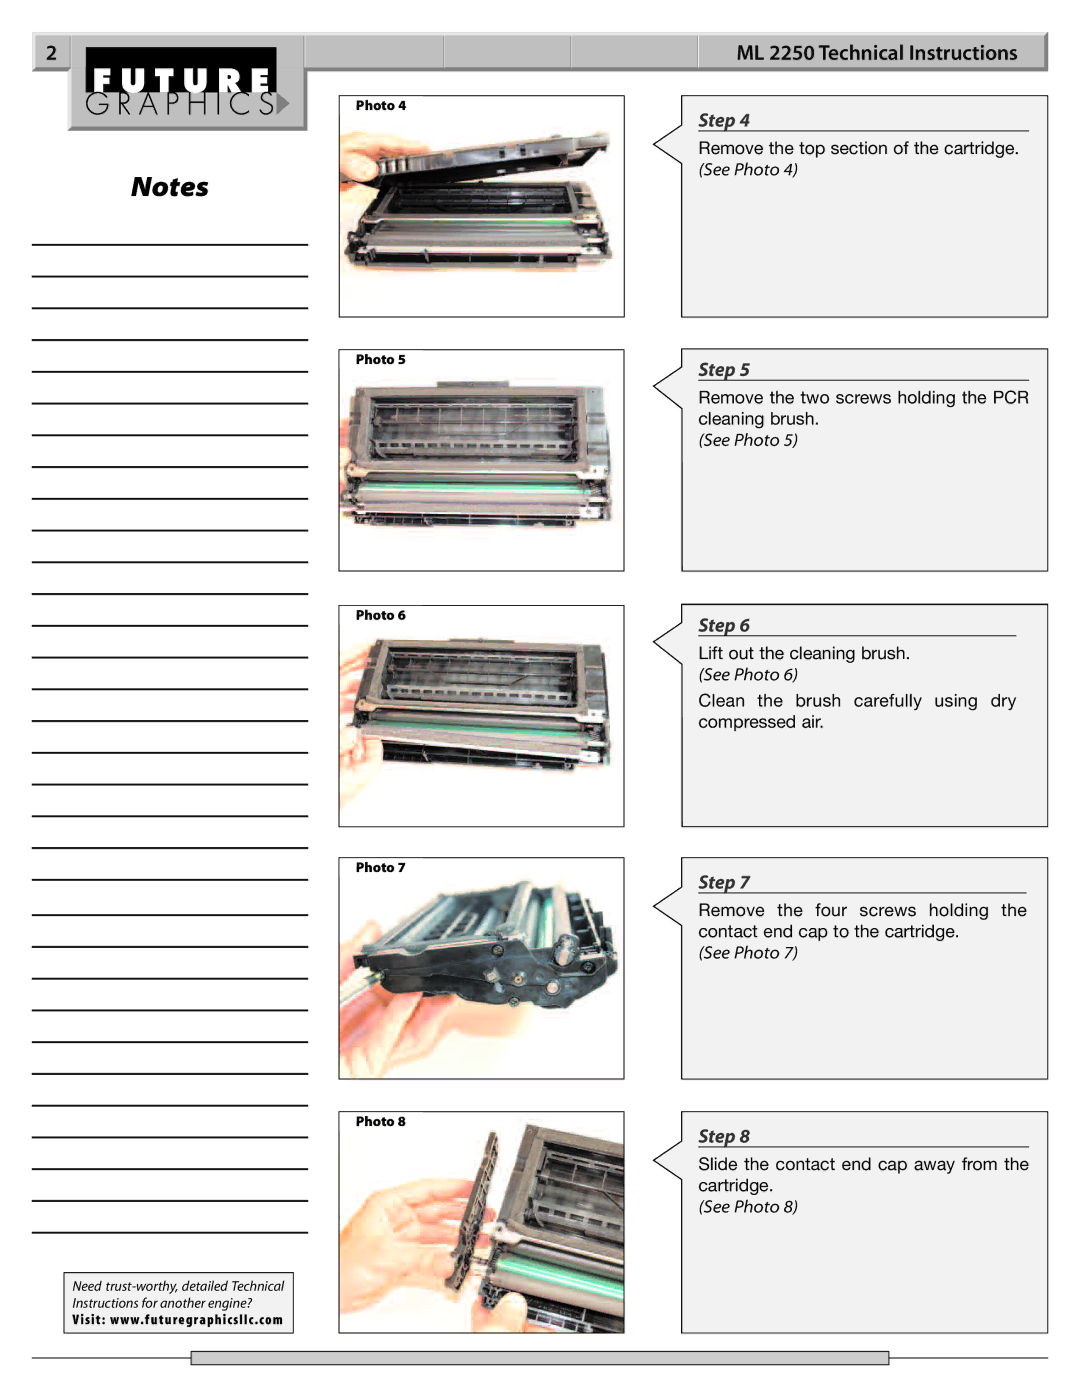
Step 4
Remove the top section of the cartridge. (See Photo 4)
Step 5
Remove the two screws holding the PCR cleaning brush.
(See Photo 5)
Step 6
Lift out the cleaning brush. (See Photo 6)
Clean the brush carefully using dry compressed air.
Step 7
Remove the four screws holding the contact end cap to the cartridge.
(See Photo 7)
Step 8
Slide the contact end cap away from the cartridge.
(See Photo 8)