4
Notes
Need
E-mail: info@futuregraphicsllc.com 
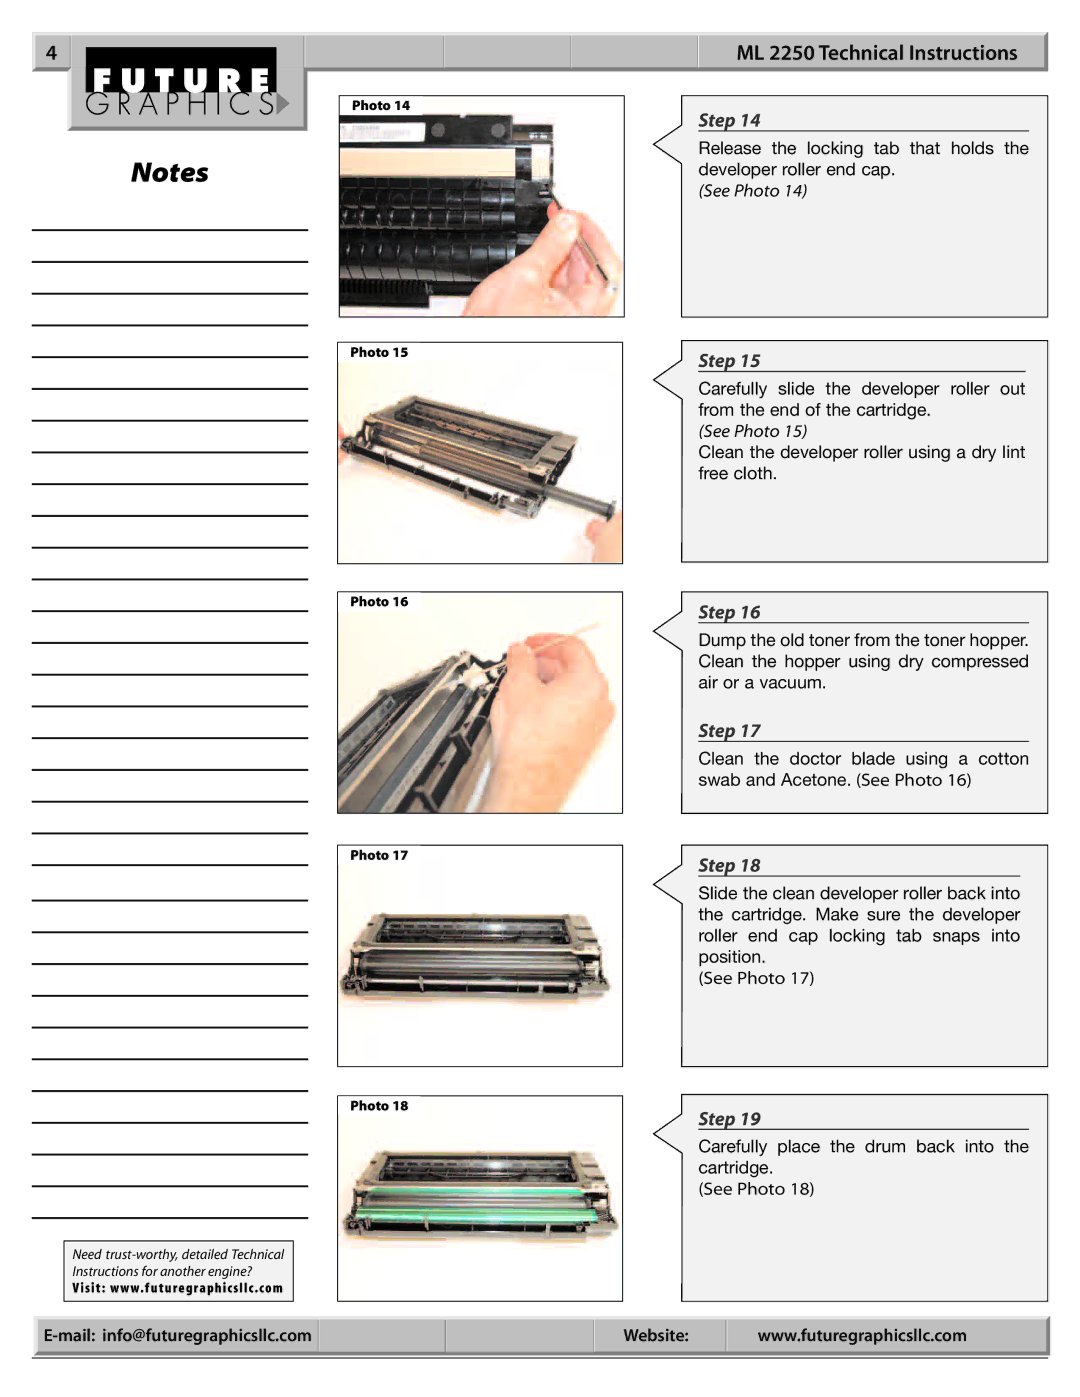
Photo 14
Photo 15
Photo 16
Photo 17
Photo 18
ML 2250 Technical Instructions
Step 14
Release the locking tab that holds the developer roller end cap.
(See Photo 14)
Step 15
Carefully slide the developer roller out from the end of the cartridge.
(See Photo 15)
Clean the developer roller using a dry lint free cloth.
Step 16
Dump the old toner from the toner hopper. Clean the hopper using dry compressed air or a vacuum.
Step 17
Clean the doctor blade using a cotton swab and Acetone. (See Photo 16)
Step 18
Slide the clean developer roller back into the cartridge. Make sure the developer roller end cap locking tab snaps into position.
(See Photo 17)
Step 19
Carefully place the drum back into the cartridge.
(See Photo 18)
Website: | www.futuregraphicsllc.com |
|
|