Manuals
/
Samsung
/
TV and Video
/
Flat Panel Television
Samsung
400UXn
user manual
Connections, You can connect USB devices such as a mouse or keyboard
Models:
400UXn
1
40
50
50
Download
50 pages
33.88 Kb
37
38
39
40
41
42
43
44
Troubleshooting
Install
Q Check Signal Cable message
Power indicator
Connecting a Computer
Problems related to Audio
Wall Bracket Angle Adjustment
Remote Control Sensor
Connecting Using a HDMI Cable
Page 40
Image 40
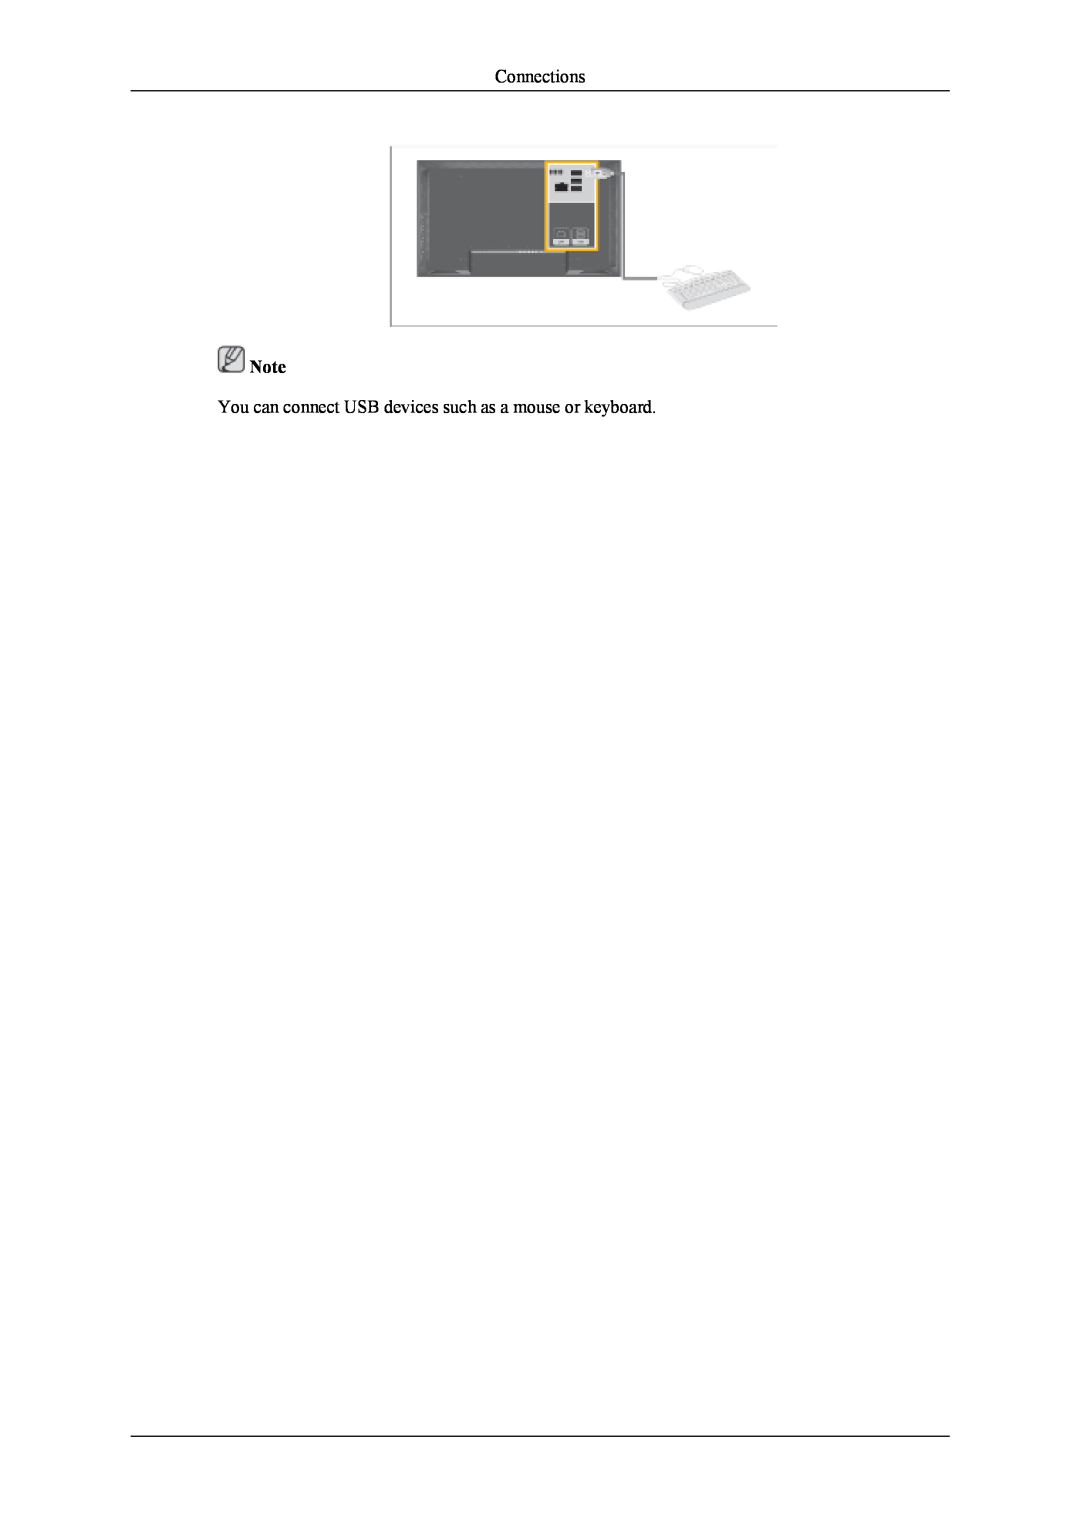
Connections
Note
You can connect USB devices such as a mouse or keyboard.
Page 39
Page 41
Page 40
Image 40
Page 39
Page 41
Contents
SyncMaster 400UXn,460UXn
LCD Monitor
400UXn Package Contents
Introduction
Unpacking
Manuals
Others
400UXn Your LCD Display Front
Sold separately
→ MagicInfo
AV / S-Video / Component / HDMI Mode BNC AV / S-Video / HDMI Mode DVI
AV / S-Video / Component Mode AV / S-Video PC / BNC / DVI Mode
Component PC / DVI Mode HDMI PC / BNC Mode
Rear
Remote Control Sensor
POWER S/W ON / OFF O
POWER IN
REMOTE OUT/IN
AV AUDIO IN L-AUDIO-R LCD Display Audio Connection Terminal Input
400UXn Remote Control
PIP SOURCE SWAP SIZE
AV / S-Video / Component P.MODE
PC / DVI / BNC M/B MagicBright
trol and the LCD Display except for the Power and LOCK buttons
When you press this button, current picture mode is displayed on
DUAL
tons
26. PIP 27. SOURCE 28. SWAP
400UXn Mechanical Layout Mechanical Layout NETWORK MODEL SIZE
SIZE
LCD Display Head NETWORK MODEL SIZE Installation VESA Bracket
Dimensions
Wall Bracket Installation
Wall Bracket Assembly
Components
Introduction There are two hingesleft and right. Use the correct one
Captive Screw
Wall Bracket
Hinge Left
To mount the product on the wall bracket
Wall Bracket Angle Adjustment
460DXn Package Contents
Others
460DXn Your LCD Display Front
Rear
AV / S-Video / Component / HDMI Mode BNC AV / S-Video / HDMI Mode DVI
AV / S-Video / Component Mode AV / S-Video PC / BNC / DVI Mode
Component PC / DVI Mode HDMI PC / BNC Mode
Introduction
BNC Analog PC Connection connecting the R, G, B, H, V ports
460DXn Remote Control
Introduction
→ Custom
Introduction
460DXn -- Mechanical Layout Mechanical Layout NETWORK MODEL SIZE
LCD Display Head NETWORK MODEL SIZE
Installation VESA Bracket
Wall Bracket Assembly
To mount the product on the wall bracket
Introduction 2. Insert the screw B into the plastic hanger
Wall Bracket Angle Adjustment
Using a Power cord with Earth
Connecting a Computer
Connections
Connecting to Other devices
Connecting a VCR
Connecting a DVD Player
Connecting a Camcorder
Connecting a DTV Set Top Box
Connecting to an Audio System
Connecting Using a HDMI Cable
Connecting to a Wired Remote Control
Connecting Using a DVI to HDMI Cable
Connecting a LAN Cable
Connecting a USB device
You can connect USB devices such as a mouse or keyboard
Using the Software
Installation MagicInfo Pro Installation
6. Choose a folder to install the MagicInfo Pro program
Using the Software
7. Click Install
8. The Installation Status window appears
System Requirements
Troubleshooting
Self-Test Feature Check
Maintenance and Cleaning
Warning Messages
Problems related to the Installation PC Mode
Symptoms and Recommended Actions
Check List
Q Check Signal Cable message
Problems related to the Screen
Q Not Optimum Mode message
Problems related to Audio
Problems related to the Remote Control
Problems related to MagicInfo
Q & A
Q How can I clean the outer case/LCD Panel?
Set the resolution at the Control Panel → Display → Screen Saver
Q How can I play the video?
Top
Page
Image
Contents