Viewing the Control Panel
✎✎The product color and shape may vary depending on the model.
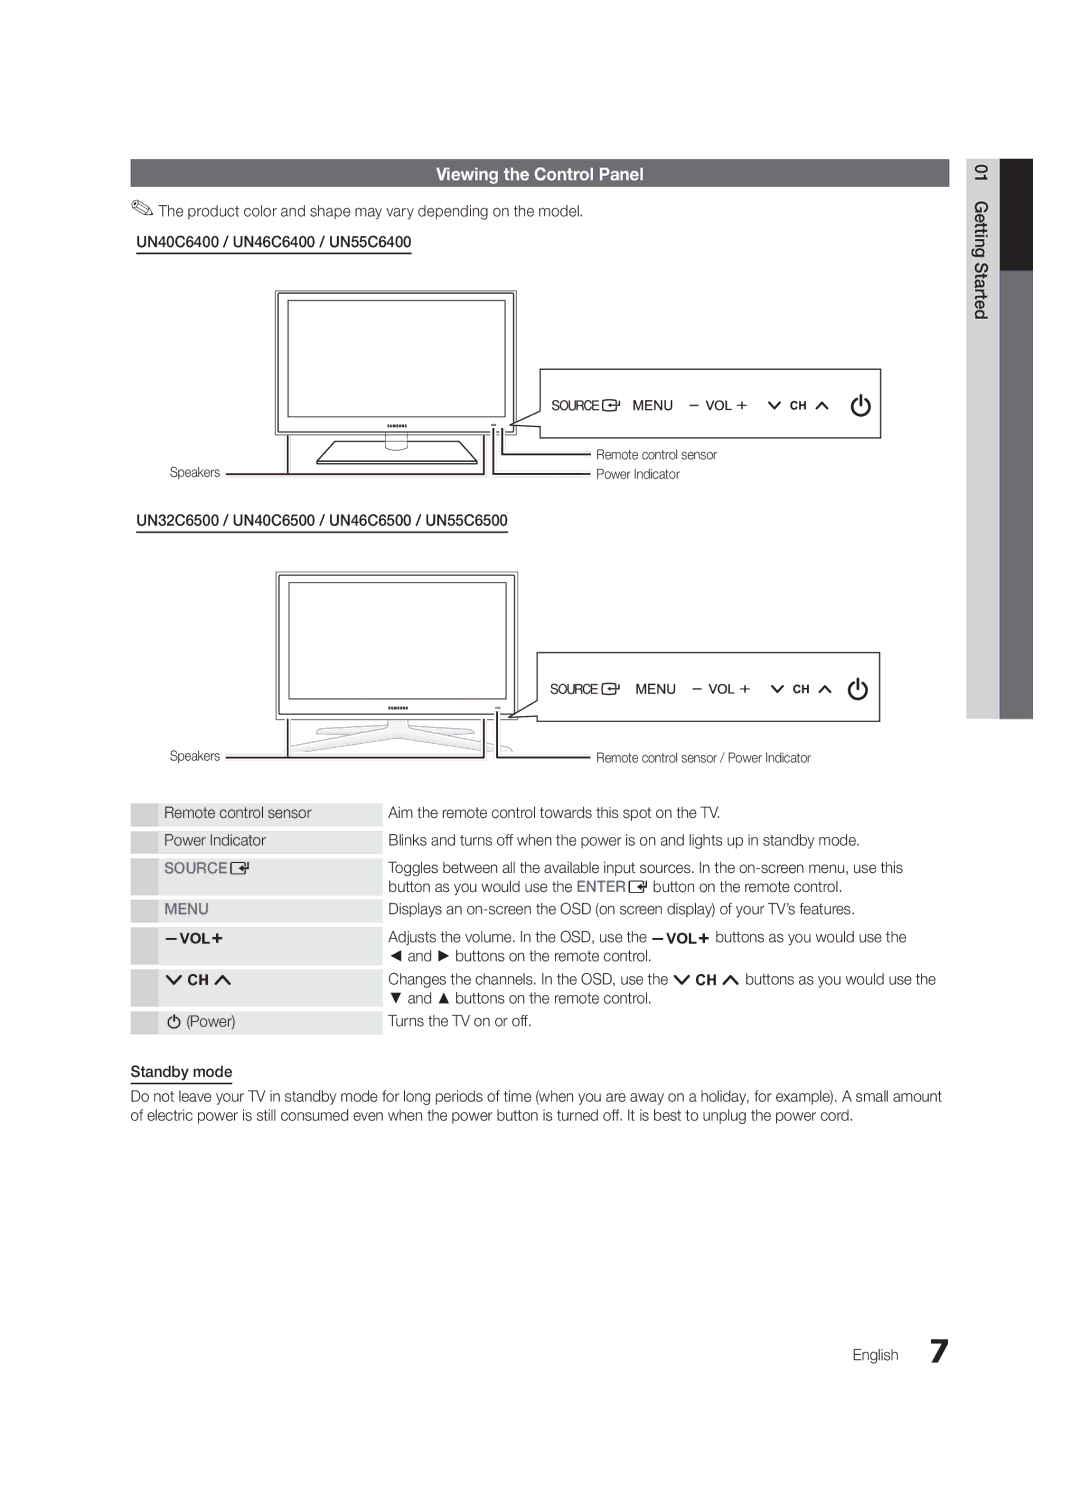
UN40C6400 / UN46C6400 / UN55C6400
|
|
|
|
| Remote control sensor |
|
|
|
|
| |
Speakers |
|
|
|
| Power Indicator |
|
|
|
|
UN32C6500 / UN40C6500 / UN46C6500 / UN55C6500
01Started Getting![]()
Speakers
 Remote control sensor / Power Indicator
Remote control sensor | Aim the remote control towards this spot on the TV. |
Power Indicator | Blinks and turns off when the power is on and lights up in standby mode. |
SOURCEE | Toggles between all the available input sources. In the |
| button as you would use the ENTEREbutton on the remote control. |
MENU | Displays an |
y | Adjusts the volume. In the OSD, use the ybuttons as you would use the |
| ◄ and ► buttons on the remote control. |
z | Changes the channels. In the OSD, use the zbuttons as you would use the |
| ▼ and ▲ buttons on the remote control. |
P(Power) | Turns the TV on or off. |
Standby mode
Do not leave your TV in standby mode for long periods of time (when you are away on a holiday, for example). A small amount of electric power is still consumed even when the power button is turned off. It is best to unplug the power cord.